Step into a world where the focus is keenly set on How To Update Your Chrome Browser. Within the confines of this article, a tapestry of references to How To Update Your Chrome Browser awaits your exploration. If your pursuit involves unraveling the depths of How To Update Your Chrome Browser, you've arrived at the perfect destination.
Our narrative unfolds with a wealth of insights surrounding How To Update Your Chrome Browser. This is not just a standard article; it's a curated journey into the facets and intricacies of How To Update Your Chrome Browser. Whether you're thirsting for comprehensive knowledge or just a glimpse into the universe of How To Update Your Chrome Browser, this promises to be an enriching experience.
The spotlight is firmly on How To Update Your Chrome Browser, and as you navigate through the text on these digital pages, you'll discover an extensive array of information centered around How To Update Your Chrome Browser. This is more than mere information; it's an invitation to immerse yourself in the enthralling world of How To Update Your Chrome Browser.
So, if you're eager to satisfy your curiosity about How To Update Your Chrome Browser, your journey commences here. Let's embark together on a captivating odyssey through the myriad dimensions of How To Update Your Chrome Browser.
Showing posts sorted by relevance for query How To Update Your Chrome Browser. Sort by dateShow all posts
Showing posts sorted by relevance for query How To Update Your Chrome Browser. Sort by dateShow all posts
Update your Chrome: Google releases important security fix
Update your Chrome: Google releases important security fix
If you see a notification to update your Chrome this week, don't ignore it. On Thursday, Google said it's now rolling out securityupdates for the browser to patch a vulnerability that's still being exploited in the wild. As first reported by CNET sister publication ZDNet, the zero-day vulnerability and patch are for Chrome version 88.0.4324.150 for Mac, Windows and Linux system users.
The details about the vulnerability, called CVE-2021-21148, are currently being kept under wraps "until a majority of users are updated with a fix," according to a post on Google's security update blog on Thursday. The discretion is typical of companies facing security risks that are still widely active, but Google did note that the bug was being used in attacks before it was reported to engineers by user Mattias Buelens on Jan. 24.
"Google is aware of reports that an exploit for CVE-2021-21148 exists in the wild," the company said in a blog post. "We would also like to thank all security researchers that worked with us during the development cycle to prevent security bugs from ever reaching the stable channel."
Just two days after Buelens brought the bug to Google's attention, Google's Threat Analysis Group issued a warning to cybersecurity researchers that North Korean hackers were targeting researchers working on sensitive topics, in part by luring the researchers onto blog sites that exploited a browser vulnerability.
Google said browser updates will continue rolling out over the coming days and weeks.
How to update Chrome
If you're using Chrome, it's a good idea to check which version you're using and see whether you're fully updated. If you're using the Brave browser or another browser built on Google's Chromium engine, you should consider updating those as well.
Updating Chrome is a supersimple process. Here's how you do it.
Open Chrome, and check the top-right corner of the browser window for a green Update button, beside your three-dot More menu.
Screenshot by Rae Hodge/CNET
Once you click Update, you'll be greeted by a prompt to confirm your choice. Click Relaunch and Google does the rest. Remember that this will close and restart your browser, so make sure you've saved anything you're working on before proceeding.
Screenshot by Rae Hodge/CNET
Many Chrome users already have their browsers set to update by default, so you may not need to take any action. To check whether your browser has already updated itself, simply open Chrome, go to the top-right corner and click the three-dot More menu.
If you see an option that says Update Google Chrome, then you're not running the latest version. If you are running the latest version, that option won't be in the list. You can also manually check for updates by opening Chrome, then going to the top-left of your browser, clicking File, then clicking Preferences.
From there, select Safety Check from the list of options on the left side of the browser.
Screenshot by Rae Hodge/CNET
You'll be taken to a screen that will offer to run a check for any updates or risks in your current version of Chrome. Click the Check Now button and the automated process will take over. You'll still need to restart Chrome afterward, though, so be sure to save any open work.
Don't forget to check the browsers on your phone and tablet. Check out Google's four-step instructions for Android users, and those for iPhone and iPad.
What version of Chrome am I using?
Wondering whether this affects your browser? It takes only two clicks to find out whether you're running Chrome's 88.0.4324.150, the latest version and the one impacted by the vulnerability and update. Here's how.
Open Chrome and go to the top-left corner of your window.
Screenshot by Rae Hodge/CNET
Once you've clicked preferences, you'll be presented with not only your current Chrome version information, but other system and security options to explore.
Windows 10 you need to try these 30 windows 10 you need to try these giant windows 10 you need to activate windows before you can personalize your pc windows 10 you need permission to perform this action windows 10 your device ran into a problem anydesk download for windows 10 minecraft bedrock edition download windows 10
Windows 10: You need to try these 3 new features
Windows 10: You need to try these 3 new features
The latest major Windows 10 ($144 at Amazon) update began rolling out to desktops, laptops and two-in-ones in late October, and should be available for you to download now. (Learn how to download the Windows 10 October 2020 Update here. If you still haven't upgraded from Windows 7 ($5 at Target), you may be able to use this trick to download Windows 10 free, too.) Once you've updated your device, you'll find a few important new features that will help you get the most out of the new operating system.
Upgrading as soon as the update is available to you will make your computing life easier and more secure. And at this point, as many of us are still spending more time at home on our computers for work or play, every little thing that can make your experience better is a win in our book. Plus, updating will prepare you for the upcoming Windows 10 spring 2021 update, which appears to be setting the stage for bigger changes in the future.
Here are three of the best new features in the Windows 10 October 2020 Update (also known as version 20H2), and how to use them.
Read more: The best antivirus protection for Windows 10
1. Microsoft Edge browser brings privacy improvements
Microsoft Edge gets new privacy features to help you block sites from tracking you for advertising.
Illustration by Stephen Shankland/CNET
Windows 10 Version 20H2 is the first to come with the revamped Microsoft Edge browser installed by default. The browser is now built on Chromium, Google's open-source foundation for the Chrome browser, which makes it compatible with more websites than the old version was.
There are other benefits, too. The new Edge browser includes a privacy feature that tries to block sites that track you online -- similar to Mozilla's Firefox browser. And a feature called Collections lets you more easily gather information from different websites as you're doing research.
Read more: Best Windows laptop for 2021
How to use the new Edge browser privacy settings: You'll use the new Edge browser in largely the same way you would any other browser. Navigate to the logo on your Taskbar or from the Start menu -- the icon is a circular crashing wave tinted blue, green and aqua, similar to the old blue Internet Explorer "e" icon.
To set up your privacy features, go to Settings > Privacy and services. You'll see three options for tracking prevention: basic (allows most trackers), balanced (blocks trackers from sites you haven't visited -- Microsoft recommends this one) and Strict (blocks a majority of trackers from all sites).
To check your privacy settings on the fly when you're using the browser, click the lock icon to the left of the search bar. A box will appear letting you know if your connection is secure, with options to check the site certificate, cookies in use and site permissions. You can also toggle Tracking Prevention on or off, and manage the setting for all sites you visit. If it's set to on, you'll see the number of trackers that the browser has blocked.
How to use the Edge browser Collections feature: Once you've navigated to a page you'd like to save, click the icon that looks like a "+" in a box, to the right of the search bar. This will open the Collections panel to the right of your screen. Click Start new collection, and rename it to whatever you'd like. You can click Add current page to save the webpage you're on. You can also click and drag an image from the page into the collection, as well as select and drag text, and add your own notes too. To export your collection to Word or Excel, click the three-dot share and more icon at the top of the collection.
Read more:Here's the best way to set up your new PC or laptop
2. Customize your new Start menu
The new Start menu will change the look of the tiles.
Microsoft
The classic Windows Start menu gets a refresh in the October 2020 Update. The new design is more streamlined, and replaces the solid color backplates behind the logos in your apps list with partially transparent backgrounds, so the icons stand out more. The colors will also change depending on if you're running light or dark mode.
How to customize the new Start menu: If you want to add an accent color so your tiles match your desktop theme, you can go to Settings > Personalization > Color and enable the accent color on Start, Taskbar and action center.
Read more at TechRepublic: 20 pro tips to make Windows 10 work the way you want (free PDF)
3. Open all of your tabs at once
See all of your tabs at once by pressing Alt + Tab.
Microsoft
With the update, you'll be able to open all of your tabs in Edge with a simple command, instead of just the active one in each browser window. This makes it easier to get a full view of every window you have open, instead of just one. You'll also be able to configure it to show only your last three or five tabs, or turn it off completely. However, it only works with the Edge browser, at least for now.
How to customize your tabs:To open all tabs in Edge at once, press Alt plus Tab. To configure your tab settings or turn off the feature, go to Settings > System > Multitasking. You'll see a drop-down menu with options for what Alt plus Tab can do.
Want more? Check out our roundup of the best Windows 10 tips and tricks, and six simple security changes all Windows 10 users need to make.
The keyboard shortcut i promise you ll use the potty song the keyboard shortcut i promise you ll never find another like me the keyboard shortcut i promise you this i ll the keyboard shortcut i promise you by donna what is the keyboard shortcut to take a screenshot what is the keyboard shortcut for emojis what is the keyboard shortcut for copy how to turn on the keyboard lights on a laptop how to type the degrees sign on the keyboard
The Keyboard Shortcut I Promise You'll Use Even More Than Ctrl+Z
The Keyboard Shortcut I Promise You'll Use Even More Than Ctrl+Z
I spend more time in the Google Chrome browser than ever these days, and my laptop screen is almost always cluttered with dozens of open tabs. I can't tell you how many times I've accidentally hit the "X" on a tab I was just trying to switch over to. It seems to happen on a daily basis. Maybe my mouse speed isn't properly calibrated. Maybe I'm too click-happy. Or maybe I just know Ctrl+Shift+T has my back. This keyboard shortcut is my secret weapon, and it's saved me more times than I care to admit.
What is Ctrl+Shift+T (or Cmd+Shift+T for Mac users)? I'd argue it's one of the most important and useful keyboard shortcuts there is, right up there with Ctrl+Z. In fact, it performs a similar function: undoing a mistake. Specifically, the mistake of accidentally closing a browser tab or window. Ctrl+Shift+T is the easiest way to restore a browser tab you didn't mean to X out.
Let's walk through how to use it, plus all the other ways to restore lost tabs in any browser. And don't miss our list of the best Windows 11 keyboard shortcuts, the essential Mac keyboard shortcuts and a Google Chrome trick that organizes all your tabs for you.
Four ways to reopen closed tabs in Google Chrome
Google Chrome gives you a few options for restoring tabs and windows after you've closed them, and depending on your needs, it's good to know how they all work. Note, however, that restoring closed tabs isn't an option when browsing in incognito mode.
1. Keyboard shortcut method
The quickest way to restore a single tab you closed by accident is with a keyboard shortcut. On a PC, use Ctrl+Shift+T. On a Mac, use Cmd+Shift+T. If you want to restore multiple tabs, or if you need a tab you closed a while ago, just keep pressing Ctrl+Shift+T and your tabs will reappear in the order in which they were closed. Bonus: If you accidentally close your entire browser window altogether, just open a new Chrome window and the keyboard shortcut will reopen everything at once. This is a great trick for the times when a system update forces you to close your browser or restart your computer altogether.
2. Browser history method
Your Chrome browser history also keeps track of recently closed tabs. It's not as lightning-fast as a keyboard shortcut, but this method is useful if you closed the tab a long time ago and need to refer back to it.
There are a few ways to access your browser history in Chrome. One way is to use another shortcut: Ctrl+H. Another is to click the hamburger menu in the top right corner of your browser, then select History. And a third option is to type "chrome://history" into your address bar, then press enter.
However you arrive at your browser history, once there you'll have access to all the websites and tabs you've viewed, in reverse chronological order. Clicking on a result will reopen it for you. Going through the hamburger menu also has a built-in list of Recently Closed tabs, which you can select to reopen.
Angela Lang/CNET
Read more: 11 Chrome Features You'll Wish You'd Known All Along
3. Tab search method
Ever noticed the little downward-pointing arrow in your Chrome tab bar? In Windows, it's right next to the icons for minimizing, maximizing and closing your window. (On Mac it's at the top right.) This icon is Chrome's built-in tab search feature, which itself can be accessed with a simple keyboard shortcut: Ctrl+Shift+A. Tab search shows you a list of all the tabs you currently have open, and another list of your recently closed tabs. You can scroll through the lists to reopen or switch to the desired tab, or use the search bar to find it with a keyword. This comes in handy for those who keep dozens of tabs open at all times.
4. Taskbar method
If you've got a Chrome window opened -- or if the app is pinned in your taskbar -- right-click the icon from the taskbar and you'll see a short list of links: Most visited and Recently closed. From there, you can restore a tab just by clicking on it. (Note these options do not appear on Mac.)
Bonus: 'Continue where I left off' method
There's a Chrome setting that essentially makes Ctrl+Shift+T the default. By toggling this feature on, every time you open Chrome, the browser will automatically reopen the tabs you had open in your previous session. To turn it on, go to your Chrome settings (also through the hamburger menu), then On startup. Select the Continue where you left off option.
What about other browsers, like Firefox, Microsoft Edge and Opera?
The Ctrl+Shift+T keyboard shortcut will work in other browsers, too (as well as right-clicking the tab bar and selecting Reopen closed tab). Most of the other methods of reopening a tab work across browsers too, though the menu labels and options may differ. The experience is largely the same on a Mac, with the exception of the taskbar method.
For both Firefox and Microsoft Edge, you can also go through your browser history to find and reopen a tab you accidentally closed. Firefox has a dedicated sub-menu under History called Recently closed tabs. Microsoft Edge has a tabbed History menu for All, Recently closed and Tabs from other devices. In Opera, if you have the sidebar enabled -- and if History is one of the elements you've elected to include in the sidebar -- clicking the History icon from the sidebar will also pull up a list of recently closed tabs.
The other browsers also offer a setting to reopen the previous session's tabs automatically upon startup. In Firefox, go to Settings > General and check the box under Startup labeled Open previous windows and tabs. In Microsoft Edge, go to Settings > Start, home, and new tabs and under When Edge starts, select open tabs from the previous session. And in Opera: Settings > On startup, then check the box for retain tabs from previous session.
For more, check out Google Chrome's best features, including how to mute a noisy browser tab. Plus, browser settings to change for better privacy and browser extensions that'll save you money when shopping online.
Chrome's Toughest Browser Security: What You Give Up When You Use Enhanced Safe Browsing Mode
Chrome's Toughest Browser Security: What You Give Up When You Use Enhanced Safe Browsing Mode
Threats to your personal data have grown more common in recent years, and they're unlikely to subside anytime soon. There were a record number of data breaches last year, and cases in the first quarter of this year have risen by 14% since last year. At this rate, data breaches will soon be as common as houseplants in a millennial's home.
The folks at Google offer Chrome users protections to help keep their personal data safe from malicious activity online, with Enhanced Safe Browsing. These additional protections were released in 2020 and received an update last year. Google reports that people who turn these protections on are 35% less likely to fall victim to phishing scams than others.
While these protections certainly help keep you safer online, your privacy might suffer. By enabling these protections, you're giving Google access to more in-depth information on your browsing habits.
Here's what to know about Chrome's Enhanced Safe Browsing protections.
How to turn on Enhanced Safe Browsing
These protections aren't on by default, meaning you have to turn them on if you want the extra security. Here's how to turn them on.
1. Open Chrome from your computer or Android device.
2. Click or tap the three dots in the upper right corner of your browser or screen.
3. Click or tap Settings.
4. Click or tap Privacy and security.
5. Click or tap Security.
6. On your computer, click Enhanced protection. On Android, tap Safe Browsing.
Google hasn't brought Enhanced Safe Browsing to iOS, but that could change.
One important thing to note is if you turn these protections on from one device, they don't carry over to your other devices. That means you have to turn the protections on for all your devices if you want complete coverage.
If you decide Enhanced Safe Browsing is more trouble than it's worth, you can turn them back off by following the steps above and clicking or tapping Standard protection or No protection. However, No protection, as the name implies, gives you no protections so it's not recommended.
Benefits of Enhanced Safe Browsing
If you turn Enhanced Safe Browsing protections on, Chrome will check in real time whether or not a site you are about to visit might be a phishing site. These scans could protect users from accidentally giving their information to malicious actors, potentially saving them time and money.
When you're about to download a new extension from the Chrome web store, Enhanced Safe Browsing protections will let you know if the extension is trusted or not. Trusted extensions follow the Chrome Web Store Developer Program Policies.
Chrome also scans files before you download them to block suspicious files. If the files are risky but not clearly unsafe, Chrome will ask users if they want to send the file to Google for a more thorough analysis. These scans and analysis shouldn't take more than a few minutes to complete, and the extra caution is worth it to make sure you're being as safe as possible.
Google will also scan usernames and passwords associated with data breaches to see if your information is compromised. This could save you a lot of headache and worry. A notification from Google could warn you before you get hit with fraudulent charges.
The downsides to Enhanced Safe Browsing
These protections are nice, but there are a few drawbacks.
If you turn on Enhanced Safe Browsing, you share more data, like what your are downloading, with Google. If you are signed into Chrome, your Google account is also temporarily linked to your browsing data. According to Google, this is to tailor protections to your specific situation, and this data is anonymized after a short period of time to protect users. However, according to a study from Princeton and Stanford universities, anonymized data, including search histories, can be linked to social media profiles using publicly available data.
Enhanced Safe Browsing could also hurt developers. If you're a new extension developer, you have to wait for Google to say your product can be trusted. Google requires new developers to follow the developer program policies for a few months before they can be labeled as trusted. This policy could hurt new developers who rely on income from their work, and it could lock out talented developers who can't afford to wait those months.
For more Google news, check out why Google is suing Sonos, what to know about Google's new Wallet app and how to make room in your Google Drive.
How to Factory Reset a MacBook, Windows Laptop or Chromebook to Sell or Give Away
How to Factory Reset a MacBook, Windows Laptop or Chromebook to Sell or Give Away
One side effect of spending more time at home during the pandemic is the realization that I have a lot of old tech lying around. A lot. Then, when I made a KonMari attempt at decluttering said tech, I unearthed several things I forgot I had -- including an old laptop I stopped using years ago because it was too slow for my high-end computing needs.
While this laptop no longer sparked joy for me, it turned out to be a perfect fit for my mom. It just needed to be cleaned up first, and I'm not just talking about removing dust and mystery goo with a few swipes of a disinfectant wipe, though you'll want to do that, too. The type of cleaning I'm talking about is restoring the laptop to like-new condition inside and out. Cleaning the outside is the easy part. Wiping the computer of all your apps, files, folders and other personal information isn't necessarily as straightforward. Of course, how much data scrubbing you need to do will likely depend on the recipient.
The big picture steps you take to refresh a laptop are the same regardless of whether it's a Windows laptop. Apple MacBook or Chromebook -- save your old data, remove all personal information, then go for a factory reset. It's the actual step-by-step procedure that differs depending on the type of laptop you're dealing with. Below, you'll find everything you need to know and do before giving your laptop a second life. And with supply chain issues, shipping problems and chip shortages making new devices harder to get, passing along a new-to-you laptop can be a welcome holiday gift.
Last thing first
I typically save the laptop's physical cleaning until last (why clean your fingerprints off twice?), but you may want to start there -- especially if it's been gathering dust in the back of a closet/under a bed/in the garage for the past several years. The basic equipment required for a good laptop cleaning is a can of compressed air and some disinfectant or alcohol wipes. For a slightly deeper clean, you may also want to grab a screwdriver and remove the bottom cover of your laptop (if possible) so you can carefully blow out any dust that's accumulated on the fans and vents.
After the laptop is clean, you can also wipe down the power adapter and any related accessories. It's also a good idea to ensure the power adapter is still in good, working condition. If you're still not quite sure where to start with the cleaning, check out our complete guide to getting your laptop looking its best.
Gifting a used MacBook
Óscar Gutiérrez/CNET
Before you even think about doing a factory reset on your MacBook, you need to save any data you want to keep. You may have already done this at some point if you migrated data from this old MacBook to a new one using using Apple's Migration Assistant. If that's not the case, it's time to hook up an external drive and use MacOS' built-in Time Machine tool to create a backup. If you have an iCloud account, you can back up your data there as well.
Sign out of everything
You'll also want to log out of all accounts before wiping your MacBook's drive. Start with iCloud, Find My Mac and iMessage. Then look for individual software accounts you may need to deregister. If you use a browser other than Safari, such as Chrome or Firefox, you should sign out of those as well. Basically, if it's got personal account information, you'll want to sign out. (Here's how to find account settings in MacOS.)
Two other things you should do before a factory reset: Unpair any Bluetooth devices -- particularly if the MacBook is being gifted to someone in your household -- and reset the NVRAM. The latter is memory that holds onto settings that the MacBook needs before loading MacOS. On startup, press and hold Option-Command-P-R to reset the NVRAM.
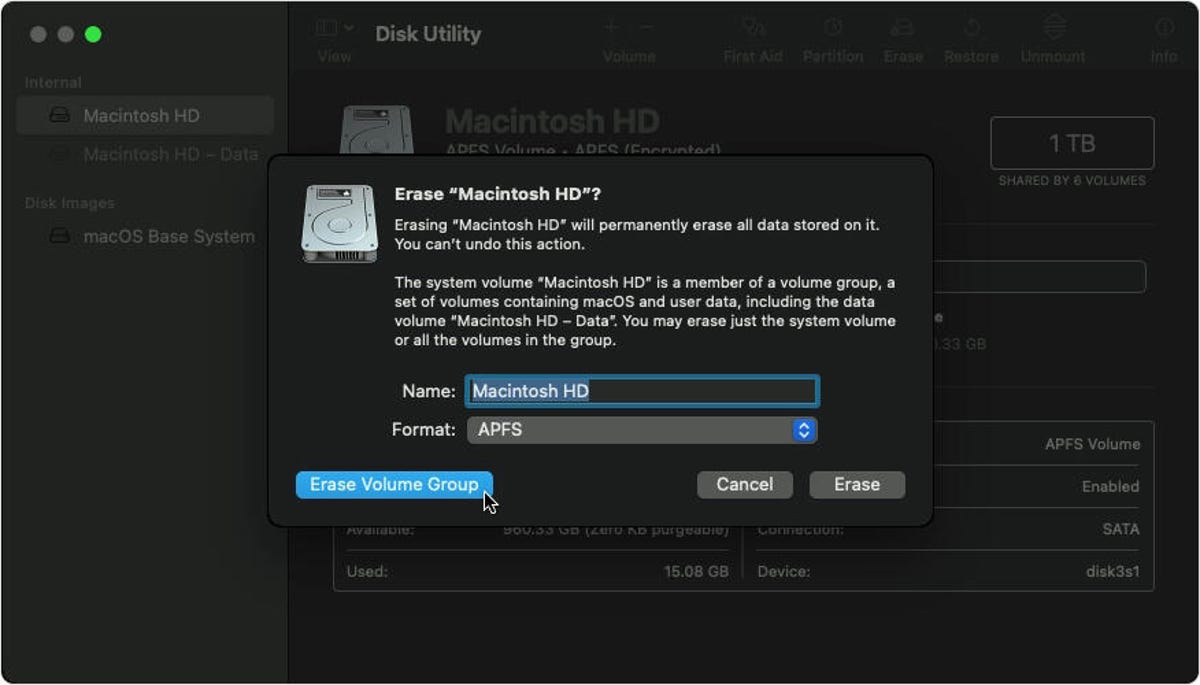
Perform a factory reset
If you've done everything above, you're ready to return your MacBook to its out-of-the-box state. On an Intel-based Mac, reboot the system and press and hold Command-R to enter Recovery Mode. (Accessing Recovery Mode on MacBooks running on the company's Apple Silicon chips is different, however.)
Read more:Before selling your MacBook, you need to factory reset it
Once in Recovery Mode, you'll see a window of MacOS utilities. Use the Disk Utility to erase your drive. When that's complete, you'll be able to reinstall MacOS. After it's done reinstalling, you'll reach the Setup Assistant. From there you can stop and shut it down or set it up for the recipient.
Gifting a used Windows laptop
Screenshot by Josh Goldman/CNET
As with gifting a MacBook, start by backing up any important folders and files on your old laptop to cloud storage or an external drive. If you're doing the latter, go to Settings > Update & Security > Backup > Add a drive and select the external drive. Then click on Backup Now.
Sign out of all your apps
A lot of paid software requires you to sign in with an account, a product key or both. Before you wipe your laptop's storage, sign out of any accounts and deregister software licenses (if possible). If you need those product keys to re-register software on a new laptop, be sure to save that information. If you use a browser other than Edge, such as Chrome or Firefox, sign out of those as well. Basically, if it's got personal account information, sign out.
Reset the laptop
Ready to clean the drive and reinstall Windows? Go to Settings > Update and security > Recovery. At the top of the window, you'll see Reset this PC. Click on Get Started and select Remove Everything from the box that appears. From there, you can select to reinstall Windows from the local drive or download from the cloud. After that, Windows cleans the drive of all software, settings and data. When it's done, the laptop will start in its setup assistant mode. You can then stop and shut it down for a fresh-out-of-the-box experience or do some setup, which is nice touch, especially if it's going to a family member so they can use it right away.
Unlink from your Microsoft account
If you used a Microsoft account to sign in to the laptop, the last thing you'll want to do is remove the laptop from that account. Sign in to your account from another computer and click on the Devices tab at the top of the page. Find the laptop that you're gifting on the list of devices, and at the bottom of the listing, you'll see the option to remove the device. Click it and you're done.
Gifting a used Chromebook
Sarah Tew/CNET
Chromebooks are the easiest to refresh for gifting. That's mainly because of their cloud-based design. Google also makes it extremely easy to wipe your data and securely clean the internal storage as well as remove the Chromebook from your Google account.
Check the AUE first
Before you even consider gifting an old Chromebook, check its auto-update expiration. Google only guarantees Chrome OS and browser feature support on non-Google hardware for so long. Every device has a date on which it stops receiving updates, aka its AUE date. Current models receive updates for eight years; older models could potentially be a year or two away from reaching their AUE.
Google maintains an AUE list, so finding the date your Chromebook will stop receiving updates is as easy as locating your model on that list. The AUE can also be found in your Chromebook's settings. Here's how to find the AUE from Google and in your Chromebook.
Give it a Powerwash
Powerwash is Google's built-in factory reset tool for Chromebooks. Once you've backed up folders or files stored on the Chromebook's internal drive, running Powerwash will securely scrub the system and reboot. When it restarts, it'll be just like the day you unboxed it.
The actual Powerwash typically takes less than a minute to complete. A simple search for "powerwash" in your Chromebook's settings will bring you right to the feature, but here's everything you need to know about the procedure.
Remove the Chromebook from your Google account
Although you've removed your account from the Chromebook, you haven't removed the Chromebook from your account. Start by signing into your Google account and head to the Security settings. If you use the Chrome browser, you can also click on your account avatar and select Manage your Google Account from the drop-down menu.
In the Security section, scroll down until you see a box labeled Your devices, which lists all the devices attached to your account. At the bottom of the box, click on Manage devices and find the Chromebook you're gifting and select Sign Out.
Give the Chromebook a good external cleaning, gather up any accessories and it's ready to hand off to your giftee.
Read more: How to regift a game console
How Factory Reset Your Devices
Make sure to wipe personal data before selling, trading in or regifting your gear.
Windows 10 on a mac here s how to set it to day in minecraft windows 10 on a mac here s how to set itunes windows 10 on a mac here s how to set alarm windows 10 on a mac here s your perfect jamie miller lyrics windows 10 on a mac here synonym windows 10 on a mac hereford how to install windows 10 on a mac download windows 10 on chromebook whatsapp download for windows 10
Windows 10 on a Mac: Here's How to Set It Up for Free
Windows 10 on a Mac: Here's How to Set It Up for Free
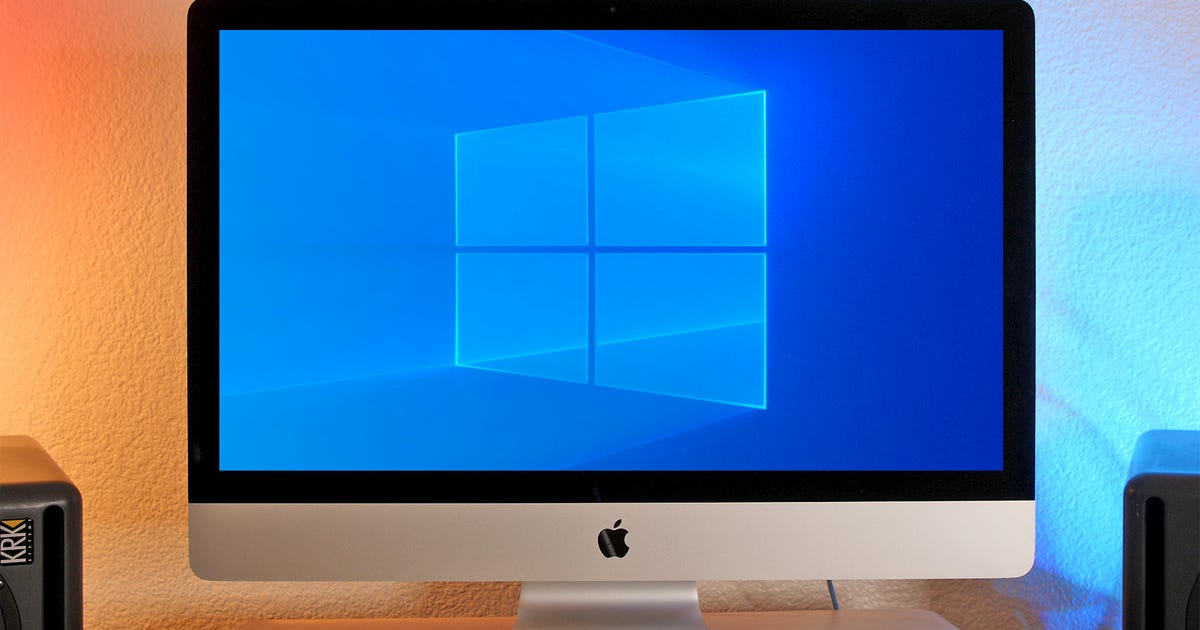
No matter how happy you are with your MacBook Pro, there's always something that Windows can offer that MacOS can't, whether it's exclusive software and video games or unique settings and features. And you might not know this, but if you only own an Apple computer, there's still a way to run Windows on it.
As long as you have an Intel-based Mac with enough storage and the correct Windows 10 ISO file -- which you can download for free from the official Windows website -- you can set up Windows 10 on your Apple computer in less than an hour. From then on, anytime you boot up your Mac, you can choose whether to run Windows 10 or MacOS. Here's how to do it.
Here's what you need before you start
To successfully run Windows 10 on your Mac computer, here's what you need to have:
An Intel-based Mac computer (if your computer is on this list, it's not supported).
64GB or more free storage space on your startup disk.
A power connection (if you're on a laptop).
If you're unsure whether your computer is Intel-based, click on the Apple logo on the menu bar, and then go into About This Mac. If you see the words Processor, followed by the name of an Intel processor, like "2.6GHz 6-Core Intel Core i7," then you have an Intel-based Mac.
Before you start, though, it's wise to back up your disk with Time Machine before partitioning just in case something goes wrong.
1. Download the Windows 10 ISO File
Windows 11 isn't currently compatible with Boot Camp Assistant on MacOS. So, you'll need to download Windows 10 instead. You can download a free disc image, also known as an ISO file, of Windows 10 from the official Windows website.
1. On your Mac, go to this Windows software download page.
2. Click on Select Edition, and choose Windows 10 (multi-edition ISO).
3. Hit Confirm, and wait for your request to be verified.
4. Once that finishes, choose your language and click on Confirm.
5. Finally, click on 64-bit Download to download the Windows 10 ISO file.
Download the 64-bit Windows 10 ISO file from the Windows website (most modern computers have a 64-bit capable processor).
Nelson Aguilar/CNET
The Windows 10 ISO file is nearly 6GB, so depending on your internet connection and speed, it could take up to 30 minutes to finish downloading. After the ISO file is done, leave it in your downloads, and move on to the next step.
2. Run Boot Camp Assistant
The software you'll use to run Windows 10 on your Mac is Boot Camp Assistant, which comes factory-installed on your Mac. Boot Camp Assistant is made specifically for installing Windows operating systems on your computer, and fortunately the setup process is pretty straightforward.
1. Launch Boot Camp Assistant on your Mac, and click Continue.
2. Click on Choose a Windows 10 ISO file, and upload the Windows 10 ISO file you downloaded in the previous step.
3. Drag the bar to choose a size for your Windows partition disk (42GB is the minimum).
4. Click Install,and wait roughly 10 minutes for the partition to be created.
Upload the Windows 10 ISO file and choose the partition size.
Nelson Aguilar/CNET
Once the Windows partition is finished, your laptop will restart.
3. Install Windows on your Mac
Your computer will boot up, but instead of showing you the Apple logo you're accustomed to, you should instead see the blue Windows logo appear. Here's what you need to do next:
1. Go through the Windows setup.
2. Enter a product key if you have one. If not, you can continue without one.
Even without a product key, you'll be able to access Windows on your Mac, so don't worry. During the installation, you'll see window files copied, features and updates installed and more. This should take another 10 minutes.
4. Set up Windows on a Mac
Your Mac will restart. But this time you'll be asked to set up Windows, just as you would on a Windows computer. You can use Cortana and your voice to complete the setup, but you're also welcome to use your keyboard, mouse and trackpad.
1. Choose your language, keyboard layout, Wi-Fi and more to begin.
2. If you have a Windows account, log in with your credentials.
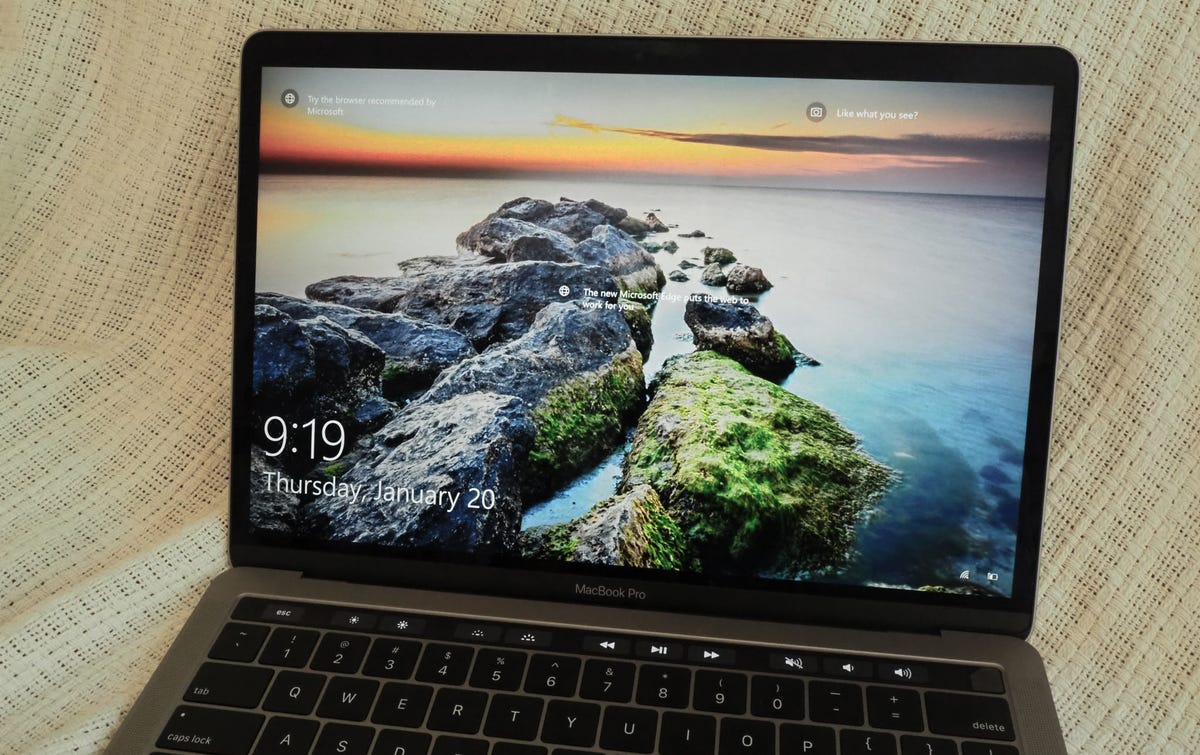
3. Windows will boot up on your Mac. You'll be asked to create a passcode and/or PIN to enter your computer. Do that to protect your account.
This is the Windows lock screen that appears after your Mac restarts.
Nelson Aguilar/CNET
5. Install Boot Camp on Windows
Finally, the last thing you'll need to do is install and update Boot Camp on Windows. That will let you make any additional changes to your partition or fix any issues while you're running Windows. When you access Windows for the first time, you should receive a notification to install Boot Camp. This will take 10 minutes to install, but it's the last thing you need to do before you can use Windows without any issues.
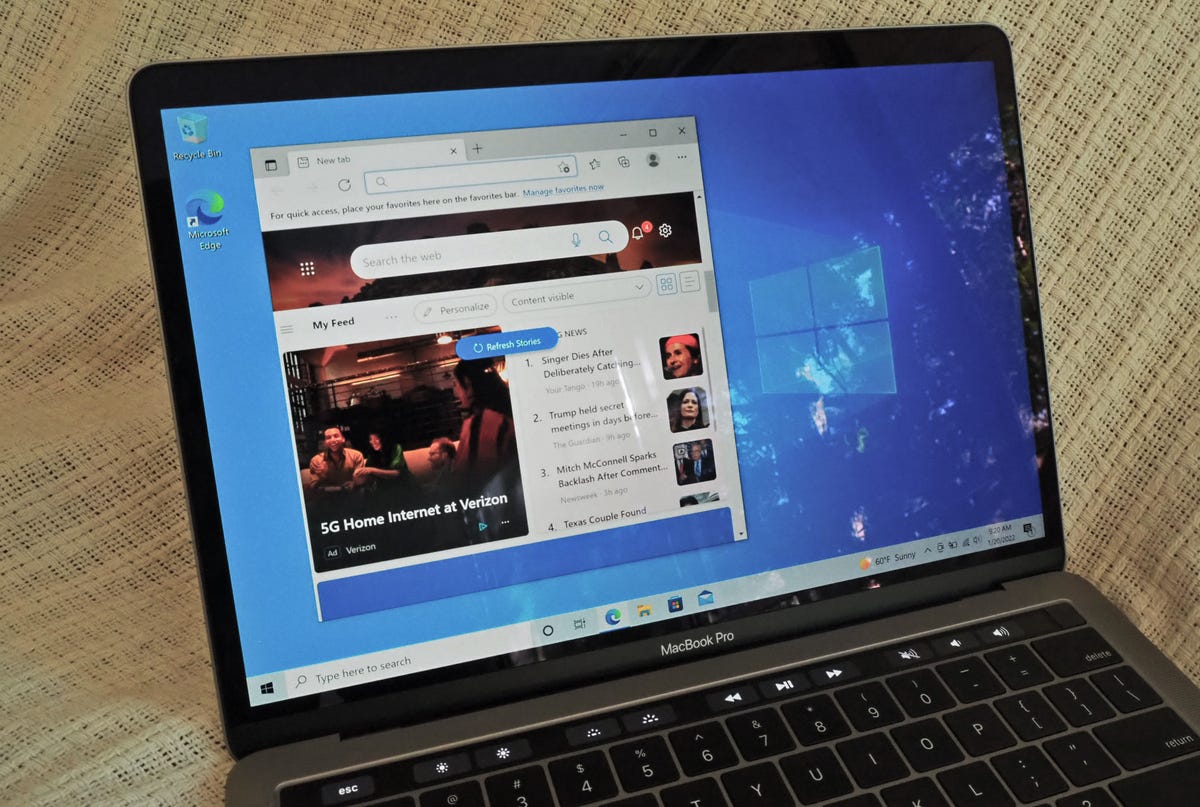
6. Use Windows on your Mac
Feel free to use Windows how you want. Windows 10's default web browser is Microsoft Edge, but you can use it to download Chrome or anything else to surf the internet. You can then download files and install software you would only be able to install on a Windows-powered computer -- like Paint.NET and certain games from Steam -- but on your Mac.
Windows 10 on a MacBook Pro.
Nelson Aguilar/CNET
7. Switch Between Windows and Mac
If you ever want to go back to MacOS from Windows, do the following:
1. Restart your computer.
2. As soon as the screen goes black, hold down the Option key for 5 seconds.
3. On the screen, you'll then have the option to boot up MacOS or Windows.
4. Choose the partition you want to open.
Hold down the Option key when you reboot to choose a different partition.
Nelson Aguilar/CNET
Use this keyboard shortcut to switch between your disks as needed.
Right lyrics reviews of windows 10 windows 10 reviews cnet windows 10 reviews and complaints windows 10 pro review microsoft windows 10 support microsoft windows 10 media creation tool microsoft windows 10 download
Microsoft Windows 10 review: Microsoft gets it right
Microsoft Windows 10 review: Microsoft gets it right
When Microsoft unveiled Windows 10 in 2015, it delivered an elegant operating system that could -- for the first time -- fulfill the potential of each modern computing form factor. Equally proficient on a touchscreen tablet, laptop, or conventional desktop PC, Windows 10 resuscitated the operating system's best features while setting the stage for Microsoft's ongoing innovation streak that includes idiosyncratic products like the Surface Pro 4, Surface Book and, more recently, the Surface Studio -- a desktop PC for artists and designers in need of high-end horsepower and display -- and the Surface Dial, a touch-friendly dial designed to facilitate fine contextual controls.
Late 2016 update
The next generation of the popular Surface tablet, the rumored Surface Pro 5, is expected to appear in the spring of 2017 -- timing that may coincide with the rollout of the next version of Windows, a free update scheduled for the first half of 2017. Windows "Creators Update" will introduce 4K video game streaming and support "augmented reality," bringing 3D capabilities to legacy applications such as Paint and PowerPoint. It will support 3D rendering for Microsoft's HoloLens technology, which will be incorporated into forthcoming devices from Acer, Lenovo, Dell, HP and Asus. And it will enable a virtual touchpad that lets you control external monitors from tablets, without need for a mouse.
It's worth mentioning that Apple delivered its own operating system overhaul in September 2016. MacOS Sierra added some new features inspired by its own mobile operating system. And though Apple clearly wishes to continue the integration of Macs and iOS products, providing additional incentives to keep your hardware inside Apple's walled garden, it's not always a perfect fit. In fact, the new MacBooks announced in early October 2016, equipped only with USB-C ports, can't connect to the new iPhone 7 and its Lightning Connector, without an adapter.
Editors' note:The original Microsoft Windows 10 review, first published in July 2015, follows.
Windows 10 is the Goldilocks version of Microsoft's venerable PC operating system -- a "just right" compromise between the familiar dependability of Windows 7, and the forward-looking touchscreen vision of Windows 8.
This new Windows, available as a free upgrade for existing Windows 7 and Windows 8 noncorporate users, is built from the ground up to pursue Microsoft's vision of a unified OS that spans all devices without alienating any one platform. It's an attempt to safeguard Microsoft's crumbling software hegemony, assailed on all sides by Google and Apple. And it's a vision of the future as Microsoft sees it, where a single user experience spans every piece of technology we touch. Welcome to Windows as a service.
Yes, this new OS is chock-full of fresh features. To name just a few: a lean, fast Internet Explorer replacement called Edge; Microsoft's Siri-like voice-controlled virtual assistant, Cortana; and the ability to stream real-time games to your desktop from an Xbox One in another room. (And in case you're wondering: there is no "Windows 9" -- Microsoft skipped it, going straight from 8 to 10.)
Windows 10 bridges the gap between PC and tablet.Nate Ralph/CNET
But Windows 10 is also the end of a long, awkward road that began with the release of Windows 8 in 2012, when Microsoft tried to convince a world of keyboard and mouse wielders that touchscreens were the way to go -- or else. Ironically, in 2015, the PC hardware for that touchscreen future is now here -- everything from 2-in-1s such as the Lenovo Yoga line to convertible tablets with detachable keyboards, like Microsoft's own Surface. And Windows 10 smoothly lets users transition from "tablet" to "PC" mode on such devices like never before.
For the rest of the PC universe -- including those who still prefer good old-fashioned keyboard and mouse navigation -- Windows 10 is a welcome return to form. The Start menu, inexplicably yanked from 8, is back and working the way you expect it to. Those live tiles from the Windows 8 home screen still exist, but they've been attached to the Start menu, where they make a lot more sense. And the fiendishly hidden Charms bar has been morphed into the more straightforward (and easier to find) Action Center.
As always, there are some quibbles and gripes with the end product, but all-in-all -- after living with Windows 10 for months -- I can say it's a winner. It's flexible, adaptable and customizable. And it's been battle-tested by an army of beta testers for the better part of a year, making it one of the most robust operating system rollouts in recent memory.
A fresh Start
The Start menu is back; it's almost funny how relieving that is. That humble Start button has been a fixture on the lower left corner of the Windows desktop since the halcyon days of Windows 95, offering speedy access to apps and settings. Press it on Windows 10, and you'll see the latest step in a long conversation about the state of the PC industry.
I spend more time than I'd like to admit rearranging the Start Menu.Screenshot by Nate Ralph/CNET
The past sits on the left: a neat column with shortcuts to your most used apps. Press the "All Apps" button and you'll get an alphabetical list of all of the apps installed on your PC. There are folders in there too -- press them, and extra options will fly out, just like they always have.
The future -- or at least, the future as Microsoft envisions it -- sits on the right side of the Start menu. These are the colorful, animated live tiles that debuted in Windows 8, pulling double duty as app shortcuts and informative widgets. You can resize these live tiles, drag them about to arrange them into groups and pin as many apps as you'd like -- the entire Start menu can be shrunk or expanded to suit your liking. It's essentially a miniaturized version of the fullscreen Start menu we saw in Windows 8. Hate live tiles? Then unpin them to excise them from your computer, leaving you with the narrow column of frequently used apps we've known for so long.
One step back, two steps forward
The Start menu in Windows 10 is admission that Windows 8 maybe have been a bit too forward thinking. But Microsoft hasn't abandoned that vision of unifying all manner of devices under a single operating system: Continuum in Windows 10 is the latest attempt to bridge the gap between touch and non-touch devices, and this time it doesn't force us to relearn how to work with our PCs.
To start, there's no divide between the Windows 8-style "Modern" apps you get from the Windows app store, and those you install the old-fashioned way. Everything exists as a traditional windowed app, sharing space on the desktop. If you're on a two-in-one device like Microsoft's Surface Pro 3 , pop the keyboard off and Windows 10 will switch to tablet mode. The Start menu and your apps will stretch to take up the entire screen, and all of the miscellaneous apps and shortcuts on your taskbar will disappear, to give your finger fewer obstacles to hit.
Apps go fullscreen, and the taskbar gets a little less cluttered in tablet mode.Screenshot by Nate Ralph/CNET
Reattach the keyboard, and everything slots back into place. It's an instantaneous, seamless process (once you've shooed away the annoying confirmation window). It's also entirely optional: you can disable the feature and switch to tablet mode manually, or forget that this whole touch concept exists at all.
This is what Windows 8 always should've been: an operating system that bridges the divide between touch and non-touch, without alienating folks who fall into one camp or the other. Like it or not, the future belongs to devices with touchscreens. But Microsoft (finally) understands that we'll all get there at own pace, and Continuum makes the transition painless. And now that there are so many hybrid devices to choose from, making the switch to touch without abandoning the interface we know is more important than ever.
Learning new tricks
Microsoft hasn't stopped at making touch make sense on a Windows PC. With Windows 10, just about every facet of the OS has been tweaked and updated, and a few new features have been rolled in. In typical Microsoft fashion, there's a dizzying array of keyboard shortcuts and touch gestures for each of these features, giving you no fewer than three ways to access the things you're trying to get to. No need to memorize them all -- just use whatever suits you (or your device) best.
Virtual desktops
If I had to pick my favorite new feature, I'd go with virtual desktops. Click the new Task View button on the taskbar and you'll get a bird's-eye view of all of the apps you've got open. Drag one of those apps onto the "new desktop" button, and it'll be moved to its own independent workspace. I can keep one workspace focused on work, a separate desktop for gaming forums, yet another workspace for the new camera lenses I'm checking out; there's no limit to the amount of virtual desktops you can create, and each one is treated as its own little private island.
Virtual desktops help you spread your apps across several workspaces.Screenshot by Nate Ralph/CNET
Virtual desktops are far from a new development, and they've been available in past versions of Windows thanks to third-party apps. But it's nice to see Microsoft catching up here. The feature could still use some work: desktops are numbered, but if you create a lot of them it can be hard to keep track of where everything is. The "traditional" Win32 apps you might download and install from a website are happy to open a new instance on any desktop, while clicking the shortcut on an app from the Windows store will yank you back to whatever desktop you used it on last.
You can move apps across virtual desktops -- just drag them, or right-click to shunt them over -- but there's no way to reorder the virtual desktops themselves, which would be really useful for staying organized. I'd also like to be able to set a different wallpaper for every virtual desktop -- I can do both of those things in Apple's OSX operating system, and have always found it really handy.
Windows Snap
The Snap feature introduced in Windows 7 has gotten a bit of an upgrade, too. Drag an app to the left or right side of the screen, and it'll "snap" to fill that space. The new Snap Assist feature will then chime in, showing you little thumbnails of any other apps that are currently open -- click a thumbnail, and it'll fill up the remaining space. You can also snap an app into a corner of your display and fill your screen with up to four apps, divided equally across the screen -- this could prove useful for folks with massive monitors.
Action Center
The new Action Center replaces the "Charms" introduced in Windows 8, and is another nod to mobile operating systems. Click the Action center icon on the taskbar to bring up a panel that houses all of your app notifications, and offers quick access to a few important system settings, like toggling your Wi-Fi network or switching in and out of tablet mode -- you can choose the options that turn up here in the settings menu. If you're coming from Windows 7 and have no idea where to find some of the settings you're used to, there's a good chance you'll find them here.
Wi-Fi Sense
I'd be remiss if I didn't mention Wi-Fi Sense. While technically not a new feature (it's part of Windows Phone 8.1) its presence in Windows 10 should've been a welcome addition: Wi-Fi Sense connects your devices to trusted Wi-Fi hotspots.
I love the idea. Automatically sharing Wi-Fi credentials with my friends would remove much of the hassle of most social gatherings, when people just want to jump on my Wi-Fi network. And -- this part is key -- Wi-Fi Sense doesn't share your actual password, so it theoretically eases a social transaction (the sharing of Wi-Fi connectivity) without necessarily compromising my network security.
Until Wi-Fi sense offers granular control over sharing, I'd avoid it.Screenshot by Nate Ralph/CNET
But the implementation is, in a word, daft. I do want to automatically share my network with a select group of friends who are visiting, and have them return the favor. I don't want to automatically share access with everyone in my Outlook address book, or on Skype, or the random assortment of folks I've added on Facebook over the years. Give me the ability to choose who I share access with, down to the individual, and I'll give it a shot. Until then, I'll be leaving Wi-Fi Sense off -- I recommend you do too.
Windows Hello and Windows Passport
Microsoft is also beefing up security with Windows Hello. The feature will use your Windows 10 devices' camera or a fingerprint scanner to turn your body into a password. Once you've authenticated yourself with Windows Hello, Windows Passport will then give you access to a number of third-party sites and products, without forcing you to log in all over again. This should make it a bit more convenient to log in to your devices, so you don't skimp on traditional measures, like having a robust password. The only catch is that Hello isn't widely supported on a lot of existing hardware: you'll need a device sporting Intel's RealSense camera, or a fingerprint scanner.
Chatting with Cortana
Microsoft's virtual assistant Cortana isn't exactly a new feature, as she's been on Windows Phone for just over a year. But the company's answer to Apple's Siri, Amazon's Alexa and Google Now has made the transition to the desktop with Windows 10, taking over the OS' search functionality, while also handling quite a few housekeeping duties. You can have Cortana trawl through your email and calendar, and keep you notified of any upcoming flights you're taking, or packages you're expecting. She can set reminders and track stocks, and you can even dictate email messages for her to send to your contacts. Cortana can also be set to listen for you to say "Hey, Cortana," and can be trained to recognize several different voices. If you want to learn more about Cortana, head over to my preview on Microsoft's virtual assistant .
Cortana will help you get things done.James Martin/CNET
I'm torn. I love Google Now's proactive stream of useful information, served to me whenever I need it. But my primary mobile device is an Android phone and not a Windows Phone, which keeps my interactions with Cortana sequestered to my desktop.
She's not especially useful here. Windows 10's Voice recognition is rather accurate, but if I have to send an email message and I'm at my desk, I'm just going to use my email client. She'll offer recommendations for places to eat or things to see, but that'd be a lot more useful when I'm out and about than at my desk. The same goes for reminders, which are decidedly less useful if I can't access them anywhere.
Cortana will be making her way to Android and iOS devices later this year, which should clear up most of these issues -- provided most of her functionality crosses platforms without issue. I'll still turn to Cortana for the occasional joke, but until it's available on a phone I use regularly, I'll be sticking to Google for Now.
Microsoft Edge rethinks the browser
Microsoft has added a brand-new browser into Windows 10, and it's called Microsoft Edge. Introducing a new browser in a world that already has Google Chrome, Mozilla Firefox and Apple's Safari is a pretty bold move. Doubly so when your previous effort was Internet Explorer -- once a juggernaut in the space, now the Internet's favorite punchline.
Annotate webpages with Microsoft's Edge browser.James Martin/CNET
Edge is a fast, modern browser that offers quite a few commendable features. Cortana is integrated right into the browser, and she'll offer detailed information on things like the weather or flight statuses while you're typing into the browser's address bar. Navigate over to a bar or restaurant's website, and Cortana can pull up a little sidebar full of useful information, like reviews or directions. The webnote feature lets you scribble on webpages and share your annotations to OneNote or via email, and you can use the Reading view option to strip a website down to its bare essentials. Edge has also been built with tighter security from the start, to hopefully circumvent some of the headaches that erupted from Internet Explorer.
But there are no extensions to tame overzealous advertisements, or enhance websites like Reddit, or simply organized my tabs -- I've been thoroughly spoiled by Google Chrome. There's no way to sync tabs or bookmarks across devices, and you currently can't import bookmarks from other browsers. All those features will be available eventually, with support for extensions coming sometime before the end of the year -- like Windows 10, Edge is a constantly evolving work in progress. But it's going to take a lot for someone like me, wholly enmeshed in Google's ecosystem, to ditch Chrome for something new. Internet Explorer also isn't going anywhere: it'll remain a part of Windows for the foreseeable future, as legacy apps are dependent on it. Head over to my Microsoft Edge preview to learn more about Microsoft Edge .
Getting your game on
Windows 10 adds and tweaks a few things in the entertainment department. The Xbox Video and Xbox Music apps have been renamed to Movies & TV and Groove Music, respectively. Their function is identical: any music and video files on your device can be found here, but it mostly serves as a means to convince you to buy or rent content from Microsoft's stores. You've got plenty of streaming services to choose from, for music and video.
Xbox Live achievements for Solitaire? Brilliant.Screenshot by Nate Ralph/CNET
If you're a gamer, the Xbox app will prove far more interesting. It's a window into your Xbox Live feed, letting you see what your friends are up to and send them messages, browse recordings people have made, compare achievements, and all of the expected ways of interacting with the social network. But if you own an Xbox One, you can stream activity from your console to any device running Windows 10.
It's awesome. No, it's not a game changer, and certainly not a reason to run out and grab an Xbox One. But it's still awesome: if someone wants to use the television, I can just plug an Xbox One controller into one of my PCs and continue plugging away at the Xbox One version of The Witcher 3 . The quality of the experience is going to be dependent on your network, so I'd recommend making sure both your console and the PC you're streaming to are connect to your LAN. The console also can't be used by others when it's streaming so this won't enable cooperative gaming. But if you frequently find yourself sharing the TV and have a PC with Windows 10 on hand, it's a fun little addition that could come in handy.
Handy tools for shutterbugs
The new Photos app isn't going to replace something like Adobe Lightroom, but if you take a lot of photos and are looking for a simple tool to keep things organized, you'll do well here.
Use the Photos app to make quick, non-destructive edits to your pictures.Screenshot by Nate Ralph/CNET
The Photos app scans your devices and OneDrive account for photos, and automatically arranges them into albums. You can use the app as a way to keep track of your pictures, but it also offers some basic editing tools too. If you prefer a hands-off approach, Photos will automatically enhance all of the photos it finds, wrangling red eye and sorting out exposure levels -- it works on RAW files, too. But don't worry: the edits Photos makes are non-destructive, so you can undo any changes it makes, or prevent it from altering your photos altogether.
Windows, everywhere
Windows 10 has finally arrived, but this version of Windows is fundamentally different from any that have come before it. It will truly be an everywhere OS, a concept Microsoft will be pushing with Windows 10 Mobile , and Universal Apps. We've been here before: apps developed for Windows 8 and Windows Phone 8 could share much of their code, which was supposed to make it easy to create a single app that ran everywhere.
Microsoft's universal apps share an identical codebase: the Excel client on your desktop, for example, will be the exact same client as the one on your phone, with elements adjusted to make sense of the different display, and the lack of a keyboard or mouse. You can currently get a taste of this on the latest version of Windows 10 Mobile, and while I wouldn't recommend editing spreadsheets on your smartphone, it's possible.
Universal apps will lead to their own challenges, as developers will have to weigh creating rich, robust apps that can run on a mobile device, against developing apps that can make use of all of the power a full PC can bring to bear. Microsoft is already drafting a solution using Continuum. Microsoft has demonstrated Continuum for phones: plug a Windows Phone into a display, and the interface will one day morph to mimic the PC-based version of Windows. You'll see the desktop, desktop-versions of Windows Store apps, and get full mouse and keyboard support. There's no word on when Continuum for phones will be available, or what devices it'll run on, but it offers a tantalizing glimpse of what Microsoft has in store.
Getting ready for what's next
The Windows Update process will be key to getting everyone on board with Microsoft's vision of the future of Windows. It'll also prove to be one of the most contentious elements: if you're running the standard Home version of Windows 10, updates are automatic and can't be refused.
This is a great thing. Windows' Achilles' heel has long been its nigh-ubiquity, which makes it a prime target for malware and other digital nastiness. A computer that's kept up to date is a happy computer, as it will offer you the best chance of avoiding viruses and other unpleasant things.
You can delay updates, but you can't avoid them.Screenshot by Nate Ralph/CNET
This is also a terrible thing. Many of us have encountered software updates that don't quite work out, occasionally breaking more than they fix. One of the last updates to the Windows 10 preview has been triggering software crashes, a recurring reminder that things occasionally don't work out as intended.
Microsoft has plans in place to mitigate these snafus: those of us who've signed up for the Windows Insider program can opt to continue serving as beta testers in perpetuity, and we'll be receiving every update first, for better or worse. But an army of five million testers could go a long way toward making sure these compulsory updates go as smoothly as possible. Insiders will also be able to continue driving the future of Windows by sharing feedback on features and functionality in Windows as they are developed.
I still worry that something will eventually slip through the cracks, and that will be the forced update that sours everyone's mood on the whole process. But I still favor Microsoft's approach: better to deal with the occasional botched update than have the legion of vulnerable or compromised devices that currently exists.
Conclusion
In an ideal world, we'd just call Microsoft's latest operating system "Windows," and sweep version numbers and codenames under the rug. That "10" gives the impression that something comes next, when in reality Windows is transitioning from something you buy (begrudgingly) once every few years, to a living document that's constantly being updated, and tweaked. For many Windows users expecting a predictable upgrade cadence, this is going to be a difficult transition.
Windows 10 will mean the end of grand, sweeping changes, with a marked increase in the sort of minute, quality-of-life tweaks we've grown accustomed to on our smartphones and tablets. Cortana will learn new tricks, and the interface will become flexible enough to support entirely new kinds of devices, like Microsoft's HoloLens . Should Windows Phone survive, we'll eventually see the world Microsoft envisioned back at the launch of Windows 8, when every device was supposed to feel right at home.
All of that comes later. What we have, at present, is a fast, functional OS that that is equally at home on a beefy gaming rig as it is on a Surface tablet. It does everything you expect it to, and bakes in all of the improvements Windows 8 brought to bear. Both Cortana and Edge have a long road ahead of them before they'll supplant Google's vicelike grip on my digital life, but the novelty of dictating emails and requests to my PC is not lost on me. And then there's the price: free, for those upgrading from Windows 7 or Windows 8.
If you're running Windows 7 or Windows 8 you've little to lose, and quite a bit to gain, by making the jump to Windows 10. If you're still on Windows XP, you've probably got your reasons. But Windows 10 marks the first steps in a transition from operating system to ecosystem, a wild dream that gets a little less crazy every time I ask my PC a question, or pop the keyboard of my laptop to get some reading done. This is Microsoft's second attempt at bringing us the future, and this time they're getting it right.