DJI Phantom 3

Clean All The Things

Embark on a Quest with Clean All The Things

Step into a world where the focus is keenly set on Clean All The Things. Within the confines of this article, a tapestry of references to Clean All The Things awaits your exploration. If your pursuit involves unraveling the depths of Clean All The Things, you've arrived at the perfect destination.

Our narrative unfolds with a wealth of insights surrounding Clean All The Things. This is not just a standard article; it's a curated journey into the facets and intricacies of Clean All The Things. Whether you're thirsting for comprehensive knowledge or just a glimpse into the universe of Clean All The Things, this promises to be an enriching experience.

The spotlight is firmly on Clean All The Things, and as you navigate through the text on these digital pages, you'll discover an extensive array of information centered around Clean All The Things. This is more than mere information; it's an invitation to immerse yourself in the enthralling world of Clean All The Things.

So, if you're eager to satisfy your curiosity about Clean All The Things, your journey commences here. Let's embark together on a captivating odyssey through the myriad dimensions of Clean All The Things.

Showing posts sorted by relevance for query Clean All The Things. Sort by date Show all posts

Step Inside The Clean Room Where A Revolutionary Satellite Is Taking Shape


Step inside the clean room where a revolutionary satellite weather step inside the clean room where a revolutionary satellite imagery step inside the clean room where a revolutionary life step inside the clean room where a revolutionary movie step inside the clean room where are hearings step inside the clean room where it happens step inside the clean room where drugs step inside the clean room where priest step inside the clean garage step inside the cleansing step inside the temptations otis williams home step inside the shows about to start step inside the furnace creek visitor center step inside the world of the island of sea women step inside thinking routine step inside song step inside the circle lyle lovett step inside this house

Step inside the clean room where a revolutionary satellite is taking shape


Step inside the clean room where a revolutionary satellite is taking shape

This story is part of Road Trip 2021, CNET's coverage of the push and pull to manufacture more products in the USA.

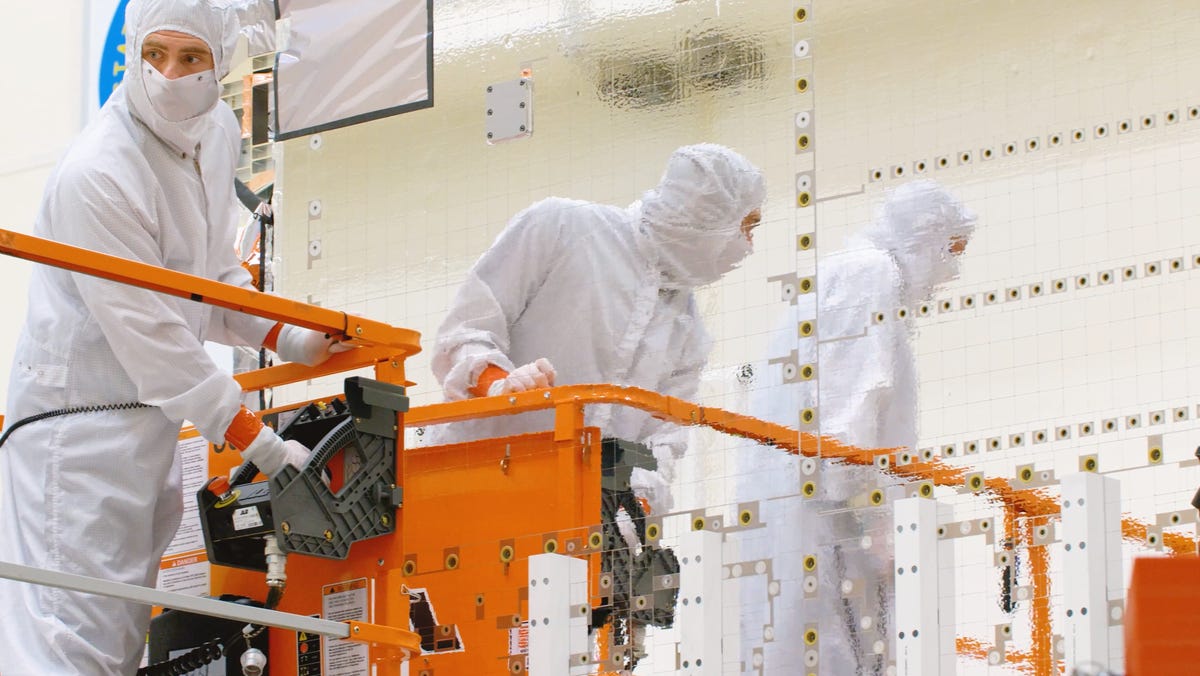
In a massive clean room in the middle of Denver, a giant satellite sits dormant, waiting for its journey into orbit. Engineers with Lockheed Martin's Space division move around its hulking body, indistinguishable from one another in their face masks and full-body protective suits.

Robert Rodriguez/CNET

They perch over the spacecraft on a large forklift, taking laser-guided measurements. They shuffle underneath the satellite's belly, triple-checking the position of wires and instruments. They lean up close to its mammoth silver facade, delicately adjusting tiny components by as little as one-thousandth of an inch. It's like watching dozens of Mike Teavees, shrunk down and moving around the inner workings of a Wonkavision TV set. 

I've been Wonkafied myself -- gaffer-taped into a white clean suit, complete with clip-on booties, two masks and, hilariously, an orange hairnet that tells everyone I'm from overseas. (Getting access to Lockheed facilities, including this clean room, requires a full security credentialing process. US citizens are dressed in all white, but foreign nationals, including Australians like me, need to be easily identifiable while on-site. I don't mind the extra flair -- after all, one does want a hint of color.) 

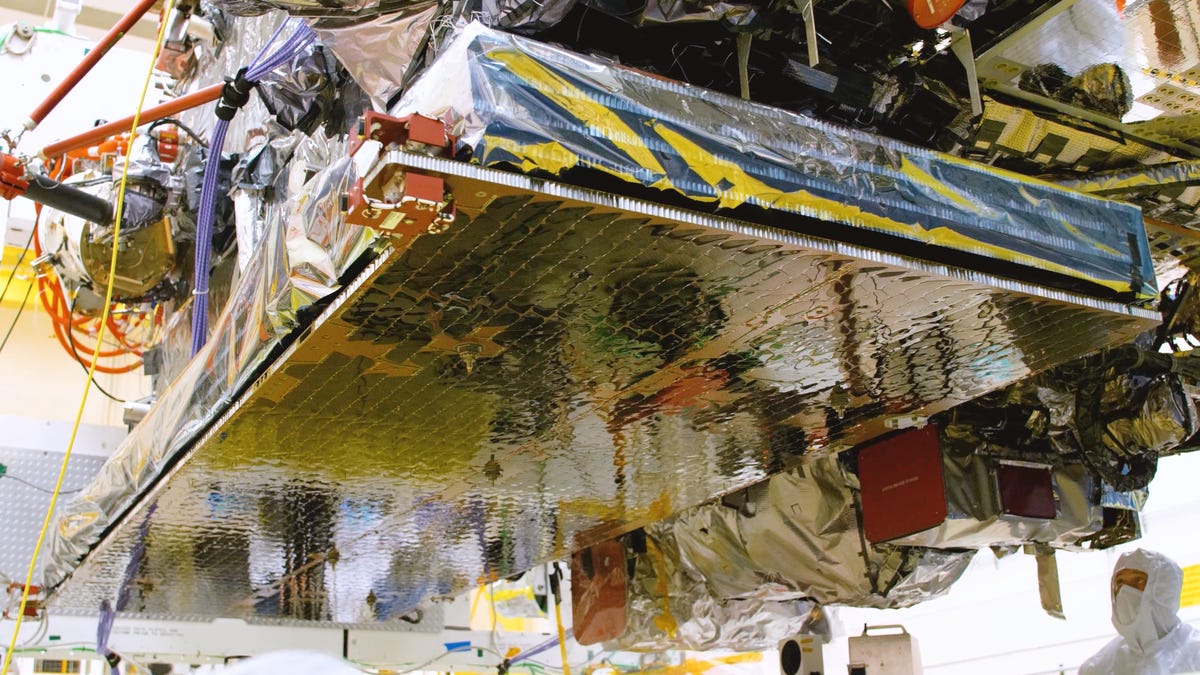
I've been given rare access to see the GOES-T, a massive weather satellite Lockheed Martin Space is building for the National Oceanic and Atmospheric Administration and NASA. The satellite is destined to enter geostationary orbit, a bit more than 22,000 miles above Earth's surface, and collect huge amounts of data about weather here on Earth and in space.

lockheed-goes-t-1

The GOES-T satellite inside the clean room at Lockheed Martin Space headquarters.

John Kim/CNET

"We're getting 30 times the data down on this satellite as they did on the previous satellites," says GOES-T's deputy program manager, Alreen Knaub. "We're doing space weather, sun weather and Earth weather."

After its launch, scheduled for February 2022, the satellite will track meteorological events in precise detail, mapping lightning strikes, following fire lines and tracking extreme weather in real time. All this data beamed down from space could potentially be life-saving, helping scientists and meteorologists better predict natural disasters and protect all of us here on the ground. 

You can't be too careful when it comes to building a spacecraft and preparing it for launch. From the initial fabrication of the circuit boards inside the satellite to the final testing, the team at Lockheed Martin Space is concerned with precision at every stage of the build. This isn't "measure twice, then cut once." This is measure countless times with lasers, reposition, measure again, repeatedly torture test, show it to the lady in the orange hairnet, then take your one chance for launch.

After all, this isn't your standard piece of electronic hardware. If a satellite breaks down, it's virtually impossible to get it repaired 22,000 miles above the Earth.

lockheed-goes-t-2.png

Engineers get up close to the silver thermal reflectors on the GOES-T's surface, which are designed to reflect the sun's radiation in space.

John Kim/CNET

Life-saving data

The GOES-T is the third satellite in a family of four Geostationary Operational Environmental Satellites used by NOAA to track weather from orbit. Being geostationary satellites, these spacecraft are designed to stay in a fixed orbit in time with the Earth's rotation. GOES-T is set to stay stationed above North and South America, bringing in data for the Western Hemisphere. 

(A note on naming: The group of satellites is known as the GOES-R family. Each satellite has an alphabetical name here on Earth before being assigned a number in space. The GOES-R and GOES-S satellites launched in 2016 and 2018, respectively, and are now known as GOES-16 and GOES-17. After it launches, GOES-T will become GOES-18. The final GOES-U satellite is still in the early build stages and is expected to launch in 2024. So it's still a few years before it actually GOES, so to speak.) 

lockheed-goes-t-4.png

The GOES-T's solar array. 

John Kim/CNET

GOES-T has instruments to track space and sun weather activity like solar flares, changes in the magnetosphere and radiation hazards. All have the power to affect not only the planet's weather, but also electronics and communications equipment here on Earth, and in the International Space Station. In fact, one of the tasks of the GOES satellites is to provide warnings to astronauts on the ISS about incoming solar activity that could affect their operations or interfere with their instruments.

Imagery taken from the GOES-16 (GOES-T's predecessor) showing Hurricane Ida approaching the coast of Louisiana on Aug. 29, 2021. 

NOAA

The GOES-T is also packed with instruments for tracking Earth weather, like the Geostationary Lightning Mapper, which can map lightning all over the world, and the Advanced Baseline Imager, which takes images of the clouds, atmosphere and surface of Earth.

"We can not only track forest fires; the Advanced Baseline Imager can measure their heat signature, so we can see if they're intensifying," says Knaub. "So when you see the fire threat going up, often that's based on data from this satellite. ... It's a great tool in predicting forest fires, managing forest fires and knowing where to send the firefighters."

It's this kind of data that has a huge impact on our day-to-day lives, even if we don't realize it. During emergencies like Hurricane Ida, which battered the Gulf Coast over the past summer, the data brought down from GOES satellites was life-saving. 

"[Hurricane Ida] was a Category 2, and they knew based on the thermal picture of the Gulf that it was going to rapidly intensify into a Category 4 once it hit that Gulf weather," says Knaub. "And so we were within two hours of predicting when it would hit land mass, and within just a few miles of where we said it was going, 60 hours out. Which is unheard of."

From little things, big things grow

Accuracy in the sky starts with accuracy on the ground, and for the team at Lockheed Martin Space, that begins with the tiny components that power the satellite. 

Across the road from the clean room, I'm given a sky-blue lab coat and shown around Lockheed's Space Electronics Center. This is where electrical engineers manufacture, assemble and solder the circuit boards, modules and boxes for the spacecraft. 

"We focus on power and avionics, which is going to be the life and the brains of a satellite," says Angelo Trujillo, one of the engineering aide specialists at the SEC.

lockheed-goes-t-5.png

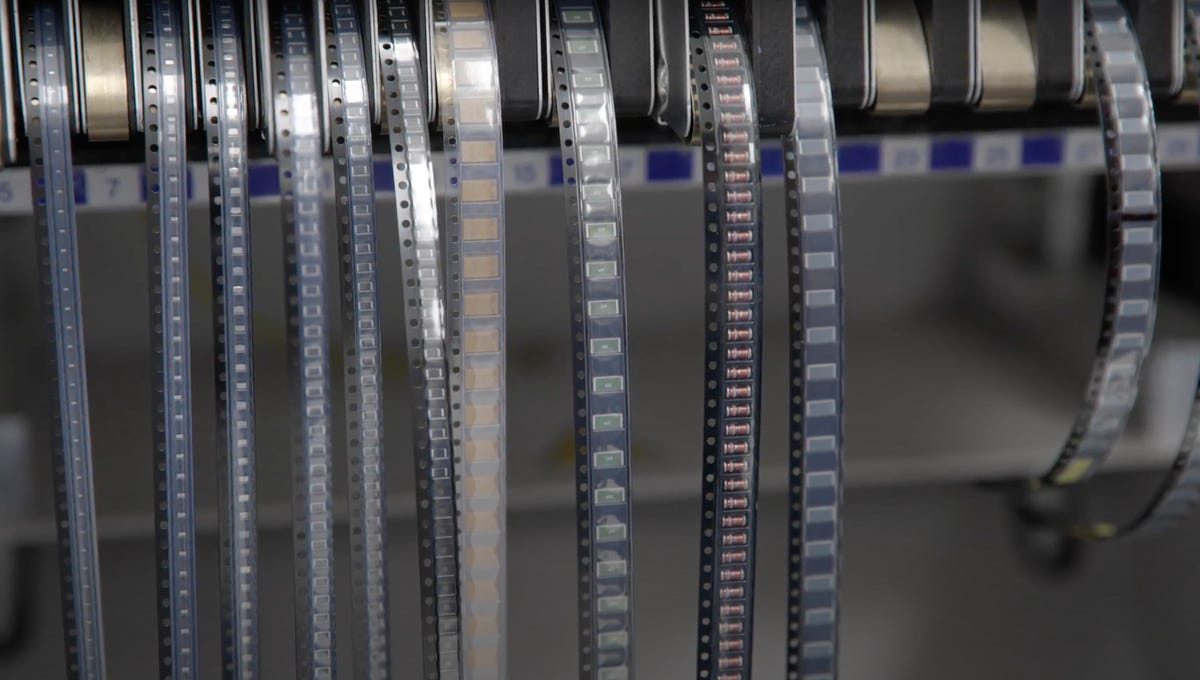
Spools of tiny circuit board components wait to be dispensed by one of the automated machines in Lockheed Martin's Space Electronics Center.

John Kim/CNET

Though many of these components were once soldered by hand, much of the fabrication is now done with the help of automation. Walking around the SEC lab, I see machines programmed to solder circuitry, and robotic arms whir as they lay down components on circuit boards. Gone are the electrical engineers identifying tiny resistors based on their color-coded stripes -- instead, long spools of plastic-sealed components are wound up like film reels, ready to be loaded into the machines for automated assembly. 

"It's a lot better for proficiency and efficiency; we get the same results every time," Trujillo tells me. "Where hand-soldering it would take a lot longer. What we can do in an hour, it would take a week or two to try and hand-solder."

(Automation doesn't just save time, it also helps avoid costly failures. Lockheed Martin declined to reveal how much the GOES-T cost to build, but the entire GOES-R program has a budget of $10.8 billion.) 

After they leave the SEC, the electronics and circuit boards come together with other components in an assembly process that sounds like a giant game of Lego, albeit with much higher stakes.

lockheed-goes-t-3.png

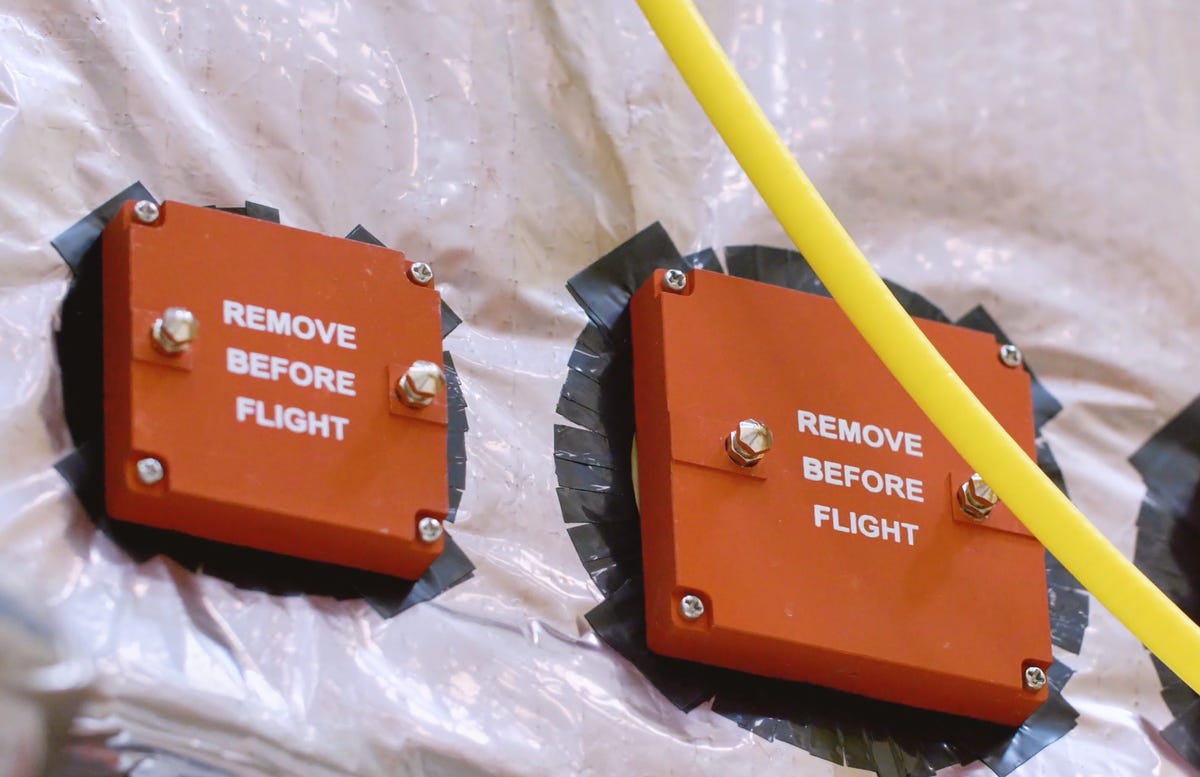
Components on the GOES-T satellite remain covered right up until launch to protect the sensitive instruments inside. 

John Kim/CNET

"[The GOES-T] actually starts out as a bunch of piece parts, and the piece parts are assembled into boxes, and then the boxes become what they call subsystems," says Knaub. "So just like your house has an air conditioner, a heater, this satellite has the same thing. It has a power system. It has a thermal system. It has a guidance and navigation control system. And all that gets put together. ... It really is complex."

Before they're all assembled into the final satellite, each of these systems and components has to be torture-tested to ensure it can survive in orbit. The idea is to work out the kinks on Earth so they don't turn up as problems in space. 

The components are subjected to vibration testing that simulates the shaking of a rocket launch (the last thing you want is a satellite that breaks before it's even reached space). Then they're tested to see if they'll withstand the wild temperature fluctuations they'll experience in orbit. 

For that, Lockheed has its own space simulator of sorts: a vacuum-sealed tube, about the size of a small car, known as a thermal vacuum chamber. Components are placed inside this TVAC unit, the door is sealed, and then engineers draw it down to a vacuum before running through a cycle of hot and cold temperatures. 

Then, when those components are built into the satellite, all that testing happens again: mechanical environment tests to simulate launch, more thermal vacuum testing and, of course, precision testing of communications equipment.

"We actually blast it with electronic electromagnetic waves to make sure it sees all the possible interference it could see," says Knaub. "You know how you get static on your radio? You don't want that coming across in the spacecraft."

Eye in the sky

lockheed-goes-t-render-1

After launching, the GOES-T satellite will stay in geosynchronous orbit over North and South America.

Lockheed Martin Space

Once the GOES-T aces its tests, it'll blast off from Space Launch Complex-41 in Cape Canaveral, Florida, on an Atlas V rocket. It'll jolt through the atmosphere to join a swarm of more than 3,000 other satellites zooming around in orbit. And then it'll hold its position directly above the Americas, hopefully for years, sending scientific data back to Earth. 

If the GOES-T satellite is successful in its mission, it'll undoubtedly save lives, bringing in more weather data in less time and helping officials predict the path and intensity of extreme weather events like hurricanes and wildfires.

But chances are most of us won't really know it's there. It'll quietly beam down data that we ultimately see on weather apps, or in updates on the evening news. It'll become one of the thousands of human-made sentinels orbiting our planet, 24 hours a day, helping us stay connected and alive.


Source

Clean All The Nooks And Crannies With This Rechargeable Compressed Air Duster For $56


Clean All the Nooks and Crannies With This Rechargeable Compressed Air Duster for $56


Clean All the Nooks and Crannies With This Rechargeable Compressed Air Duster for $56

Do you have a dust dilemma causing your computer to overheat? Or crumbs in the keyboard? Life happens, but this handheld, rechargeable electric air duster is perfect for blowing away the dust and debris that collects around keyboards, computers, electronics, cars components, video game consoles and more. It's also cordless, lightweight and ultra-portable, with a detachable nozzle that can be stored in the body for easy transport in the car, to the office and beyond. You can grab the Dorobeen cordless air duster for just $56 at Amazon right now, a 25% savings. 

The adjustable speed allows you to work with all sorts of situations, from cleaning fragile plants to removing heavy dust from computer fans. Unlike cans of air, this electronic duster is rechargeable, able to be reused time after time. Not only is this a more economic choice for your wallet, but it's eco-friendly as well. A single charge will allow between 15 and 30 minutes of cleaning time based on your settings, which is plenty of time to take care of clearing the debris that collects around most small electronics. And as this device simply needs a USB connection to charge, most cars, computers and power strips can accommodate this air duster, making it a convenient and reliable option for any home.


Source

Tags:

How To Clean A Car Seat In 6 Easy Steps


Easy to clean car seat how to clean seat in car how to clean seats in a car how to clean my car seats how to clean a car seat how to clean a car seat how to clean a keurig coffee maker how to clean silver how to clean washing machine how to screenshot on windows 10
How to Clean a Car Seat in 6 Easy Steps


How to Clean a Car Seat in 6 Easy Steps

As a parent or caregiver, your kids' health and safety are always your first priority. Although you can't protect your kids from everything, there are some things that you can control, including the cleanliness of their car seats.

Keeping your child's car seat clean is a simple way to protect them from harmful germs and bacteria -- and as long as you follow a few basic rules, cleaning their seats is a pretty painless task. You'll need a few basic household items, like a bristle brush and mild soap, and enough time to let the seat air dry after you've cleaned it.

Below, we've outlined step-by-step instructions that explain how to clean a car seat. Whether you're dealing with the aftermath of a back-seat accident or your car seat is overdue for a clean, you can use the following tips to ensure that your kids' car seat is safe and sanitized.

Read more: The Ultimate Guide to Properly Installing Your Child's Car Seat

What you'll need

Since car seats are constructed from several materials (including fabric, plastic and metal), you'll need a few different items to clean each part effectively. Having multiple tools at your disposal can also come in handy when dealing with stubborn stains and spills.

  • Vacuum: It's the easiest way to remove loose food, dirt and other debris.
  • Gentle soap: You'll need it to clean the fabric and plastic components of your car seat. Dish soap or mild detergent should work well.
  • Small bristle brush: Depending on how dirty the seat is, you may need a small brush (like a toothbrush) to scrub stains away.
  • Reusable cloth: Washable cloths are perfect for wiping down buckles, straps and other movable parts.
  • Bowl of warm water: If there's anything stuck in the buckle, you can soak it in water to dislodge it.
Child safety seat in the back of the car. - getty 1077314940
bigtunaonline/iStock/Getty Images

Step 1: Vacuum the cover

Keeping the cover on, use a handheld or cordless vacuum to get rid of crumbs, sand and other particles that may be hiding in the cracks of the car seat. If you have one, use your vacuum's extension wand or crevice tool to remove as much loose debris as possible. The more you get rid of now, the easier the other steps will be.

Step 2: Scrub any stains

If there are any unsightly stains on the car seat cover, now is the time to spot clean them. You can do this by grabbing a clean, wet cloth or small bristle brush and using it to scrub each trouble area. For more stubborn messes, apply a pinch of gentle soap (such as dish soap or baby wash) to the stain and scrub with your cloth or brush.

Step 3: Wash the cover

These days, most car seat covers are machine-washable, but you should check your instruction manual to be sure. If yours is safe to wash, place it into the washing machine on a delicate cycle with mild detergent (or whatever type of cleaner your manufacturer recommends). Otherwise, you can hand wash it. When you're done, let the cover air dry completely before reattaching it to the seat. Avoid throwing the cover in the dryer, as this can damage the material and make the seat less safe.

Step 4: Clean the straps and buckle

Next, remove the shoulder straps from the car seat. Use a damp cloth or brush to spot clean any stains on the straps, adding mild soap if necessary and being careful not to get them soaking wet. Then, dunk the buckle and clips into a bowl of warm, soapy water to get rid of any food or dirt. Finally, let everything air dry, ensuring that the buckle is hanging upside-down so any water can drain.

Step 5: Vacuum and wipe down the base

While the cover and straps are drying, vacuum the car seat base to remove any remaining debris. After that, take a damp reusable cloth and wipe down the plastic part of the base, cleaning up any sticky or dirty areas. Allow the base to dry fully before reassembling the car seat.

Step 6: Put the seat back together

When all of the components are clean and dry, you can reassemble the car seat. Consult your instruction manual to make sure that you're putting everything back in the correct place. We also recommend taking photos of the seat before you clean it (more on that in the next section). After cleaning, double-check the straps and buckle to ensure that they're fitted to your child's body. 

Front view of an empty child car seat - getty 1346266924
Catherine McQueen/Moment/Getty Images

Things to keep in mind when cleaning a car seat

Cleaning a car seat might not be the most difficult thing in the world, but there are important things to know before getting down to it.

  • Only use gentle, baby-safe soap. Bleach, vinegar and harsh chemicals can weaken the cover and straps, putting your child's safety at risk.
  • Putting a clean car seat back together after washing it can be tricky. Before dismantling the seat, take a few photos and videos to help you reassemble it after it's clean.
  • Don't reassemble your car seat until all components are completely dry. Reattaching damp components could lead to mold growth.
  • Some car seat parts are replaceable. If you're frustrated by a particularly tough stain, don't panic. Instead of spending hours trying to get it out, you may be able to order replacement parts from your manufacturer.
  • Every car seat is different. These guidelines provide general advice, but don't forget to consult your instruction manual before cleaning your car seat.

The information contained in this article is for educational and informational purposes only and is not intended as health or medical advice. Always consult a physician or other qualified health provider regarding any questions you may have about a medical condition or health objectives.


Source

How To Factory Reset A MacBook, Windows Laptop Or Chromebook To Sell Or Give Away


How to Factory Reset a MacBook, Windows Laptop or Chromebook to Sell or Give Away


How to Factory Reset a MacBook, Windows Laptop or Chromebook to Sell or Give Away

One side effect of spending more time at home during the pandemic is the realization that I have a lot of old tech lying around. A lot. Then, when I made a KonMari attempt at decluttering said tech, I unearthed several things I forgot I had -- including an old laptop I stopped using years ago because it was too slow for my high-end computing needs. 

While this laptop no longer sparked joy for me, it turned out to be a perfect fit for my mom. It just needed to be cleaned up first, and I'm not just talking about removing dust and mystery goo with a few swipes of a disinfectant wipe, though you'll want to do that, too. The type of cleaning I'm talking about is restoring the laptop to like-new condition inside and out. Cleaning the outside is the easy part. Wiping the computer of all your apps, files, folders and other personal information isn't necessarily as straightforward. Of course, how much data scrubbing you need to do will likely depend on the recipient. 

The big picture steps you take to refresh a laptop are the same regardless of whether it's a Windows laptop. Apple MacBook or Chromebook -- save your old data, remove all personal information, then go for a factory reset. It's the actual step-by-step procedure that differs depending on the type of laptop you're dealing with. Below, you'll find everything you need to know and do before giving your laptop a second life. And with supply chain issues, shipping problems and chip shortages making new devices harder to get, passing along a new-to-you laptop can be a welcome holiday gift. 

Last thing first

I typically save the laptop's physical cleaning until last (why clean your fingerprints off twice?), but you may want to start there -- especially if it's been gathering dust in the back of a closet/under a bed/in the garage for the past several years. The basic equipment required for a good laptop cleaning is a can of compressed air and some disinfectant or alcohol wipes. For a slightly deeper clean, you may also want to grab a screwdriver and remove the bottom cover of your laptop (if possible) so you can carefully blow out any dust that's accumulated on the fans and vents. 

After the laptop is clean, you can also wipe down the power adapter and any related accessories. It's also a good idea to ensure the power adapter is still in good, working condition. If you're still not quite sure where to start with the cleaning, check out our complete guide to getting your laptop looking its best.


Gifting a used MacBook

macbook-air-2018-analisis-3
Óscar Gutiérrez/CNET

Before you even think about doing a factory reset on your MacBook, you need to save any data you want to keep. You may have already done this at some point if you migrated data from this old MacBook to a new one using using Apple's Migration Assistant. If that's not the case, it's time to hook up an external drive and use MacOS' built-in Time Machine tool to create a backup. If you have an iCloud account, you can back up your data there as well. 

Sign out of everything

You'll also want to log out of all accounts before wiping your MacBook's drive. Start with iCloud, Find My Mac and iMessage. Then look for individual software accounts you may need to deregister. If you use a browser other than Safari, such as Chrome or Firefox, you should sign out of those as well. Basically, if it's got personal account information, you'll want to sign out. (Here's how to find account settings in MacOS.)

Two other things you should do before a factory reset: Unpair any Bluetooth devices -- particularly if the MacBook is being gifted to someone in your household -- and reset the NVRAM. The latter is memory that holds onto settings that the MacBook needs before loading MacOS. On startup, press and hold Option-Command-P-R to reset the NVRAM.

Perform a factory reset

If you've done everything above, you're ready to return your MacBook to its out-of-the-box state. On an Intel-based Mac, reboot the system and press and hold Command-R to enter Recovery Mode. (Accessing Recovery Mode on MacBooks running on the company's Apple Silicon chips is different, however.) 

Read more: Before selling your MacBook, you need to factory reset it

Once in Recovery Mode, you'll see a window of MacOS utilities. Use the Disk Utility to erase your drive. When that's complete, you'll be able to reinstall MacOS. After it's done reinstalling, you'll reach the Setup Assistant. From there you can stop and shut it down or set it up for the recipient. 


Gifting a used Windows laptop

reset-windows-10-laptop.png
Screenshot by Josh Goldman/CNET

As with gifting a MacBook, start by backing up any important folders and files on your old laptop to cloud storage or an external drive. If you're doing the latter, go to Settings > Update & Security > Backup > Add a drive and select the external drive. Then click on Backup Now. 

Sign out of all your apps

A lot of paid software requires you to sign in with an account, a product key or both. Before you wipe your laptop's storage, sign out of any accounts and deregister software licenses (if possible). If you need those product keys to re-register software on a new laptop, be sure to save that information. If you use a browser other than Edge, such as Chrome or Firefox, sign out of those as well. Basically, if it's got personal account information, sign out.

Reset the laptop

Ready to clean the drive and reinstall Windows? Go to Settings > Update and security > Recovery. At the top of the window, you'll see Reset this PC. Click on Get Started and select Remove Everything from the box that appears. From there, you can select to reinstall Windows from the local drive or download from the cloud. After that, Windows cleans the drive of all software, settings and data. When it's done, the laptop will start in its setup assistant mode. You can then stop and shut it down for a fresh-out-of-the-box experience or do some setup, which is nice touch, especially if it's going to a family member so they can use it right away.

Unlink from your Microsoft account

If you used a Microsoft account to sign in to the laptop, the last thing you'll want to do is remove the laptop from that account. Sign in to your account from another computer and click on the Devices tab at the top of the page. Find the laptop that you're gifting on the list of devices, and at the bottom of the listing, you'll see the option to remove the device. Click it and you're done. 


Gifting a used Chromebook

Asus Chromebook CX9400
Sarah Tew/CNET

Chromebooks are the easiest to refresh for gifting. That's mainly because of their cloud-based design. Google also makes it extremely easy to wipe your data and securely clean the internal storage as well as remove the Chromebook from your Google account. 

Check the AUE first

Before you even consider gifting an old Chromebook, check its auto-update expiration. Google only guarantees Chrome OS and browser feature support on non-Google hardware for so long. Every device has a date on which it stops receiving updates, aka its AUE date. Current models receive updates for eight years; older models could potentially be a year or two away from reaching their AUE. 

Google maintains an AUE list, so finding the date your Chromebook will stop receiving updates is as easy as locating your model on that list. The AUE can also be found in your Chromebook's settings. Here's how to find the AUE from Google and in your Chromebook.

Give it a Powerwash

Powerwash is Google's built-in factory reset tool for Chromebooks. Once you've backed up folders or files stored on the Chromebook's internal drive, running Powerwash will securely scrub the system and reboot. When it restarts, it'll be just like the day you unboxed it. 

The actual Powerwash typically takes less than a minute to complete. A simple search for "powerwash" in your Chromebook's settings will bring you right to the feature, but here's everything you need to know about the procedure. 

Remove the Chromebook from your Google account

Although you've removed your account from the Chromebook, you haven't removed the Chromebook from your account. Start by signing into your Google account and head to the Security settings. If you use the Chrome browser, you can also click on your account avatar and select Manage your Google Account from the drop-down menu. 

In the Security section, scroll down until you see a box labeled Your devices, which lists all the devices attached to your account. At the bottom of the box, click on Manage devices and find the Chromebook you're gifting and select Sign Out

Give the Chromebook a good external cleaning, gather up any accessories and it's ready to hand off to your giftee.

Read more: How to regift a game console

How Factory Reset Your Devices

Make sure to wipe personal data before selling, trading in or regifting your gear.


Source

Tags:

Pixel 6A Vs. Samsung Galaxy A53 Vs. Nothing Phone: Under-$500 Phones Compared


Galaxy a53 vs pixel 6 google pixel 5a vs samsung a53 samsung galaxy a53 5g vs pixel 6a google pixel 5a vs samsung a53 pixel 4a vs samsung galaxy s10e samsung galaxy s20 fe vs google pixel 6a pixel 6a vs samsung s21 fe pixel 6a vs pixel 6
Pixel 6A vs. Samsung Galaxy A53 vs. Nothing Phone: Under-$500 Phones Compared


Pixel 6A vs. Samsung Galaxy A53 vs. Nothing Phone: Under-$500 Phones Compared

Phones that cost just under $500 are looking better and better as 2022 continues, with Samsung, Google and new contender Nothing all offering three phones at pretty much identical $450 prices. All three of these phones promise a slick and enjoyable experience, even with their lower prices.

The Google Pixel 6A has already earned itself a glowing review, with CNET's Lisa Eadicicco calling it "the best budget Pixel yet." Meanwhile I myself was impressed with the Nothing Phone 1's balance of price and performance -- not to mention its flashing rear lights. Then there's the Samsung Galaxy A53 5G, which earned a great review score thanks to its price, its display and its cameras. 

But which phone is actually deserving of your hard-earned cash? I got hold of all three to put them through their paces. 

Three phones lying flat on a table
Andrew Lanxon/CNET

Price and availability: The Nothing Phone 1 is hard to get

Let's start with a biggie. the Nothing Phone 1 is on sale in the UK and wider Europe but a rollout into the US is so far uncertain. While Nothing has said it would like to launch its phone in the US, it needs a network partner to make it compatible with US 5G networks. As of the time of writing, there are no plans for a proper US launch. People in the US can easily get the Pixel 6A and the Galaxy A53 5G, however.

All three phones start at very similar prices; $450 for the Pixel 6A, $450 for the Galaxy A53 and $472 for the Nothing Phone 1, based on a conversion from its UK price. In the UK, all three phones start at £399. Simple.

Design and display: Nothing's flashing lights stand out

While many phones in recent years have been forgettable-looking slabs, all three of these midrangers have designs that are very much their own. The A53 keeps things simple with a plastic back, raised camera unit and metallic edging. The Pixel 6A maintains the distinctive camera bar seen on its pricier siblings and while its back is technically plastic, you'd be hard pressed to tell it apart from the glass back of the 6 and 6 Pro. 

Three phones lying flat on a table
Andrew Lanxon/CNET

Between the two, the Pixel 6A has a more premium feel, than the plasticky A53, but it's the Nothing Phone 1 that stands out in the looks department. That's due to its transparent back panel, which not only provides a unique view of its internal components but also allows for its light-up LED "glyph" to pulse when you get notifications. It's arguably a gimmick and one that you may not care about at all, but it's certainly fun and it's nice to have something quirky at this price. 

The Pixel 6A is the smaller of the three, packing a 6.1-inch display against the Nothing's 6.55-inch and the A53's 6.5-inch screens. That said, the Pixel's resolution results in a pixel density higher than its competitors, although all three are pin sharp with vibrant colors and high brightness levels. The Nothing's extra size might make it the better choice for mobile gamers among you, or those of you who watch a lot of video on the move, but they all do a good job of displaying vibrant content and colorful games.

Power and performance: Pixel 6A packs a punch

The Nothing Phone 1 makes use of a Snapdragon 778G+ processor and 12GB of RAM (as reviewed), while the Galaxy A53 5G uses an Exynos 1280 chip and 6GB of RAM. The Pixel 6A meanwhile uses Google's own custom-built Tensor processor with 6GB of RAM.

And that Tensor processor put in some excellent scores on our suite of benchmark tests, that put it consistently above the other two. The Nothing was a fair second, while the A53 did somewhat fall behind on both CPU and graphics benchmarks. 

Performance comparison chart

Nothing Phone 1

Galaxy A53 5G

Legend:

Geekbench 5 (Single core)

Geekbench 5 (Multi-core)

3DMark Slingshot Unlimited

Note:

Longer bars equal better performance

Benchmarks alone aren't a perfect indicator of real-world performance however and I found all three to be perfectly capable of handling the essentials well. Navigating the interfaces was swift and lag-free on all models and all of them handled more demanding gaming in Asphalt 9: Legends without any noticeable stuttering or slow-down. Video streaming was no problem on any phone and I could immediately jump between open apps with the multitasking switcher. 

Over time I would expect the Pixel 6A to generally perform better as it's already starting from a more powerful position. It might mean that as even more demanding games arrive it's well-placed to handle them in a way that perhaps the A53 couldn't. Right now though, any of your everyday emailing, Instagramming, Candy Crushing, WhatsApp group message avoiding fun will be handled perfectly well by any of these phones. 

Cameras: Pixel 6A strikes the right balance

All three phones have multiple rear cameras, giving both standard views and ultrawide shots. The A53 includes a 5-megapixel macro camera and a depth sensor for portrait photos, but it's the main and wide cameras you'll likely find yourself using most often. Samsung's phone cameras have often had a tendency to look overly saturated and contrasty and that's absolutely the case with the A53. 

pizza-normal-a53

Galaxy A53 main camera test.

Andrew Lanxon/CNET
pizza-normal-nothing

Nothing Phone 1 main camera test.

Andrew Lanxon/CNET
pizza-normal-pixel

Pixel 6A main camera test.

Andrew Lanxon/CNET

Its shots are consistently punchy with the colors, to the point that they look as though you've slapped on some high-contrast filter on Instagram. The Nothing Phone 1 goes the other way, however, with frequently muted tones. It's particularly noticeable when you switch to the Phone 1's ultrawide lens, which produces drab-looking images that look almost shameful against the others. 

pizza-wide-a53

Galaxy A53 ultrawide camera test.

Andrew Lanxon/CNET
pizza-wide-nothing

Nothing Phone 1 ultrawide camera test.

Andrew Lanxon/CNET
pizza-wide-pixel

Pixel 6A ultrawide camera test.

Andrew Lanxon/CNET

It's the Pixel 6A that consistently produces the most balanced-looking images in both its standard and ultrawide views. The 6A's colors are accurate and vibrant, without looking overly processed, and it generally captures a more balanced exposure than the other two, keeping bright skies under control well. 

pub-a53

Galaxy A53 main camera test.

Andrew Lanxon/CNET
pub-nothing

Nothing Phone 1 main camera test.

Andrew Lanxon/CNET
pub-pixel

Pixel 6A main camera test.

Andrew Lanxon/CNET

All three phones are perfectly capable of taking decent snaps at your next family picnic, but if photography prowess is important to you then the Pixel 6A is the one to go for. 

Battery life: A close fight but Pixel 6A takes the win

With a huge 5,000-mAh battery stuffed inside I expected the Galaxy A53 to put in the best performance when it came to battery life. It's a more capacious cell than the 4,410 mAh of the Pixel 6A or the 4,500 mAh of the Nothing Phone 1. On my tests, however, it was the Pixel that managed to edge out the competition.

After 1 hour of streaming a YouTube video on Wi-Fi, with the screens set to maximum brightness, the Pixel had dropped from full to 98% remaining. The Nothing Phone 1 dropped to 95% in the same time, while the A53 dropped to 94%. After a second hour, the Pixel had dropped to 92%, with the Nothing phone coming in a close second at 90%, with the A53 having dropped to 89%. 

Three phones laying flat on a table
Andrew Lanxon/CNET

Sure, the Pixel technically did the best here, but we're really only talking a few percentage points between them, which isn't a big deal. All three put in solid performances: Both here and in everyday use, the battery lift you can expect to see will vary depending on how much you demand of your phone. 

With careful use you won't struggle to get a full day out of any of the phones, and all three will likely want a full recharge every night. 

Software and other features 

All three phones run Android 12 at their core, but you will find some notable differences in the experience. The Pixel 6A runs a pure, Google-produced version of Android 12. It's a clean and clutter-free experience that I've enjoyed using for some time on the Pixel 6 and 6 Pro. The Nothing Phone 1 has a visual skin that includes different colors, fonts and backgrounds, but it's also neat and stripped-back, making it smooth and simple to navigate.

The A53 immediately annoyed me with a variety of prebundled apps, including ones for Booking.com, TikTok, Nextdoor and a variety of Samsung's own apps and stores. These apps make the phone feel cluttered before you've even begun to install your own. There are two different messaging apps, for example -- Google's and Samsung's -- so Android novices might find it more complicated to get to grips with. 

Close up on details of two phones
Andrew Lanxon/CNET

The A53 does have a killer feature not found on the other two though: expandable storage. While the Pixel 6A comes with 128GB of storage and the Nothing Phone 1 is available with up to 256GB, the Galaxy A53's 128GB of storage can be expanded with microSD cards up to 1TB in size. That makes it a great option if you take a lot of photos or videos or want to save a lot of media locally to your phone to enjoy when you don't have an internet connection. 

Which phone should you buy? 

The Nothing Phone 1's unique design certainly gives it an edge over the others, but if you're not bothered about those flashy lights, you love taking wide-angle photos on vacation -- or if you live in the US and can't even buy it -- then you should look toward the others. 

While the A53 5G performed admirably in our tests, it was the Pixel 6A that consistently came out on top. Its processor performance is better, it takes better photos from both its cameras, its pure Android interface is nicer to navigate and it even feels like the more premium device when you hold it. 

The A53 is larger and its expandable storage gives it a definite one-up if you want to store a lot of media, but overall it's the Pixel 6A that offers the best value for money. 

Pixel 6A vs. Nothing Phone 1 vs. Galaxy A53 5G specs comparison chart


Google Pixel 6A Nothing Phone 1 Samsung Galaxy A53 5G
Display size, resolution 6.1-inch OLED; (1080 x 2400); 60Hz 6.55-inch OLED display, 2,400 x1080 pixels; 6.5-inch AMOLED (2,400x1,080 pixels); 120 Hz
Pixel density 429 ppi 402ppi 405ppi
Dimensions (Inches) 6.0 x 2.8 x 0.35 in
6.28 x 2.94 x 0.32 in
Dimensions (Millimeters) 152.2 x 7.18 x 8.9 mm 159.2 x 75.8 x 8.3 mm 159.6 x 74.8 x 8.1 mm
Weight (Ounces, Grams) 6.3 oz; 178g 193.5g 6.67 oz; 189g
Mobile software Android 12 Android 12 Android 12
Camera 12.2-megapixel (wide), 12-megapixel ultra wide) 50-megapixel (main), 50-megapixel (ultrawide) 64-megapixel (wide), 12-megapixel (ultrawide), 5-megapixel (macro), 5-megapixel (depth)
Front-facing camera 8-megapixel 16-megapixel 32-megapixel
Video capture 4K 4K at 60fps 4K
Processor Google Tensor Snapdragon 778G+ Exynos 1280
RAM/Storage 6GB RAM/128GB storage 8GB + 128GB, 8GB +256 GB, 12GB RAM + 256GB 6GB/128GB
Expandable storage None None Up to 1TB
Battery/Charger 4,410 mAh capacity; 18-watt fast charging (adapter sold separately) 4,500mAH (33W wired charging, 15W wireless charging, 5W reverse charging) 5,000mAh (charger not included, does not support wireless charging)
Fingerprint sensor Under display In-display In-display
Connector USB C USB-C USB-C
Headphone jack None None None
Special features 5G-enabled, 18W fast charging, WiFi 6E, security updates for 5 years, Android OS updates for 3 years, dual SIM, IP67 water resistance 5G, IP53, Three years of Android updates, Dual Sim, 120Hz adaptive refresh rate 5G-enabled; IP67 rating; supports 25W wired fast charging, Samsung Pay
Price off-contract (USD) $449 $470 (converted) $450
Price (GBP) £399 £399 £399
Price (AUD) A$749 AU$685 (converted) AU$699

Source

7 Tips To Try If You Have Trouble Putting In Contact Lenses


How to stop getting in trouble how to avoid trouble how to get in trouble what to do when your in trouble how to avoid trouble things to do when your in trouble what are some tips best tips and tricks how to get tips 7 tips to optimize the data storage cost
7 Tips to Try if You Have Trouble Putting in Contact Lenses


7 Tips to Try if You Have Trouble Putting in Contact Lenses

After plopping them in enough times, you'll get used to those sticky little domes that hug your eyeballs so you can see better (or see at all, depending on your prescription strength). 

But like many daily habits, there's a learning curve to wearing prescription contacts. After all, our eyes instinctively close up when they sense danger, like a shaking, protruding finger trying to insert a piece of plastic. 

Whether you're a new or returning contact lens user, here are a few tips to get this routine to feel like second nature. 

Read more: Best Places to Buy Contacts Online

How to put in your contacts 

First, let's start with the basics: how to get those contact lenses into your eye as comfortably as possible.

1. Thoroughly wash and dry your hands. You can often blame uncomfortable contacts on something being on the lens. To ensure you don't transfer anything into your eye and to minimize your risk of eye infections, get those hands clean. Be sure that they are dry. 

2. Scoop the first contact out of the case using your fingertip, not your nail. You can gently shake the case first if either lens is stuck to the side. Then, rinse out the lens with contact solution. Do not use tap water. Plain water can allow harmful bacteria to stick to the lens and infect your eye.

3. Inspect the lens. Check that it's not torn, creased or dirty. Also, make sure it's not inside-out. When the lens sits on the tip of your finger, it should have consistent curvature around the lip. If it's flaring out, the lens is probably inside-out. Flip it the other way before you put it in your eye. 

4. Put in the lens. Place the contact lens on the tip of the pointer finger on your dominant hand. Use your other hand to gently pull your top eyelid up, making it easier to get the lens into your eye without hitting your eyelid or eyelashes. Gently tap the finger with the lens on it to your eye. The moisture of your eye should be enough to transfer the lens from your finger to your cornea. 

5. Adjust the lens. Blink a few times. Then, look down, up, right and left. This centers the lens on your cornea. 

6. Repeat with the other eye. You know the drill. 

Close up of contacts in solution
ScantyNebula/iStock/Getty Images

Caring for your contact lenses

Just knowing how to put in contacts is a key first step. But wearing your contact lenses comfortably every day hinges on you knowing how to take care of them. This is relatively easy if you have daily lenses (the ones you wear once, then toss). 

However, if you wear any other type of lens, talk with your optometrist about best practices for contact care. They may recommend a specific type of contact solution. 

Generally, you should take your contacts out and put them in a clean case in that solution:

  • Before you go to bed: Unless you have lenses specifically designed for sleeping, remove your contacts each night before bed. 
  • Before you get wet: Whether you're hopping in the shower or going for a swim, take your contacts out first since you could lose a lens in the water. Also, the water could transfer something onto your lens or compromise the structure of the lens. 

We won't dig too deeply into how to remove contact lenses here, but the basic steps are: 

1. Wash and dry your hands. 

2. Gently pinch the lens from the surface of your eye. 

3. Put your contact lenses into a clean case filled with contact solution.

You should be replacing two things regularly:

  • The contact lenses themselves: Follow your optometrist's direction here, whether that means swapping your lenses out daily, weekly, bi-weekly or monthly. Wearing them past the recommended time can lead to a buildup on the lens. 
  • The case: Swap out the case for a new one every three months to ensure you always store the lenses in a hygienic environment. Many contact solution companies include cases with the bottles of solution they sell.

Finally, prep before you go on vacation. You might want to buy a small bottle of solution to pack in your toiletries bag. In general, when you're traveling, caring for your contacts can be extra tricky. 

Read more:  The Quickest Way to Keep Your Contacts Fresh While Traveling

Optometrist helping patient with contacts in office
Peathegee Inc/Tetra Images/Getty Images

7 tips for beginners

If you're just starting out with contacts, here are a few things to keep in mind that can make your transition easier. 

Know contact lenses are safe

When used properly (that is, taken out every night, handled with clean hands and replaced on time), contacts are a safe form of vision correction used by roughly 45 million people in the US. They're also regulated as medical devices by the US Food and Drug Administration, so you can rest assured the material you're sticking in there is safe and agreeable for your delicate eyeballs.

And know this: Contact lenses will never get stuck behind your eye, the American Academy of Ophthalmology says. That's because there's a membrane connecting your eyeball to your eyelid. So if your eyes are too dry, you insert the contact funny or there's another mishap with the lens, know your search is only temporary and you will soon be reunited with your contact lens, usually with a gentle finesse or a few drops of contact solution to loosen its hold.

Another important myth to bust, as laid out by contact retailer PerfectLens, is that contacts are uncomfortable. Once you get used to putting them in, contacts should be so comfortable you can't tell they're there. (If they are uncomfortable and you haven't been wearing them for too long, contact your eye doctor to see if you need a new brand or a different eye measurement.) 

Ask your optometrist for training

These eye pros have all the best tips for learning how to wear your specific type of contact lenses. Some optometrists charge a fee for contact lens training, but there's no better way to learn how to put contacts in. 

Try touching your eye

We know this goes against pretty much everything you've ever been told. But you have to get over that initial recoil you might feel. With clean hands, try gently making contact with the white of your eye. 

If you can touch your eye with your finger, you can touch your eye with a contact lens. You'll probably find that the lens making contact with your eye is much more comfortable than your finger. That's because it's specifically designed to fit over your cornea, distributing pressure across your eye rather than onto a single point.

Keep your nails short and trimmed

I've had my nails "done" exactly twice and both sets of longer-than-usual nails turned a daily routine I barely have to think about into a skill to remaster, like learning how to drive in snow every winter.

If you're a regular long-nailer who's mastered the art of pinching a contact without nicking the lens, or your eye, congratulations on making it to the next level. But for beginners just getting used to inserting lenses, there's a lot less room for error and pokes when you have shorter nails. 

Use both hands

Use the pointer finger of your dominant hand to hold and place the lens, but don't forget about your other hand. You can use it to gently pull up on your eyelid. If you have a reflexive tendency to try and close your eyes as you go to put your lens in, this can help. 

Don't put in contacts when your eyes are red or tired

If you're just starting out, pick a time to try inserting contacts when your eyes are alert and awake, as opposed to trying to squeeze them in at 6 a.m. on a day when you're already really tired. Generally speaking, it's not a great idea to put in contacts if your eyes are feeling irritated, and you should never sleep in your contacts because that increases your risk of eye infections (some of which can lead to permanent vision loss) by six or eight times, the AAO says. 

Similarly, you should use rewetting or eye drops if they're recommended by your eye doctor, the AAO says, especially if you're starting out in contacts. Drinking water will also help stave off dry eyes and ease your eyes into the transition with contact lenses. 

Why are my contact lenses uncomfortable? 

On that note, let's talk about what can go wrong with your contacts. If you just got them, it might take some getting used to. Note: It might feel odd, but it should never feel uncomfortable. If you continually try to wear your contacts and feel like something's stuck in your eye, talk to your optometrist. You may need a different type of lens. 

If your optometrist is confident you're in the right lenses but one feels uncomfortable after you put it in, follow these steps:

  • Don't rub your eyes. Resist the urge. Blinking can help the lens settle into a comfortable spot, but rubbing your eye can cause it to fold. That will only make you more uncomfortable. Plus, if something is stuck between the contact lens and your cornea, rubbing it can scratch your eye.
  • Take it out and check it. A lot of the time, if your lens feels uncomfortable, it's because some debris is stuck to it, which is transferred to your eye when you put it in. Look closely at the lens. Even a tiny little thread or speck of dirt feels catastrophic once it contacts your eye. Also, make sure the lens isn't torn (which will make it feel like something's in your eye) or inside-out.
  • Check your eyes. If something was stuck to the contact, it could now be stuck to your eye. You might want to use some eye drops to flush your eye. 
  • Try again. When you're learning how to put in contacts, it may take a couple of tries to get it right. Once you know the lens and your eye are both debris-free, try putting the lens back in.
  • Keep your glasses handy. Learning how to put contacts in takes time. If you're having a particularly hard time one morning, stick with glasses that day. You don't want to irritate your eye repeatedly trying to get your contacts in. 
Woman removing contact lenses
Carol Yepes/Moment/Getty Images

The bottom line

You're not alone in this. It takes most people at least a couple weeks to get comfortable wearing contact lenses. Stick with it -- paying careful attention to keeping your lenses clean and debris-free -- and it should get easier with time. 

If it doesn't, the lenses themselves could be to blame. Talk with your optometrist and consider your online contact lens options to find what's best for your specific eyes.

The information contained in this article is for educational and informational purposes only and is not intended as health or medical advice. Always consult a physician or other qualified health provider regarding any questions you may have about a medical condition or health objectives.


Source

Search This Blog

Menu Halaman Statis

close