DJI Phantom 3

What Is 3d Movie

Embark on a Quest with What Is 3d Movie

Step into a world where the focus is keenly set on What Is 3d Movie. Within the confines of this article, a tapestry of references to What Is 3d Movie awaits your exploration. If your pursuit involves unraveling the depths of What Is 3d Movie, you've arrived at the perfect destination.

Our narrative unfolds with a wealth of insights surrounding What Is 3d Movie. This is not just a standard article; it's a curated journey into the facets and intricacies of What Is 3d Movie. Whether you're thirsting for comprehensive knowledge or just a glimpse into the universe of What Is 3d Movie, this promises to be an enriching experience.

The spotlight is firmly on What Is 3d Movie, and as you navigate through the text on these digital pages, you'll discover an extensive array of information centered around What Is 3d Movie. This is more than mere information; it's an invitation to immerse yourself in the enthralling world of What Is 3d Movie.

So, if you're eager to satisfy your curiosity about What Is 3d Movie, your journey commences here. Let's embark together on a captivating odyssey through the myriad dimensions of What Is 3d Movie.

Showing posts sorted by relevance for query What Is 3d Movie. Sort by date Show all posts

What Is 3D Printing?


What Is 3D Printing?


Spend any time at an online craft market like Etsy, and you'll notice a lot of the products there are 3D printed or include 3D-printed parts. But what do we actually mean by that, and how easy is it to start 3D printing your own items? 

The answer isn't as simple as you might hope, but also not as complicated as you might fear.

How does a 3D printer work? 

3D printing is a type of additive manufacturing that uses material to build layers into 3D objects. Essentially it prints by adding material (usually a form of plastic) one drop at a time. The 3D printer draws a shape on a flat surface and then draws another on top of it until the model is complete.

There are a lot of different types of materials used to create these layers, but the ones you're most likely to use as a hobbyist are melted plastic and UV resin. Which type you use will depend on the result you want to achieve. The best 3D printers automate a lot of the process, but there is still a lot of trial and error to get it right. 

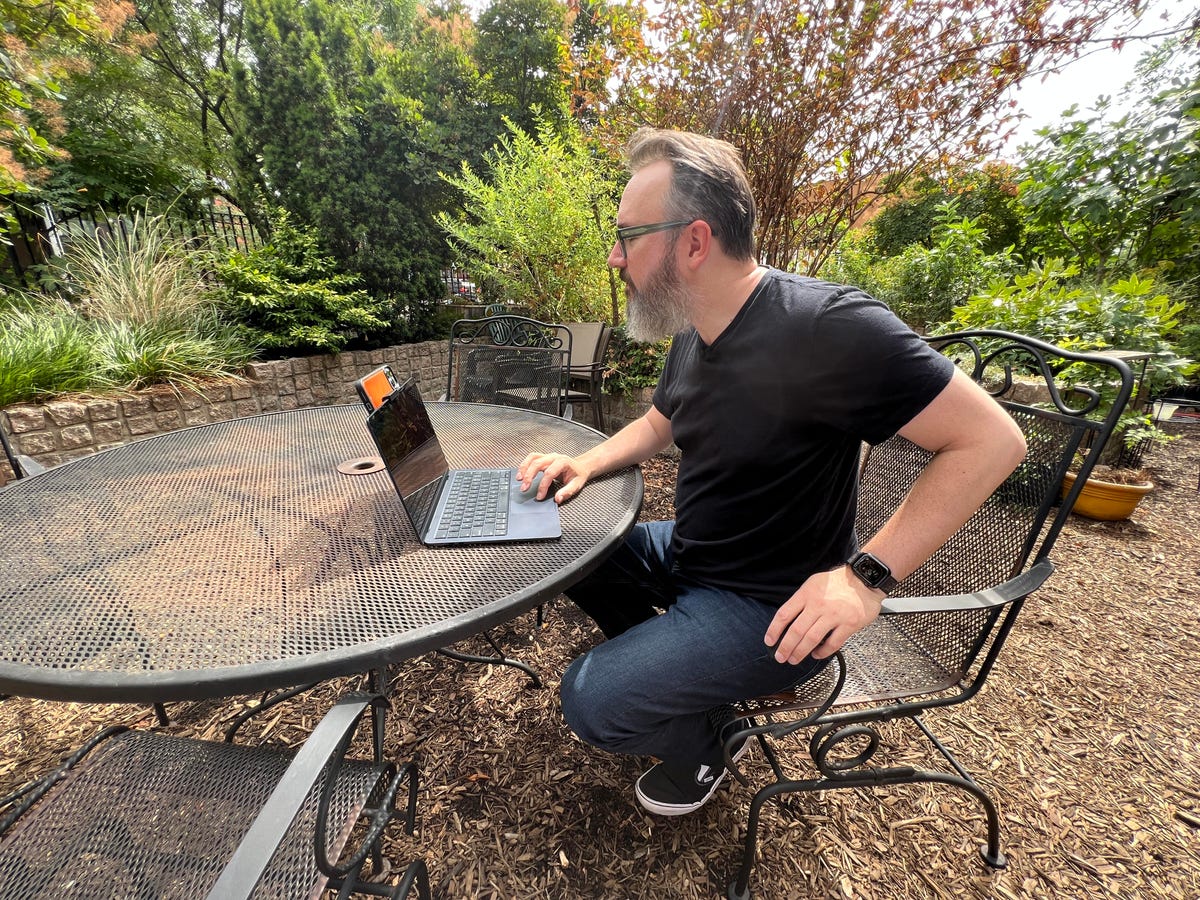
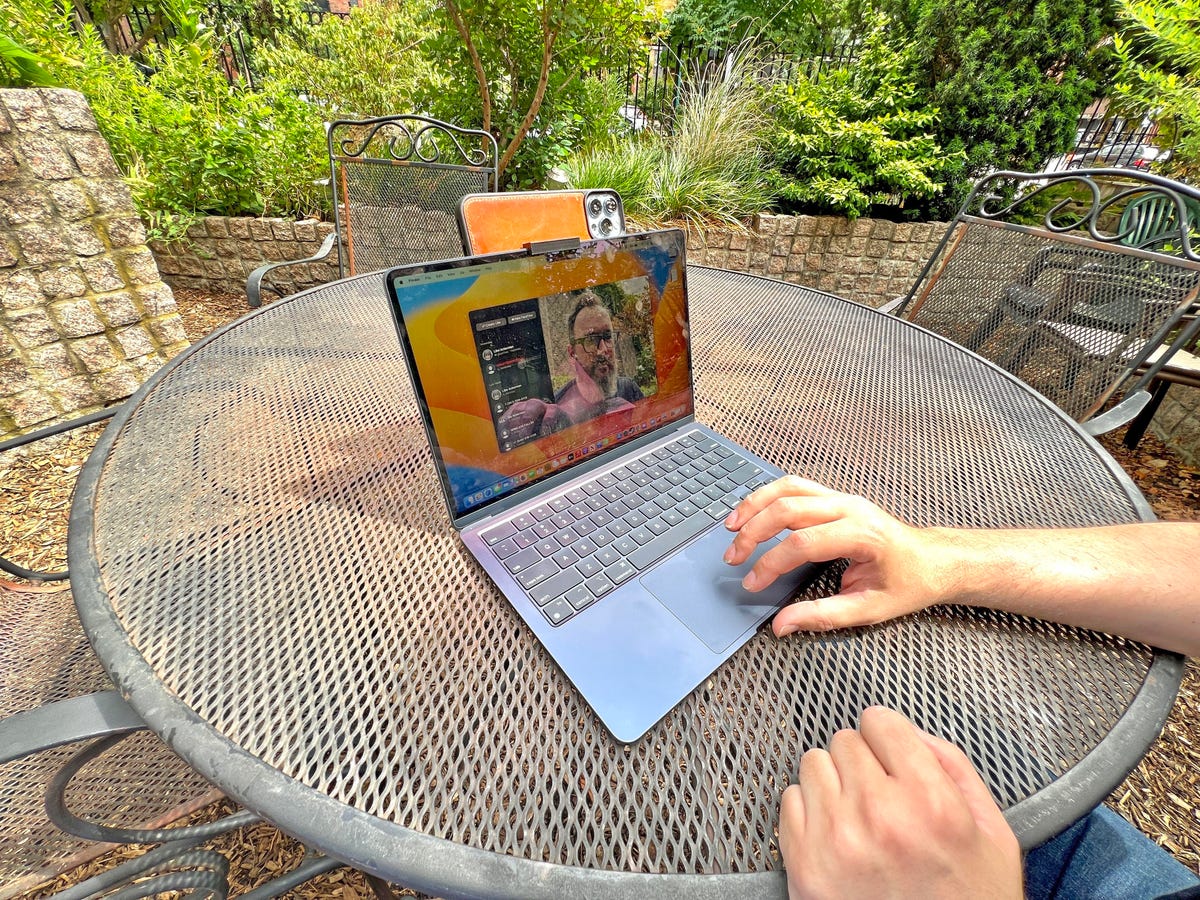
This picture shows one of the positives of owning a 3D printer. My colleague Dan Ackerman needed a mount for his iPhone to attach to his MacBook. A few hours and about $0.15 of material later, he had one up and running. It's satisfying to solve this kind of problem almost immediately.

3D printed part holding an iphone on a macbook

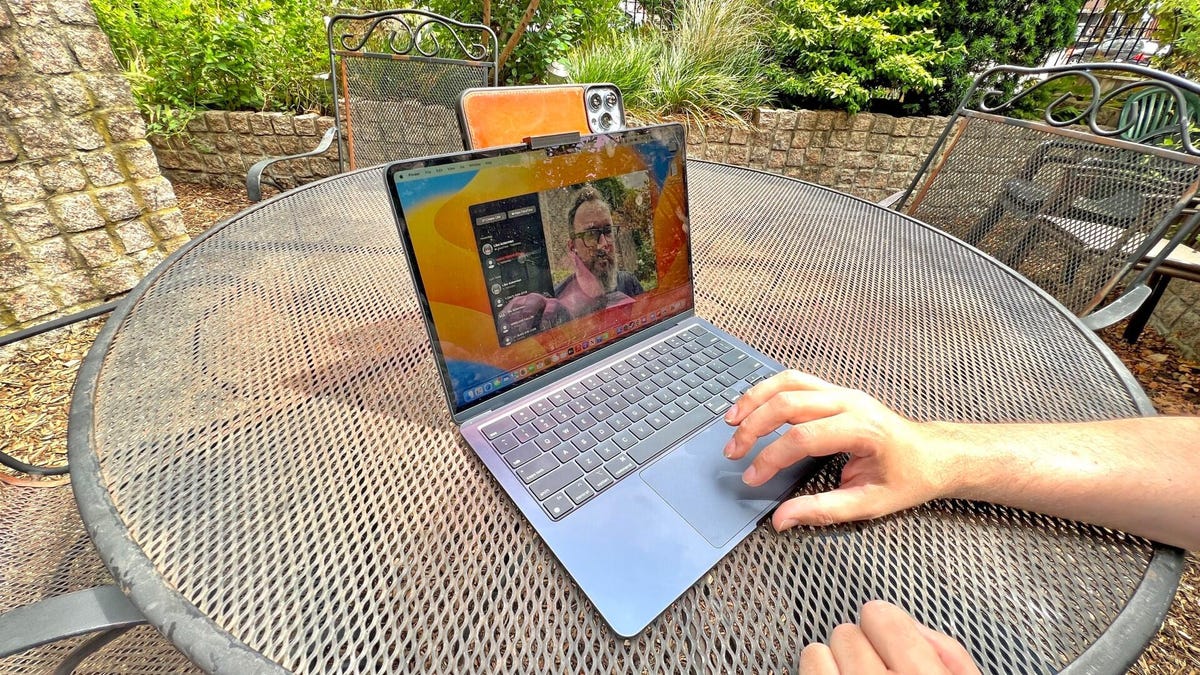
Making 3D printed parts save you time and money

Dan Ackerman/CNET

What are the types of 3D printer?

Printers come in all different shapes and sizes and can be configured in various ways depending on your end goals, but most of the ones a hobbyist or small business will use can be broken down into two distinct types: FDM and resin.

Fused deposition modeling

This is the most common type of printer and the type most widely used by businesses and hobbyists. An FDM 3D printer is simply a plotting device. It pushes a plastic filament through a hot nozzle to squish layers into the print surface in a pattern.

There are a lot of different materials that you can use with an FDM printer. I won't go into detail here -- if you want more information, check out our list of the best 3D printer filaments -- but the simplest one to use is PLA. It's a type of non-toxic plant-based plastic that prints at fairly low temperatures.

You should buy an FDM 3D printer if you are looking to 3D print practical pieces, medium-sized decorative models and cosplay armor.

SLA (stereolithography) or resin 3D printing

SLA printing, more commonly known as resin printing, is almost the opposite of FDM printing. Instead of melting plastic into liquid, it uses a UV reactive liquid that's hardened under light. Each layer is "cured" using an LED array, which emits light in a set pattern.

Resin printing produces far more detailed models as an end result but it's a lot harder to work with. There are plenty of great resins out there for you to try but you need a wash-and-cure station to make sure they're safe to handle after you have printed them.

You should buy an SLA resin 3D printer if you want to print highly detailed models such as Dungeons and Dragons miniatures jewelry or even dentistry (assuming you're a dentist).

There is another process for 3D printing: Sintering uses a laser to fuse powder into shape. It's expensive and produces amazing results, but it requires large machines and plenty of space. It's certainly not great for use in your garage.

Elegoo Neptune 2 on a shelf with Anycubic Vyper in background

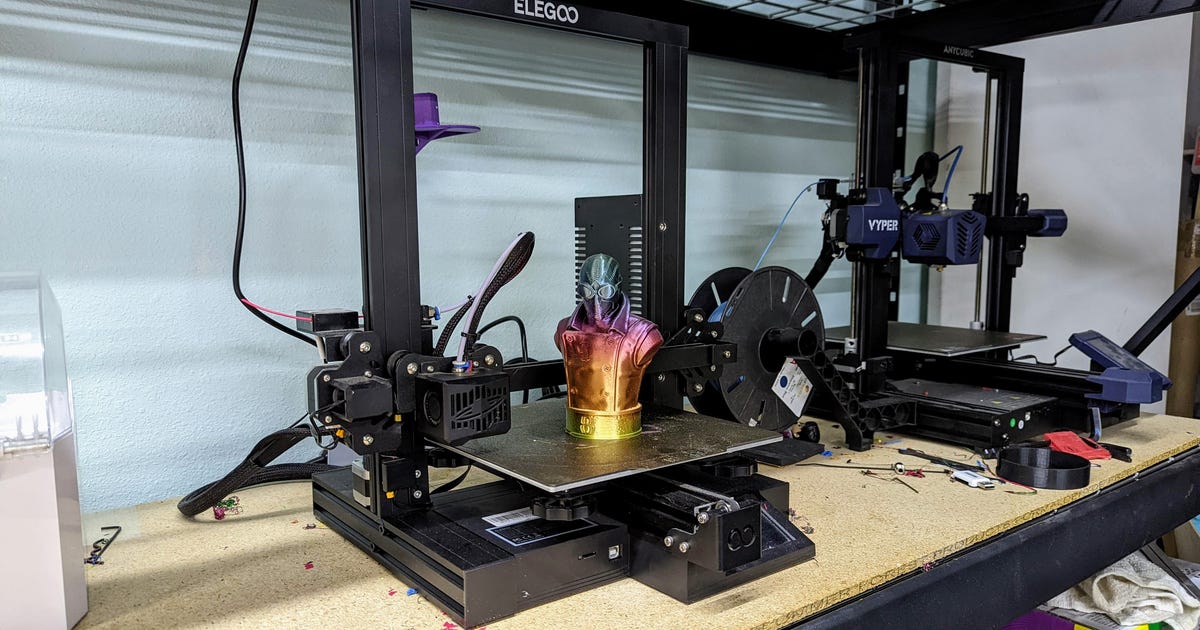
Even though it costs very little, this printer delivers excellent quality every time.

James Bricknell/CNET

How much is a 3D printer? 

Prices for 3D printers vary wildly depending on what you want to do with them, how big the printer is and how detailed you want the models from the printer to be. We have a list of the best budget 3D printers on the site if you're looking for something under $500. Or we can recommend the best 3D printers overall if you have a little more money to spend. There are even semi-professional rigs that can cost a few thousand dollars.

The Neptune 2 is a good starting point for beginners. It's easy to set up and use and it's usually priced at under $200. While it isn't going to print the most detailed models, it will give you a good understanding of everything that 3D printing entails. The most important thing is that it's cheap, making it accessible.

If money's no object and you want an amazing in-home 3D printing experience, then the Prusa Mk3S Plus is the best choice. It comes in both kit and preassembled forms, but if you want to learn more about 3D printing you should buy the kit. It's an excellent introduction to how the whole process works, and it'll save you money. 

At $799 plus shipping, it isn't the cheapest 3D printer, but it is the best out-of-the-box 3D printing experience money can buy. It's an investment when you're first starting out, but it can save you money in the long run: Some cheaper 3D printers require aftermarket upgrades and replacement parts to really shine. 

In the four years that I've owned it, it's been my most consistent 3D printer in terms of reliability and output quality.

Resin 3D printers are similarly priced as their FDM counterparts, though the differences between the price point are more about speed and size than quality. A budget resin printer like the Anycubic M3 can be as low as $270 but the level of detail it can capture is as good as printers five times the cost. What keeps the price cheap is the size of the build area. Simply put; the more space you want the more you will expect to pay. 

Is now a good time to buy a 3D printer?

3D printing is currently in a golden age. Unlike days past, when you needed an engineering degree to use a 3D printer, nowadays you can get set up and started with most printers in under 15 minutes. 

Advanced safety features such as filament runout sensors and power loss protection are now standard even on budget-friendly options, so you're less likely to experience failures and more likely to succeed. That's not to say you'll never get failures -- you will, I promise. But failures are a good learning experience, and they won't be the majority of your results, like they used to be.


Source

Tags:

These New MacOS Ventura Tricks Make Your Mac Much Better


How to get macos ventura macos ventura hackintosh reddit new mac os ventura announces macos ventura next major mac these new puritans attack music these new puritans rym these new puritans we want war mp3 download
These New MacOS Ventura Tricks Make Your Mac Much Better


These New MacOS Ventura Tricks Make Your Mac Much Better

A big change is coming to Apple's Mac computer line, thanks to the new version of MacOS, called Ventura. It's going to change the way you use video-conferencing apps like Zoom, how you juggle multiple apps at once, and even how you dig around the settings menus to make everything work the way you want. 

Some of these new changes are so big, they break my general OS rule -- that operating system updates should be like good cinematography in a movie: an important backbone, but not one that stands out too obviously. Why do I usually say that? Because if you change a device's user interface or features too radically, you lose the muscle memory and personal workflow developed over time. But at the same time, change too little and no one will feel the need to update. 

The new version of MacOS is a bigger deal than most, adding many significant new features and improvements. The official release should be coming later in 2022, but the public beta is available now. 

Everyone always says not to install beta operating systems on your primary devices, and I've offered similar counsel in the past. But honestly, once it hits the public beta phase (as opposed to a locked-down developer beta), things are usually in pretty good shape. 

So with that mindset I downloaded and installed MacOS Ventura on a MacBook and iOS 16 on my phone. Didn't even back anything up, just went for it. Yolo, I suppose. 

The next bit of unspoken OS update truth is that most people will never see, use or even be aware of most of the updates, especially as so many are small tweaks that operate behind the scenes, or add functionality you're probably not even looking for. 

But Ventura does a little more than most OS updates, and when combined with iOS 16 or iPadOS 16, you get access to some really useful features. So, while most of Ventura probably won't make a big difference in your day-to-day life, here are four new features in the beta that stand out the most. 

Stage Manager: A better, faster way to get around the Mac

The single biggest visual change in Ventura is this fresh new way to sort and organize various Mac apps and switch between them. Rather than Apple's traditional Cmd-Tab or swiping up with four fingers, Stage Manager puts your active apps in a thumbnail column on the far left side of the screen. 

Click on the app you want and it jumps to the middle of the screen, making it easy to swap between apps on the fly. Sure, it wasn't hard to jump between apps before, but this is a new, very visual way of doing that. If you have multiple windows open in an app (like multiple browser windows), clicking on the thumbnail on that left rail will jump between those windows. 

MacOS Ventura Stage Manager

Stage Manager puts your open apps along a left side rail. 

Screenshot by Dan Ackerman/CNET

Now that I'm using Stage Manager, I can't imagine going back to not using it. However, it does leave us with what I'd call the Double Dock problem. You've now got a horizontal dock at the bottom of the screen and a second quasi-dock running vertically down the left side of the screen. If you want a really clean desktop view and need to hide Stage Manager, pop open the Command Center (the two pills icon) and toggle it off. 

Dan Ackerman seated at a patio table looking at a laptop

Using an iPhone as a wireless webcam with Camera Continuity. 

Libe Ackerman/CNET

Continuity Camera: Use your iPhone camera, at last

This is something I've been waiting on Apple to implement for many years. The elevator pitch is that you can now use your iPhone as a wireless webcam for your Mac. Sounds simple enough, but before now you had to use a third-party app like EpocCam, which just isn't simple and bug-free enough to rely on for everyday use. 

Now, with Ventura on your Mac and iOS 16 on your phone (both currently via public beta), it's suddenly easy to do and it works in Zoom, FaceTime and many other apps. Just select your phone as a camera from the app's camera selection menu. You do need to be logged in to the same Apple ID on both devices, and on the same Wi-Fi network with Bluetooth enabled. 

Why would you want this? Unless you have the new M2 MacBook Air or the 14-inch or 16-inch MacBook Pro, your MacBook has a pretty unimpressive 720p-resolution camera. Those newer Macs have much better 1080p cameras, but your iPhone rear camera is still going to be much, much better than that. Looking at the 1080p camera in the M2 MacBook next to the video from an iPhone 13 Pro via Camera Continuity, the iPhone was clearly superior. 

There are some extra tricks available in the Command Center under Video Effects, including Center Stage, which follows your face around the frame; Portrait mode, which blurs the background slightly; and Studio Light, which dims the background and brightens your face.

An iPhone mounted on a MacBook.

The iPhone makes a great webcam in MacOS Ventura. 

Libe Ackerman/CNET

Potentially more interesting is Desk View, which uses the iPhone's wide-angle lens to capture what's happening just below the laptop's wrist rest and touchpad, even though the phone is pointed directly at your face. It's a stand-alone video app, so you'd screenshare it in Zoom, for example. It's pretty limited right now in what it shows and how it's implemented, but I'm interested in experimenting with it more. 

But wait, there's more. 

How do I position my phone to use it as a webcam, you ask? I'm sure there will be a lot of mini tripods and phone mounts available to clip your phone to the top of a MacBook. 

A MacBook, a phone and a clip on a patio table

This 3D-printed clip helped attach an iPhone to the MacBook lid. 

Dan Ackerman/CNET

But I've gone ahead and designed a simple one via TinkerCad, and printed it on a 3D printer. This specific mount is designed for an iPhone 13 Pro Max, with a case, and the new M2 MacBook Air. You can try downloading and printing it if you think it'll fit your phone and laptop; also I'm making the CAD file available as well, so you can adjust the measurements to your liking. 

If you don't have a 3D printer, our list of the best ones is a good place to start. 

The public TinkerCad file is here, and the 3D STL file is here on Thingiverse. 

System Settings/Preferences: Slightly less confusing 

Am I the only one who finds the Mac's traditional System Preference menu confusing? It's a bunch of icons, which seem to shift around with every OS version, and the tools you want are inevitably buried in submenus. I find some of the organizational choices confusing, and question some of the internal logic. 

Onscreen list of settings

System Preferences is now... System Settings. 

Dan Ackerman/CNET

The new look and feel of the menu, now called System Settings, is delightfully basic. It's just a list. The actual functionality isn't really different, but I find it much easier to navigate because you can still see the other list entries while inside a specific menu. The somewhat opaque icons and category names are still there and things like click-and-drag for the trackpad are still buried in a submenu of the accessibility menu, but it's nice to move the UX needle toward utility over design. 

Live captions for videos: Make FaceTime calls easier to follow

As a bonus fourth favorite feature, I like the real-time captioning that works across different apps and audio sources. 

YouTube videos already offer closed captions that are pretty good, but livestreams, for example, can be a problem. Other video or video-related services offer a wide range of captioning and subtitle options, some good, some less so. 

CNET's site with a Dan Ackerman video being captioned at the bottom of the screen

Live Captions adds real-time transcription to almost anything. 

Screenshot by Dan Ackerman/CNET

Live captions adds just that, live captions, in a pop-up box and works with real-time spoken-word content from many video sources, including FaceTime calls. That's great for expanding accessibility, but also handy for situations where the person on the other end of your video call isn't clearly audible, has a bad mic, etc. 

I've tried it a few times, and you really do get a nearly instantaneous onscreen transcription of what the other person is saying. It's not a feature I would use all the time, but it's both impressive and useful. 

Venturing into Ventura 

There are many more features in MacOS Ventura, including improvements to Mail, Safari, Spotlight and how passwords are handled. I frankly found those less interesting than the parts I've highlighted above, considering what would make an actual difference in my everyday workflow. Some of these work well now, while others need more time to fully bake, which is understandable considering this is a beta. 

The official version of Ventura should be available this fall, based on when Apple has issued OS updates previously. 

More Mac tips


Source

DJI Phantom 3 Advanced Review: The Sweet Spot For Features, Performance And Price


Dji phantom 3 advanced review the sweet spot for intermittent dji phantom 3 advanced review the sweet spot for achievement dji phantom 3 advanced review the lincoln dji phantom 3 advanced manual dji phantom 3 advanced vs professional dji phantom 3 standard dji phantom 3 firmware update dji phantom 3 advanced
DJI Phantom 3 Advanced review: The sweet spot for features, performance and price


DJI Phantom 3 Advanced review: The sweet spot for features, performance and price

DJI currently has three versions of its Phantom 3 drone: the Standard , Advanced and Professional . While there are several important differences between the entry-level Phantom 3 Standard ($799, £649 or AU$1,299) and its two linemates, the feature gap between the Professional and Advanced amounts to two things.

The Phantom 3 Professional shoots video in 4K (3,820x2,160-pixel) resolution and has a 100-watt battery charger. It retails for $1,259, £1,159 or AU$1,950. The Advanced captures video in 1080p (1,920x1,080) and has a slower 57-watt charger, but costs $999, £899 or AU$1,550. That's it.

The 4K video from the Professional is a step up from the Advanced's full-HD results. But it's not a big step up, and unless you want or need the extra resolution and have a computer powerful enough to play and edit 4K video, the Advanced's 1080p video doesn't disappoint. And since the drones' features and controllers are the same, the Phantom 3 Advanced is as easy to recommended as it is to fly. Which is to say it's really easy.

Joshua Goldman/CNET

Design and features

The quadcopter itself is, for the most part, unchanged from its predecessor, the Phantom 2 Vision+. You'll find all the same convenience features like color-coded, self-tightening propellers for easy installation and replacement, and a slot-loading battery pack, though it's a newly designed battery making the Phantom 2's batteries incompatible with the 3.

The three-axis gimbal on its belly stabilizes the camera in roll, pitch and yaw directions keeping the video looking smooth even with sudden stick movements or wind gusts. Plus, the camera can do a 90-degree tilt, letting you shoot straight down, straight ahead and anywhere in between. The camera is permanently attached to the gimbal, so if you irreparably damage one or the other, you'll have to replace the entire gimbal-and-camera assembly. It also means you don't have the option of using the camera for anything else, unlike models that use GoPro or other small cameras such as 3D Robotic's Solo or EHang's Ghost.

The Advanced's camera features a Sony-made 12-megapixel 1/2.3-inch CMOS sensor behind a new f2.8 20mm lens (35mm equivalent), which gives you a 94-degree field of view. That's much narrower than the Vision+ camera's 140-degree field of view resulting in far less distortion.

Joshua Goldman/CNET

Sitting to the back of the gimbal is the new Vision Positioning System, a set of sensors to help the Phantom 3 hover while indoors when GPS isn't available. There are many caveats for it to work properly, however, such as not flying over sound-absorbing materials, water or highly reflective surfaces. It's also only effective up to about 10 feet (3 meters). If you're thinking of getting the Advanced to fly above crowds in an arena or auditorium, you better up your piloting skills first.

When you're outside, GPS is used to help the drone determine its position and yours and is what makes it possible for the drone to stop and hover in place when you release the controller's sticks as well as delivering accurate location data for safety features like automatically returning to a home position. The more satellites it can lock onto, the better off you are, so DJI added the Russian navigational system, GLONASS, which lets it tap into more satellites than GPS alone.

Satellite acquisition speeds are noticeably faster compared to the Phantom 2 Vision+, so you can lock on and start flying more quickly. Also, with the Vision+ there were times I would struggle to get a solid lock on six satellites (the minimum for GPS-assisted flight). The Advanced never had a problem grabbing onto 10 satellites or more in a matter of seconds and regularly had upward of 15 in my testing. This makes a huge difference when it comes to putting the drone in the exact position you want for photos and video.

Joshua Goldman/CNET

The controller and DJI Go mobile app (formerly called Pilot) are important, too, of course. The Advanced and its controller have DJI's Lightbridge technology for better image transmission between the sky and ground. Lightbridge allows for a continuous connection back and forth between the two and increases flight range over the wireless range extender used for the Phantom 2 and the entry-level Phantom 3 Standard. This does mean you'll need your iOS or Android device's charging cable to use it, but the performance improvement is well worth it.

On each of the top corners you'll find discrete camera controls for starting and stopping recordings, taking pictures, reviewing your shots and two wheels, one for adjusting exposure compensation, ISO and shutter speed and the other for the gimbal's tilt. Two customizable buttons are on the bottom as well that can be used for a handful of gimbal or camera functions. Overall it's a great setup, but more than a few times I accidentally switched to playback mode while trying to snap a photo.

DJI also included a Return-to-Home button for those times when panic starts to set in and you just want to bring it on back. The controller's battery is built in and will last through several flights before you'll need to recharge it. DJI simplified charging, too, using one power supply with two cables attached: one for the controller's battery and one for the drone's.

Andrew Hoyle/CNET

Connecting your iOS or Android smartphone or tablet is as simple as plugging in your device's charging cable into the USB port on the Advanced's controller. (It'll keep your device charged while you use it for flying, too.) Then, with the controller and drone turned on, you just open the DJI Go app and tap to get the camera view.

The controller's device mount can handle phones and tablets big and small, however the app is optimized for use with the iPhone 5S, 6 and 6 Plus. Android device support is thin, with just the Samsung Galaxy S5 and Note 3, Sony Xperia Z3, Google Nexus 7 II, Google Nexus 9, Xiaomi Mi 3 and ZTE Nubia Z7 Mini listed. I tested with both a 6 Plus and a Galaxy S5 and the app performance was clearly stronger on the iOS device with the S5 occasionally freezing up forcing me midflight to restart the app.

In addition to a first-person view from the camera, you get complete camera controls, meters for signal strengths, GPS and battery life and access to settings for the whole system. It will also notify you if a firmware update is necessary (which occur with some regularity) and, eventually, you'll be able to do the updates through the app; currently they're done by downloading a file to a microSD card and popping the card into the drone's camera.

The app can also be used for automated take-offs and landings, if you don't want to handle them with stick commands, and triggering the Return-to-Home safety function. Another new safety feature of sorts is the Beginner Mode. This sets up virtual barriers called a geofence with a maximum altitude and flight distance of 30 meters (98 feet), giving you a safe way to limit where the drone can travel. It's pretty amazing to see in action as you send the Phantom full throttle toward its limit and the drone stops as if it's been snagged in an invisible net.

As for the camera settings, video recording options include full HD (1,920x1,080-pixel) and HD (1,280x720-pixel) resolutions at 24, 25, 30, 48, 50, 60 frames per second and you can choose between MOV or MP4 formats. Thanks to the Lightbridge technology, you can even use it to live-stream video straight to YouTube and uses your mobile device's mic for capturing audio.

Joshua Goldman/CNET

For photos, you can capture in JPEG, DNG raw format or both simultaneously. Shooting modes include single shots or bursts of three, five or seven; HDR and auto exposure bracketing (0.7EV bias) of three or five pictures; and time-lapse continuous shooting at 5-, 7-, 10-, 20- and 30-second intervals. You can also control ISO, exposure compensation and white balance.

At the time of this review the Phantom 3 Advanced (and Professional) didn't have DJI's Intelligent Flight features including waypoint navigation, point of interest (POI) flight planning or Follow Me function, but these are now available.

Waypoint navigation lets you set up a multipoint path for the drone to follow while you control the camera, while POI flight planning allows you to autonomously fly a circle around a subject, keeping it centered. Follow Me sets the drone to track your movement based on your orientation. Support for SDK apps already created by third-party DJI developers is available as well, giving the Advanced more features and future potential.

Joshua Goldman/CNET

Flying

If you're reading this review, you probably already know that DJI's Phantom quadcopters have a reputation of being extremely easy to fly (and fly away, but it's something I've never experienced). With the Phantom 3 the experience has only improved.

DJI has added a flight simulator to the mobile app (iOS only) that you can use to learn your way around the app and controls. I found it to be a little frustrating because the actual drone performs so much better in real life. Regardless of safety features and how stable the Phantom 3 is, I highly recommend taking your first flights out in an open area where there are no people or distractions.

Again, if you don't want to use stick commands, you can takeoff and land with a tap and a swipe on your screen. With GPS, the drone will just sit and hover wherever you leave it. Start flying a bit too close to a tree and you can just let go of the sticks and it will stop while you regroup and steer away. You can fly without GPS, but if you release the sticks the Phantom won't stop but instead continues to drift in the direction it was last headed. It's a gut-wrenching experience watching $1,000 float away seemingly uncontrollably, so it's best to fly with GPS until you fully understand the controls.

Joshua Goldman/CNET

The app is well laid out and at a glance you can see all the information you need. There's even a battery timeline meter giving you estimates on everything from remaining flight time to the power required to return home or land.

Speaking of battery life, DJI says you'll be able to get up to 23 minutes of flight time. I was able to get to just under 21 minutes of flying -- nothing too aggressive, mostly hovering in place and in light wind -- before it took over and landed itself. That flight time is very good when you factor in all that it's doing to stay in the air while recording video. It does feel short, though, especially if you're trying to get out some distance for a picture and still make it back. And extras are pricey at around $149, £125 or AU$205 each.

Video and photo quality

Closely examining the 4K video of the Phantom 3 Professional or DJI's higher-end Inspire 1 straight from the camera against the 1080p clips from the Advanced, there are noticeable differences, mainly in the level of fine detail and sharpness of subjects. There is better detail from the 4K and it's especially visible if you're viewing on a large TV or monitor. So, if it's necessary for you to capture the highest quality video without ponying up a ton more cash, the Phantom 3 Professional is the better choice.

Frankly, though, the full-HD clips from the Advanced look pretty great as do its photos, and they're more than suitable for sharing online and/or viewing on a phone, tablet or laptop. It's also a huge jump in quality from the Phantom 2 Vision+. For those considering an upgrade from that model to the Professional, your needs might be met with the less expensive Advanced.

Joshua Goldman/CNET

The live-streaming quality to YouTube is just OK. You have to have a pretty strong wireless connection to keep the video moving smoothly and even then the results were a bit glitchy and compressed. Still, it's sort of amazing it can do it at all and could be helpful for professional uses.

Lastly, whenever you record a video, a compressed 720p version is stored to your mobile device. To help make the most of these clips, DJI built in a basic video editor to the Go app. You can use it to cut up your clips, gather them up and then combine them into one movie. DJI also included some style templates with music you can apply before you save. Then you can just share away.

Joshua Goldman/CNET

Conclusion

The DJI Phantom 3 Advanced is a great little aerial photo and video machine, however it's the whole system -- the drone, the controller and the app -- that make it so easy to pick up and just start flying. It's not inexpensive, but compared with the $900 Parrot Bebop with its Skycontroller , you won't regret spending the extra money. And if you don't need the Professional's 4K video, you can put your money toward a spare battery or two so the good times don't come to an end after 20 minutes.


Source

https://nichols.my.id/how-to-download-draft-tiktok.html

.

DJI Phantom 3 Advanced Review: The Sweet Spot For Features, Performance And Price


Dji phantom 3 advanced review the sweet spot for those big dji phantom 3 advanced review thesaurus dji phantom 3 advanced review the lincoln dji phantom 3 advanced review the midnight dji phantom 3 advanced review the ordinary dji phantom 3 advanced review the batman dji phantom 3 advanced drone review dji phantom 3 advanced downloads dji phantom 3 advanced quadcopter drone dji phantom 3 professional dji phantom 3 standard manual pdf dji phantom 2

DJI Phantom 3 Advanced review: The sweet spot for features, performance and price


DJI Phantom 3 Advanced review: The sweet spot for features, performance and price

DJI currently has three versions of its Phantom 3 drone: the Standard , Advanced and Professional . While there are several important differences between the entry-level Phantom 3 Standard ($799, £649 or AU$1,299) and its two linemates, the feature gap between the Professional and Advanced amounts to two things.

The Phantom 3 Professional shoots video in 4K (3,820x2,160-pixel) resolution and has a 100-watt battery charger. It retails for $1,259, £1,159 or AU$1,950. The Advanced captures video in 1080p (1,920x1,080) and has a slower 57-watt charger, but costs $999, £899 or AU$1,550. That's it.

The 4K video from the Professional is a step up from the Advanced's full-HD results. But it's not a big step up, and unless you want or need the extra resolution and have a computer powerful enough to play and edit 4K video, the Advanced's 1080p video doesn't disappoint. And since the drones' features and controllers are the same, the Phantom 3 Advanced is as easy to recommended as it is to fly. Which is to say it's really easy.

Joshua Goldman/CNET

Design and features

The quadcopter itself is, for the most part, unchanged from its predecessor, the Phantom 2 Vision+. You'll find all the same convenience features like color-coded, self-tightening propellers for easy installation and replacement, and a slot-loading battery pack, though it's a newly designed battery making the Phantom 2's batteries incompatible with the 3.

The three-axis gimbal on its belly stabilizes the camera in roll, pitch and yaw directions keeping the video looking smooth even with sudden stick movements or wind gusts. Plus, the camera can do a 90-degree tilt, letting you shoot straight down, straight ahead and anywhere in between. The camera is permanently attached to the gimbal, so if you irreparably damage one or the other, you'll have to replace the entire gimbal-and-camera assembly. It also means you don't have the option of using the camera for anything else, unlike models that use GoPro or other small cameras such as 3D Robotic's Solo or EHang's Ghost.

The Advanced's camera features a Sony-made 12-megapixel 1/2.3-inch CMOS sensor behind a new f2.8 20mm lens (35mm equivalent), which gives you a 94-degree field of view. That's much narrower than the Vision+ camera's 140-degree field of view resulting in far less distortion.

Joshua Goldman/CNET

Sitting to the back of the gimbal is the new Vision Positioning System, a set of sensors to help the Phantom 3 hover while indoors when GPS isn't available. There are many caveats for it to work properly, however, such as not flying over sound-absorbing materials, water or highly reflective surfaces. It's also only effective up to about 10 feet (3 meters). If you're thinking of getting the Advanced to fly above crowds in an arena or auditorium, you better up your piloting skills first.

When you're outside, GPS is used to help the drone determine its position and yours and is what makes it possible for the drone to stop and hover in place when you release the controller's sticks as well as delivering accurate location data for safety features like automatically returning to a home position. The more satellites it can lock onto, the better off you are, so DJI added the Russian navigational system, GLONASS, which lets it tap into more satellites than GPS alone.

Satellite acquisition speeds are noticeably faster compared to the Phantom 2 Vision+, so you can lock on and start flying more quickly. Also, with the Vision+ there were times I would struggle to get a solid lock on six satellites (the minimum for GPS-assisted flight). The Advanced never had a problem grabbing onto 10 satellites or more in a matter of seconds and regularly had upward of 15 in my testing. This makes a huge difference when it comes to putting the drone in the exact position you want for photos and video.

Joshua Goldman/CNET

The controller and DJI Go mobile app (formerly called Pilot) are important, too, of course. The Advanced and its controller have DJI's Lightbridge technology for better image transmission between the sky and ground. Lightbridge allows for a continuous connection back and forth between the two and increases flight range over the wireless range extender used for the Phantom 2 and the entry-level Phantom 3 Standard. This does mean you'll need your iOS or Android device's charging cable to use it, but the performance improvement is well worth it.

On each of the top corners you'll find discrete camera controls for starting and stopping recordings, taking pictures, reviewing your shots and two wheels, one for adjusting exposure compensation, ISO and shutter speed and the other for the gimbal's tilt. Two customizable buttons are on the bottom as well that can be used for a handful of gimbal or camera functions. Overall it's a great setup, but more than a few times I accidentally switched to playback mode while trying to snap a photo.

DJI also included a Return-to-Home button for those times when panic starts to set in and you just want to bring it on back. The controller's battery is built in and will last through several flights before you'll need to recharge it. DJI simplified charging, too, using one power supply with two cables attached: one for the controller's battery and one for the drone's.

Andrew Hoyle/CNET

Connecting your iOS or Android smartphone or tablet is as simple as plugging in your device's charging cable into the USB port on the Advanced's controller. (It'll keep your device charged while you use it for flying, too.) Then, with the controller and drone turned on, you just open the DJI Go app and tap to get the camera view.

The controller's device mount can handle phones and tablets big and small, however the app is optimized for use with the iPhone 5S, 6 and 6 Plus. Android device support is thin, with just the Samsung Galaxy S5 and Note 3, Sony Xperia Z3, Google Nexus 7 II, Google Nexus 9, Xiaomi Mi 3 and ZTE Nubia Z7 Mini listed. I tested with both a 6 Plus and a Galaxy S5 and the app performance was clearly stronger on the iOS device with the S5 occasionally freezing up forcing me midflight to restart the app.

In addition to a first-person view from the camera, you get complete camera controls, meters for signal strengths, GPS and battery life and access to settings for the whole system. It will also notify you if a firmware update is necessary (which occur with some regularity) and, eventually, you'll be able to do the updates through the app; currently they're done by downloading a file to a microSD card and popping the card into the drone's camera.

The app can also be used for automated take-offs and landings, if you don't want to handle them with stick commands, and triggering the Return-to-Home safety function. Another new safety feature of sorts is the Beginner Mode. This sets up virtual barriers called a geofence with a maximum altitude and flight distance of 30 meters (98 feet), giving you a safe way to limit where the drone can travel. It's pretty amazing to see in action as you send the Phantom full throttle toward its limit and the drone stops as if it's been snagged in an invisible net.

As for the camera settings, video recording options include full HD (1,920x1,080-pixel) and HD (1,280x720-pixel) resolutions at 24, 25, 30, 48, 50, 60 frames per second and you can choose between MOV or MP4 formats. Thanks to the Lightbridge technology, you can even use it to live-stream video straight to YouTube and uses your mobile device's mic for capturing audio.

Joshua Goldman/CNET

For photos, you can capture in JPEG, DNG raw format or both simultaneously. Shooting modes include single shots or bursts of three, five or seven; HDR and auto exposure bracketing (0.7EV bias) of three or five pictures; and time-lapse continuous shooting at 5-, 7-, 10-, 20- and 30-second intervals. You can also control ISO, exposure compensation and white balance.

At the time of this review the Phantom 3 Advanced (and Professional) didn't have DJI's Intelligent Flight features including waypoint navigation, point of interest (POI) flight planning or Follow Me function, but these are now available.

Waypoint navigation lets you set up a multipoint path for the drone to follow while you control the camera, while POI flight planning allows you to autonomously fly a circle around a subject, keeping it centered. Follow Me sets the drone to track your movement based on your orientation. Support for SDK apps already created by third-party DJI developers is available as well, giving the Advanced more features and future potential.

Joshua Goldman/CNET

Flying

If you're reading this review, you probably already know that DJI's Phantom quadcopters have a reputation of being extremely easy to fly (and fly away, but it's something I've never experienced). With the Phantom 3 the experience has only improved.

DJI has added a flight simulator to the mobile app (iOS only) that you can use to learn your way around the app and controls. I found it to be a little frustrating because the actual drone performs so much better in real life. Regardless of safety features and how stable the Phantom 3 is, I highly recommend taking your first flights out in an open area where there are no people or distractions.

Again, if you don't want to use stick commands, you can takeoff and land with a tap and a swipe on your screen. With GPS, the drone will just sit and hover wherever you leave it. Start flying a bit too close to a tree and you can just let go of the sticks and it will stop while you regroup and steer away. You can fly without GPS, but if you release the sticks the Phantom won't stop but instead continues to drift in the direction it was last headed. It's a gut-wrenching experience watching $1,000 float away seemingly uncontrollably, so it's best to fly with GPS until you fully understand the controls.

Joshua Goldman/CNET

The app is well laid out and at a glance you can see all the information you need. There's even a battery timeline meter giving you estimates on everything from remaining flight time to the power required to return home or land.

Speaking of battery life, DJI says you'll be able to get up to 23 minutes of flight time. I was able to get to just under 21 minutes of flying -- nothing too aggressive, mostly hovering in place and in light wind -- before it took over and landed itself. That flight time is very good when you factor in all that it's doing to stay in the air while recording video. It does feel short, though, especially if you're trying to get out some distance for a picture and still make it back. And extras are pricey at around $149, £125 or AU$205 each.

Video and photo quality

Closely examining the 4K video of the Phantom 3 Professional or DJI's higher-end Inspire 1 straight from the camera against the 1080p clips from the Advanced, there are noticeable differences, mainly in the level of fine detail and sharpness of subjects. There is better detail from the 4K and it's especially visible if you're viewing on a large TV or monitor. So, if it's necessary for you to capture the highest quality video without ponying up a ton more cash, the Phantom 3 Professional is the better choice.

Frankly, though, the full-HD clips from the Advanced look pretty great as do its photos, and they're more than suitable for sharing online and/or viewing on a phone, tablet or laptop. It's also a huge jump in quality from the Phantom 2 Vision+. For those considering an upgrade from that model to the Professional, your needs might be met with the less expensive Advanced.

Joshua Goldman/CNET

The live-streaming quality to YouTube is just OK. You have to have a pretty strong wireless connection to keep the video moving smoothly and even then the results were a bit glitchy and compressed. Still, it's sort of amazing it can do it at all and could be helpful for professional uses.

Lastly, whenever you record a video, a compressed 720p version is stored to your mobile device. To help make the most of these clips, DJI built in a basic video editor to the Go app. You can use it to cut up your clips, gather them up and then combine them into one movie. DJI also included some style templates with music you can apply before you save. Then you can just share away.

Joshua Goldman/CNET

Conclusion

The DJI Phantom 3 Advanced is a great little aerial photo and video machine, however it's the whole system -- the drone, the controller and the app -- that make it so easy to pick up and just start flying. It's not inexpensive, but compared with the $900 Parrot Bebop with its Skycontroller , you won't regret spending the extra money. And if you don't need the Professional's 4K video, you can put your money toward a spare battery or two so the good times don't come to an end after 20 minutes.


Source

Search This Blog

Menu Halaman Statis

close