Step into a world where the focus is keenly set on How To Make Slime. Within the confines of this article, a tapestry of references to How To Make Slime awaits your exploration. If your pursuit involves unraveling the depths of How To Make Slime, you've arrived at the perfect destination.
Our narrative unfolds with a wealth of insights surrounding How To Make Slime. This is not just a standard article; it's a curated journey into the facets and intricacies of How To Make Slime. Whether you're thirsting for comprehensive knowledge or just a glimpse into the universe of How To Make Slime, this promises to be an enriching experience.
The spotlight is firmly on How To Make Slime, and as you navigate through the text on these digital pages, you'll discover an extensive array of information centered around How To Make Slime. This is more than mere information; it's an invitation to immerse yourself in the enthralling world of How To Make Slime.
So, if you're eager to satisfy your curiosity about How To Make Slime, your journey commences here. Let's embark together on a captivating odyssey through the myriad dimensions of How To Make Slime.
How to Change Your Windows 11 Wallpaper in 5 Easy Steps
How to Change Your Windows 11 Wallpaper in 5 Easy Steps
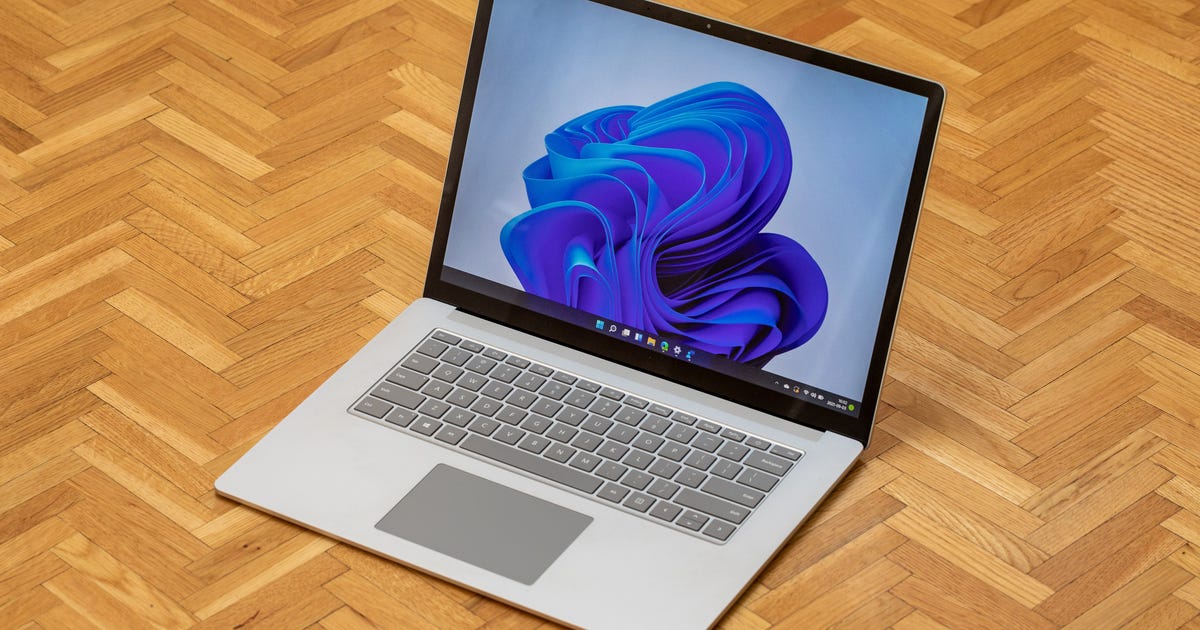
Microsoft's Windows 11 operating system came with a ton of new features like Android apps on your Windows PC, natively supporting Microsoft Teams and a cleaner, more Mac-like design. But Windows 11 also gives you options for new wallpaper.
If you're not a fan of Microsoft's new default wallpaper -- a blooming, abstract flower shape that pays homage to Windows 10's royal blue colors -- you can change it up. Windows 11 has other default images, or you can change your wallpaper to a photo you've saved or uploaded to your PC.
Read more:Windows 11 is Familiar but Fresh
We'll show you how to switch your wallpaper to a background you're fond of with just a few steps. You can also create virtual desktops and a breakdown of our favorite features. This story was recently updated.
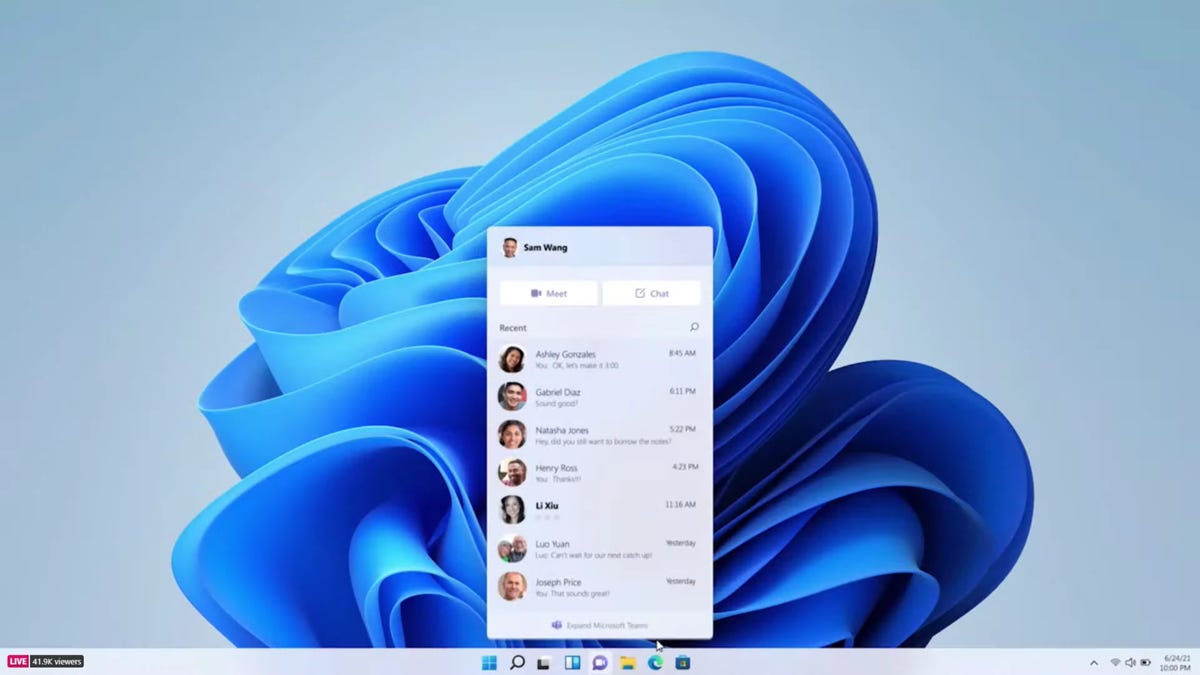
The default Windows 11 wallpaper features an abstract blue swirl design.
Microsoft/Screenshot by Sarah Tew/CNET
Once you have access to Windows 11, here's how to change your wallpaper:
1. Click the on-screen Windows button or press the Windows button on your keyboard.
2. Click Settings.
3. Go to Personalization.
4. Choose Background.
5. Select an already available image or click Browse to search for an image you've saved to your PC.
Changes to the default wallpaper only scratch the surface of the design and feature changes found on the Windows 11 desktop. For example, you'll also find ways to customize your Windows 11 desktop with widgets, virtual desktops and Snap Group layouts.
For more, check out the big changes between Windows 10 and Windows 11 and where you can find the new Start menu.
How to see memories in snapchat how to use snapchat how to use snapchat on pc how to use vlookup how to use index match how to take a screenshot how to make slime how to print screen how to delete a page in word
How to use Snapchat Memories
How to use Snapchat Memories
Snapchat wants you to hold on to your photos and videos for a little while longer.
The new Memories feature is a searchable and shareable archive of snaps that you can access within the app. Memories backs up snaps to Snapchat's servers and automatically pulls together saved snaps into categories based on location. But you can also search on a keyword, such as food.
How do I get Memories?
Snapchat's new Memories feature has tabs along the top to divide up snaps and stories.
Screenshot by Lexy Savvides/CNET
The first step is to update the Snapchat app for iOS or Android. The Memories feature is rolling out progressively to users over the next month. When the new feature is available for your account, you'll receive a snap from Team Snapchat.
Snapchat's main camera interface now has an extra icon underneath the camera button. Swipe it up to access Memories.
Memories has a series of tabs that let you switch between viewing snaps, stories and the contents of your camera roll.
Making Memories
To make a new memory, create a snap as usual with all the filters and stickers you desire. Then, tap the Save icon like you normally would to download the snap to your camera roll or gallery. Rather than saving to the roll, however, the snap will save to the Memories section.
To create a story from snaps within the Memories section, press and hold on an individual snap, then tap "My Snap" at the top of the screen. From here, tap "Create story from this snap" and select any additional snaps you want to include. Now you can save or send this snap to friends or to the My Story section as you would normally.
Note that if you post a snap to a story that was taken earlier than the past 24 hours, it will have a frame around it with the timestamp.
If you want to import snaps from your camera roll or gallery, go to Snapchat's settings and find Memories. Select "Import Snaps from Camera Roll."
Note that this will only surface actual Snapchats you have previously saved to your phone -- not photos taken with the regular camera app.
For My Eyes Only
Don't want those eggplant photos visible in your Memories section when you pass your phone around? Add them to a section called My Eyes Only.
Press and hold on the snap, tap My Snap, and select "Move to My Eyes Only." Snapchat will prompt you for a passcode or passphrase. Once you've set this up, a new tab will appear within Memories that contains these less-than-salubrious snaps for your private viewing pleasure.
So what's backed up?
Any snap you save in your Memories section is saved to Snapchat's servers, so if you log in on another device these snaps are available.
It's important to note that even though you have access to your camera roll or gallery within Memories, these photos and videos are not being backed up on Snapchat's servers.
What if I don't want to use Memories?
Within the Snapchat settings, navigate to the Memories section and find the Saving section. Tap "Save To..." and select "Camera Roll Only." This section also lets you automatically save stories to Memories or set to My Eyes Only by default.
Buy latest iphone buy latest trelegy inhalers buy latest lehenga online how to buy theta coin how to buy the best mattress how to buy bitcoin how to buy stocks in canada how to buy robux how to buy bitcoin canada how to draw how to clear cache how to make slime
How to buy the latest Amazon devices: The $1,000 Astro, Ring's flying drone camera, more
How to buy the latest Amazon devices: The $1,000 Astro, Ring's flying drone camera, more
Amazon's latest device lineup is a mix of new learning devices for kids, smart home upgrades and everyday tech. The Echo Show 15 has a screen that's bigger than ever (you can mount it on your wall) and the Ring Always Home flying drone camera gives a new take on home security cameras. But the showstopper that took our breath away was the all: Amazon's $1,000 Alexa-powered Astro robot.
Amazon's Astro takes a new spin (on wheels) in Alexa voice commands and hoping to show really need robots in our homes. Astro can monitor your Ring home security system, deliver items from one room to the next and video chat -- all while your pets. But there are already a few privacy concerns. Questions also stem from criticism of Ring's policies and police partnership and privacy issues. But there's already talk that Amazon is looking into an Astro 2, despite these raised eyebrows.
We'll tell you how and when to get your hands on Amazon's new devices and give details on the latest futuristic features. This story has been recently updated.
Amazon/Screenshot by James Martin/CNET
Astro brings AI to your home, but puts bots to the test. Amazon's new robot is designed to follow voice commands and keep an eye on your home with its periscope camera. Astro can show a live view via the mobile app, so you can check on your home when you're away. Astro works with Alexa Together and Ring Protect Pro (and comes with a six-month free trial of the latter). Anticipating privacy criticism, Amazon offers privacy features with Astro that include:
No-go zones
Do not disturb features
Alexa's standard privacy features
You can sign up to request an invite today. Astro will ship later this year.
Read more: Amazon's Astro: New details on price, privacy, battery, specs and more
Amazon/Screenshot by James Martin/CNET
Amazon partnered with the Honeywell Home thermostat team to create an Energy Star-certified smart thermostat that competes with Nest. Most customers may be able to get the thermostat for free after utility rebates. It's an Alexa-enabled thermostat that supports routines and automatically adjusts temperatures. It's available for preorder now and will ship starting Nov. 4.
Here are a few of the top features you can look forward to:
Control your thermostat using the Alexa app or voice commands
An energy dashboard to breakdown your usage on your Echo device or the Alexa app
Thermostat Hunches, which automatically adjusts the temperature
Amazon/Screenshot by James Martin/CNET
Amazon's new Echo Show is bigger than ever. It comes with a 15.6-inch display and in a single color: black. You can mount it on the wall or place it on a stand. The newest model also has facial recognition for personalized alerts and more when the hub recognizes your face, tightening the competition with Apple. It also comes with personalized to-do lists, like Google's Hub Max. But the Echo Show 15 comes with a few highly anticipated features.
Custom sounds that allow Alexa to listen to specific noises in your home (available in 2022)
Visual ID to give you more customized calendars and reminders
Customizable Alexa widgets
Echo will also get a few new features, including Hey Disney to give your device new voices with character-inspired games, books, skills and more. Alexa Together will also be available for loved ones with the Alexa Care Hub. You can sign up to receive an email when the Echo Show 15 is available for preorder.
Amazon/Screenshot by James Martin/CNET
The Amazon Glow is a brand-new kid-friendly smart device (yes, it's different from the Echo Glow night light). It takes after Osmo and other interactive learning gadgets. Kids can use the video screen to chat with long-distance family and friends. It includes a silicone mat to read, play and draw with loved ones. You'll also get a one-year subscription to Amazon Kids Plus for access to digital books, games and more. The Amazon Glow comes with a two-year, worry-free guarantee if you happen to break it. You can request an invite to the Glow program today.
Games and activities from Mattel, Disney, Nickelodeon and Sesame Street
Preapproved contacts using the Amazon Glow app
Camera with privacy shutter
Amazon/Screenshot by James Martin/CNET
The Halo View is a new addition to Amazon's Halo family. The latest Amazon fitness tracker has a few new features, including an AMOLED color display screen. Halo View users can also look forward to Halo Fitness and Nutrition services that will help with exercise and healthy eating. It benefits the Halo user in several ways, including the movement, emotional tone and the camera's body analyses. And it still works with the original Halo band. But these new additions might be worth upgrading from Amazon's Halo.
How to process and edit in iphone 12 decision in process after with editor process editor process editor visual studio how to process and edit in iphone 12 how to process emotions and feelings android process media has stopped how to fix elderberry how to harvest and process how to write a process and procedure document how to process grief how to process emotions how to process trauma how to process food in genshin impact how to process a chicken how to get on dark web how to screenshot on windows 10 how to make slime how to print screen
How to process and edit raw files from your camera
How to process and edit raw files from your camera
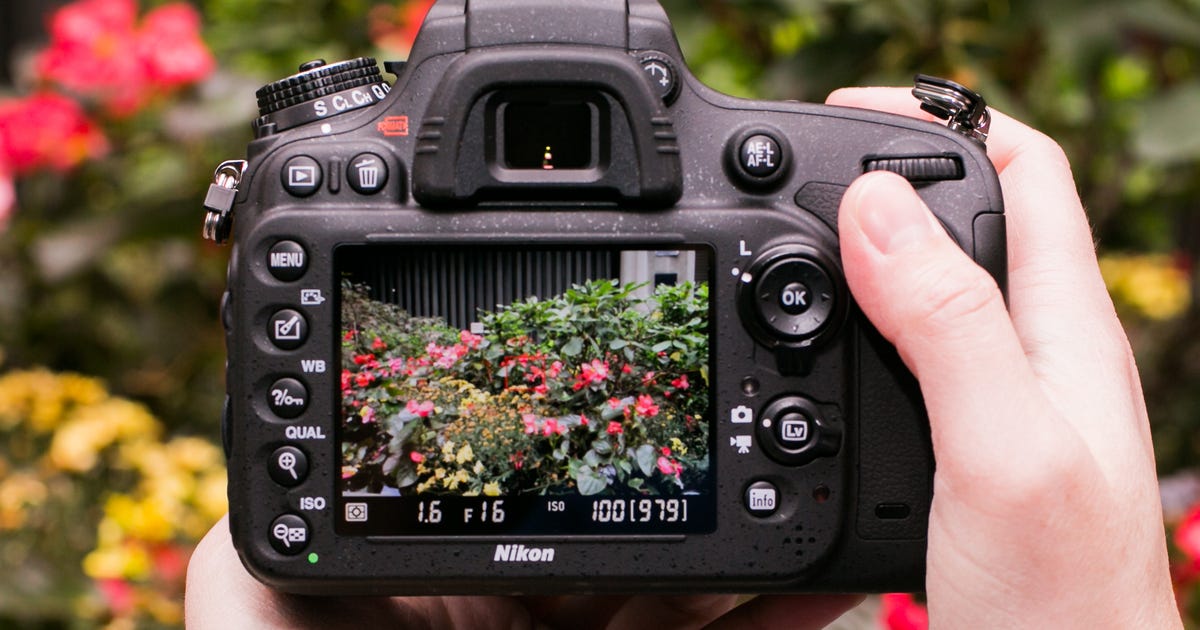
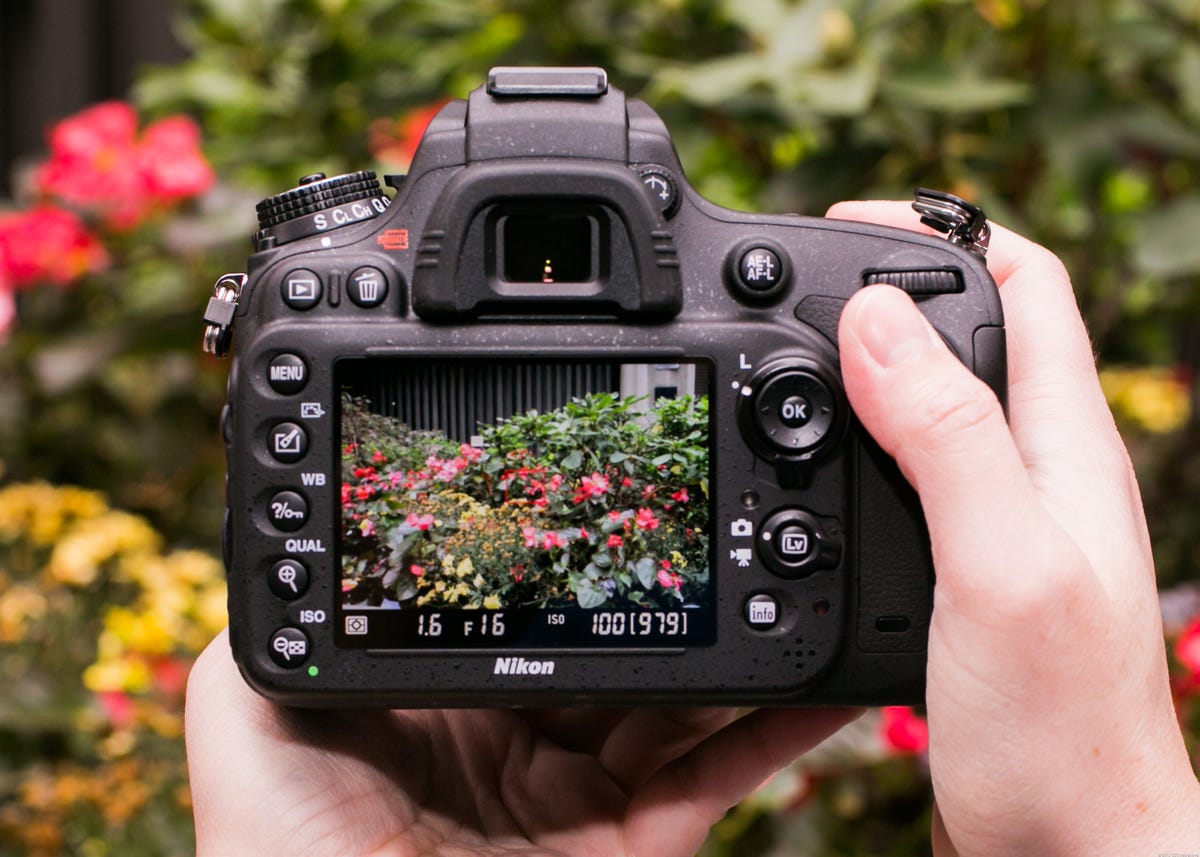
Shooting in raw is one of the best ways to have total control over your images in post-processing.
A raw file is the image as seen by the camera's sensor. Think of it like unprocessed film. Rather than letting the camera process the image for you, turning it into a JPEG image, shooting in raw allows you to process the image to your liking.
Applying adjustments to a raw image is a non-destructive method of editing your photos, unlike editing a JPEG.
Want the best of both worlds? Some digital cameras will let you shoot in raw + JPEG mode, capturing the raw image while simultaneously processing a JPEG image for easy use.
What you need
A digital SLR or camera that can shoot raw
Image processing software such as Adobe Lightroom, Photoshop or the software that came with your camera
Remember that not all raw files are created equal, as different manufacturers will more than likely use their own proprietary file formats. For example, Nikon uses the .NEF extension, Canon uses .CR2 and Sony uses .ARW. Pentax generally uses the more open DNG format.
If you don't have access to raw editing software, there are also a few web-based tools that can help, such as WebRaw and Pics.io.
For this tutorial we will be using Adobe Camera Raw and Photoshop CC, but the principles should be very similar for whichever editing program you use.
Basic adjustments
When you open up the raw image in Photoshop, Adobe Camera Raw will automatically start. The window will look something like this:
Screenshot by Lexy Savvides/CNET
From here, you can adjust values such as the exposure and temperature. Move the exposure slider to simulate the effect of adjusting your exposure in-camera. The results will be automatically reflected in the image.
Notice that as you adjust most of these settings, the histogram will also change.
Recovering detail
One of the most important reasons for shooting in raw is to be able to recover image detail in case something goes wrong. Blown out your exposure so there are white patches of highlights everywhere? You probably will be able to bring some of this detail back thanks to the raw file.
In the example below, you can see from the histogram that there are clipped highlights in the sky. If you need help reading your histogram, this article explains more.
Screenshot by Lexy Savvides/CNET
The highlights slider is the key here; moving it further to the left will bring back detail that was lost from the blown out highlights. Extra image detail can be recovered by adjusting the exposure slider as well.
The same process can be used to bring back shadow detail in underexposed areas.
This image has a lot of detail in the underexposed shadow areas that can be brought back with a bit of tweaking. Lexy Savvides/CNET
To recover shadow detail, use the same technique as for recovering highlights. Simply move the slider until you see detail appearing again.
Screenshot by Lexy Savvides/CNET
White balance
Rather than setting a white balance value in the camera, when you shoot raw you can use any white balance setting and then adjust it in post-processing. From the Camera Raw interface, choose an option from the drop-down menu that best suits your needs.
There is another tool available in Camera Raw that provides white balance adjustment -- the white balance dropper. At the top of the window, simply select the white balance tool, and click on the part of the image that should be white. Then, Camera Raw will automatically adjust the colour temperature to make that component a true white. This is exactly the same as taking a manual white balance reading in-camera.
Making images pop
The examples above have mostly been working with images with quite obvious faults. Sometimes, there may be nothing wrong with your image at all but it looks a bit dull. Here is how to make an image pop with a few simple tweaks to the raw file.
Below is an image taken on the camera's metered exposure. It looks OK, but could use a bit of work to make it look even better.
Screenshot by Lexy Savvides/CNET
First, let's brighten things up a bit by increasing the exposure. I have also brought up the contrast a bit.
Screenshot by Lexy Savvides/CNET
The image still looks a bit cool, so I'm going to change the white balance option to warm things up a bit. For outdoor situations, the cloudy white balance preset adds a more warmth to the scene. You could also achieve a similar effect by moving the temperature adjustment slider. I have also taken this opportunity to pull up the white value, and recover some of the lost highlights in the wall by bringing down the highlight slider.
Finally, to really make things look defined, boost the clarity slider a little bit to the right. The clarity tool looks for edges and defines midtone contrast. Use it sparingly for the best results.
Screenshot by Lexy Savvides/CNET
Here is a comparison of the before and after image to give you an idea of how you can make an image pop using raw adjustments:
Lexy Savvides/CNET
Once you have applied some basic adjustments, click Open Image to enter into Photoshop and continue editing as you need.
This is a basic walkthrough of editing raw images -- stay tuned for a more in-depth look at raw adjustments soon.