DJI Phantom 3

Windows 11 Iso

Embark on a Quest with Windows 11 Iso

Step into a world where the focus is keenly set on Windows 11 Iso. Within the confines of this article, a tapestry of references to Windows 11 Iso awaits your exploration. If your pursuit involves unraveling the depths of Windows 11 Iso, you've arrived at the perfect destination.

Our narrative unfolds with a wealth of insights surrounding Windows 11 Iso. This is not just a standard article; it's a curated journey into the facets and intricacies of Windows 11 Iso. Whether you're thirsting for comprehensive knowledge or just a glimpse into the universe of Windows 11 Iso, this promises to be an enriching experience.

The spotlight is firmly on Windows 11 Iso, and as you navigate through the text on these digital pages, you'll discover an extensive array of information centered around Windows 11 Iso. This is more than mere information; it's an invitation to immerse yourself in the enthralling world of Windows 11 Iso.

So, if you're eager to satisfy your curiosity about Windows 11 Iso, your journey commences here. Let's embark together on a captivating odyssey through the myriad dimensions of Windows 11 Iso.

Showing posts sorted by relevance for query Windows 11 Iso. Sort by date Show all posts

Download The Latest Windows ISO: How To Create A Windows 11 Install USB Drive


Create windows install iso create iso software free download latest windows 7 iso download latest windows iso file download latest windows 11 iso download the latest windows update download the latest version of google chrome
Download the latest Windows ISO: How to create a Windows 11 install USB drive


Download the latest Windows ISO: How to create a Windows 11 install USB drive

Windows 11  will start rolling out to eligible devices today, but not everyone will get it right away. The free update brings plenty of new features, complete with a new start menu, widgets and a refreshed interface. Even the Microsoft Store is getting a big update (though don't expect to see Android apps right away).

Launches are bound to run into issues and bugs. Sometimes, those issues may force you to reinstall Windows 11. An easy way of doing that is by using a USB installation drive that has a copy of Windows 11 on it. With the update safely stored on a flash drive, you can reinstall it at any time, should any issues get bad enough that your only option is to reinstall the update. 

You can also use a USB drive to make it easier to install Windows 11 on multiple computers, or to quickly set up a virtual machine to make testing possible without risking your personal data. 

Microsoft has updated its Media Creation Tool to include Windows 11. You can download the ISO image straight from the source and flash to a USB drive yourself. 

To create a Windows 11 installation drive, you'll need an empty 8GB USB drive, a Windows PC and up to a few hours of your time. You can download the system image using a Linux computer or Mac, but we're going to focus on using a PC for this guide. Below are the steps you'll need to follow.

Download the latest Windows 11 ISO from Microsoft

To download the Windows 11 ISO image you'll need to create a USB bootable drive. First, visit the Download Windows 11 page. You'll see a few other options for installation, but you're looking for Download Windows 11 Disk Image (ISO).

Scroll down the page until you see a dropdown labeled Select Download. Click the dropdown and then select Windows 11, then click Download. Next you'll be asked to select a language, then click Confirm again, followed by clicking on the 64-bit Download button to finally begin downloading the ISO. It's a fairly large file at 5.1GB, so depending on your internet connection, it may take some time for the download to finish. 

Once the download finishes, your work isn't completely done. You need to burn that ISO image onto a USB drive. And to do that, you'll need some extra software. Don't worry, though, it's an easy process. 

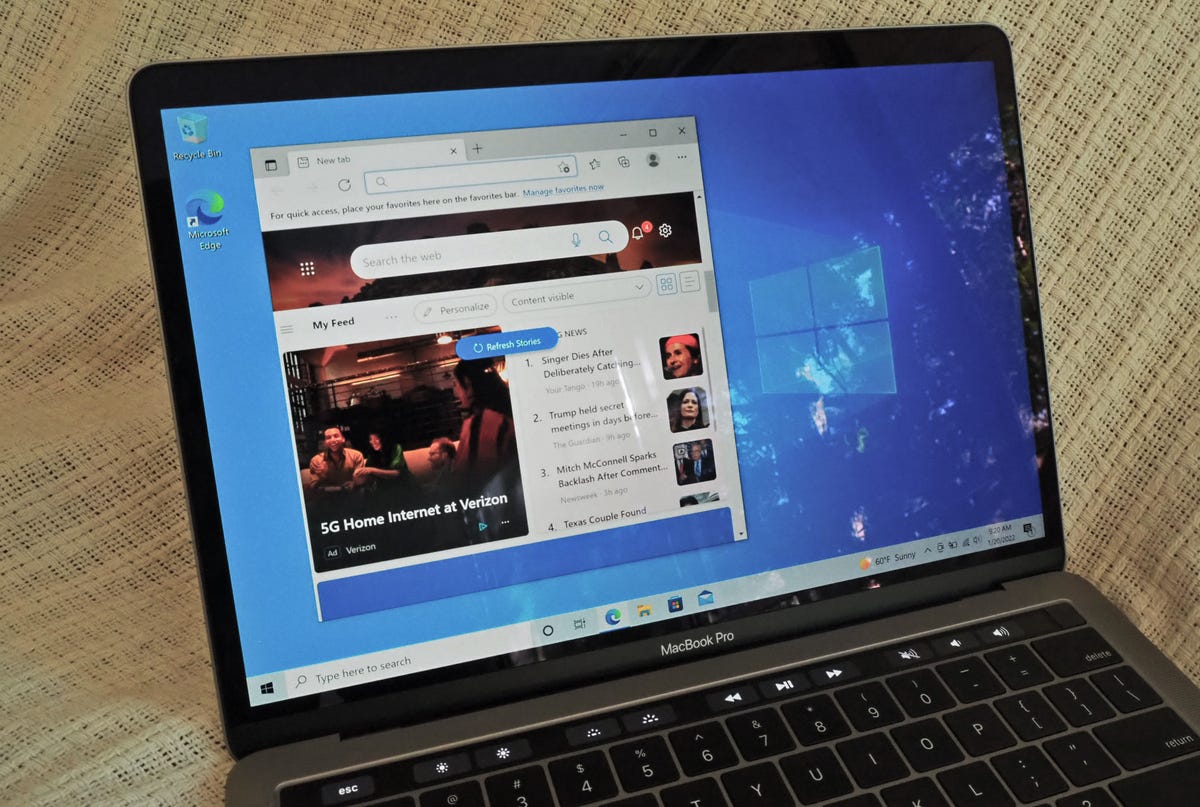
With the ISO finished, this is how Rufus should look before you flash Windows 11 to your USB drive. 

Screenshot by Jason Cipriani/CNET

How to flash Windows 11 to your USB drive

To turn a standard USB drive into an installation drive, you'll need to use a program called Rufus. It's the same app that Microsoft itself uses in its guide for creating a Windows 10 bootable drive. Visit the company's website to download and install Rufus, which should only take a few seconds. It's a small program. 

Plug in your USB drive and open Rufus. Select your USB drive using the Device dropdown. Remember, anything on your thumb drive will be erased during this process -- so make sure it's empty or you have everything you need off of it. 

Under Boot Selection select Disk or ISO image and then click on the text that reads SELECT and pick the ISO file you created in the previous step. 

There's a section in Rufus labeled Image option with several different settings -- leave everything as the default. The same can be said for format options unless you want to change the name of the USB drive to something like "Windows 11 install" or along those lines. 

Click Start when you're sure all of the options are set. You'll again have to wait while the program does its job, but it should be a much quicker process than downloading and creating the ISO. It took just over 15 minutes on a Surface Pro X for me. 

Windows 11 update on a laptop

You can now install Windows 11 with ease. 

Sarah Tew/CNET

What to do with a Windows 11 installation drive

Once Rufus finishes, you can remove the USB drive from your PC and either keep it somewhere safe in case you need to reinstall Windows 11 on your PC, or you can plug it into another PC and use it to install Windows 11 by opening the drive and double-clicking the setup.exe file. A few seconds later, a Windows 11 installation screen will appear, walking you through the rest of the process. 

Alternatively, you can try and use the USB drive as a bootable installation drive. However, this is where things get even more complicated, due to Windows 11 requiring Secure Boot, and the USB drive we just created not being compatible with that feature. I suggest waiting for Microsoft to release an official tool, but if you insist, I found a guide that walks you through the extra steps of making a bootable USB drive that's compatible with secure boot on Tom's Hardware, starting at step 11. 

Curious what all the fuss is about Windows 11? We have your back. There's a big interface redesign making its debut that includes a centered Start menu, but don't worry, you can move it back to the left corner if you want. And, finally, if you've ever had the desire to use Android apps on your PC, well, Microsoft is making that possible.


Source

https://recipesblogg.kian.my.id/

.

Windows 11 Has Arrived, But Here's Why Not Everyone Will Get The Upgrade Yet


Windows 11 has arrived, but here's why not everyone will get the upgrade yet


Windows 11 has arrived, but here's why not everyone will get the upgrade yet

Windows 11  started its wide rollout on Oct. 5 -- the first major upgrade in six years. Windows 11 is available as a free download for existing Windows 10 users, but it's not yet available for every compatible Windows device. And every major new feature promised isn't available right now. (Microsoft announced this in an August blog post). 

We've already tested and published a full review of Windows 11 (it's familiar but fresh, with a Mac-like design). You can expect a few new multitasking features, and the Start menu is in a new place. However, it will not include one of the most anticipated updates: support for Android mobile apps in its new app store. Microsoft also didn't offer a date for when Android apps would be available either, other than saying that it would roll out in a "preview" test "over the coming months," according to the post.

There's a lot to look forward to. But even if your device hasn't been prompted to update, you can still check to see if you meet the compatibility requirements. Heads up, (you'll need to be running Windows 10 first to do so -- here's how to download Windows 10 for free if you haven't yet). And just because you have a compatible Windows device doesn't mean you'll be able to run Windows 11 starting today. 

Microsoft said the launch will be "phased and measured," with new eligible devices getting the upgrade first and the rest getting offered the free upgrade sometime between October and mid-2022, depending on your hardware, age of device and other factors. You'll get a notification from Windows Update letting you know when Windows 11 is available to you, or you can check manually (here's more on how to download Windows 11 before your system asks you to). 

While you wait for Microsoft's new operating system to arrive, you can check to see if your computer will be able to automatically update to Windows 11 (you'll need to be running Windows 10 first to do so -- here's how to download Windows 10 for free if you haven't yet). But even if it isn't deemed compatible, there will be a way to manually download a version that is not supported by Microsoft. And here's how to set the default search engine, if you'd rather not use Bing.

You also don't have to upgrade to Windows 11 right away if you don't want to -- Microsoft will still support Windows 10 through October 2025. 

For more, check out the every big difference between Windows 10 and Windows 11 and what you'll need to do before you upgrade to Windows 11


Source

Tags:

Windows 10 On A Mac: Here's How To Set It Up For Free


Windows 10 on a mac here s how to set it to day in minecraft windows 10 on a mac here s how to set itunes windows 10 on a mac here s how to set alarm windows 10 on a mac here s your perfect jamie miller lyrics windows 10 on a mac here synonym windows 10 on a mac hereford how to install windows 10 on a mac download windows 10 on chromebook whatsapp download for windows 10
Windows 10 on a Mac: Here's How to Set It Up for Free


Windows 10 on a Mac: Here's How to Set It Up for Free

No matter how happy you are with your MacBook Pro, there's always something that Windows can offer that MacOS can't, whether it's exclusive software and video games or unique settings and features. And you might not know this, but if you only own an Apple computer, there's still a way to run Windows on it.

As long as you have an Intel-based Mac with enough storage and the correct Windows 10 ISO file -- which you can download for free from the official Windows website -- you can set up Windows 10 on your Apple computer in less than an hour. From then on, anytime you boot up your Mac, you can choose whether to run Windows 10 or MacOS. Here's how to do it.

Here's what you need before you start

To successfully run Windows 10 on your Mac computer, here's what you need to have:

  • An Intel-based Mac computer (if your computer is on this list, it's not supported).
  • 64GB or more free storage space on your startup disk.
  • A power connection (if you're on a laptop).

If you're unsure whether your computer is Intel-based, click on the Apple logo on the menu bar, and then go into About This Mac. If you see the words Processor, followed by the name of an Intel processor, like "2.6GHz 6-Core Intel Core i7," then you have an Intel-based Mac.

Before you start, though, it's wise to back up your disk with Time Machine before partitioning just in case something goes wrong.

1. Download the Windows 10 ISO File

Windows 11 isn't currently compatible with Boot Camp Assistant on MacOS. So, you'll need to download Windows 10 instead. You can download a free disc image, also known as an ISO file, of Windows 10 from the official Windows website.

1. On your Mac, go to this Windows software download page.

2. Click on Select Edition, and choose Windows 10 (multi-edition ISO).

3. Hit Confirm, and wait for your request to be verified.

4. Once that finishes, choose your language and click on Confirm.

5. Finally, click on 64-bit Download to download the Windows 10 ISO file.

screen-shot-2022-01-19-at-5-39-56-pm.png

Download the 64-bit Windows 10 ISO file from the Windows website (most modern computers have a 64-bit capable processor).

Nelson Aguilar/CNET

The Windows 10 ISO file is nearly 6GB, so depending on your internet connection and speed, it could take up to 30 minutes to finish downloading. After the ISO file is done, leave it in your downloads, and move on to the next step.

2. Run Boot Camp Assistant

The software you'll use to run Windows 10 on your Mac is Boot Camp Assistant, which comes factory-installed on your Mac. Boot Camp Assistant is made specifically for installing Windows operating systems on your computer, and fortunately the setup process is pretty straightforward.

1. Launch Boot Camp Assistant on your Mac, and click Continue.

2. Click on Choose a Windows 10 ISO file, and upload the Windows 10 ISO file you downloaded in the previous step.

3. Drag the bar to choose a size for your Windows partition disk (42GB is the minimum).

4. Click Install,and wait roughly 10 minutes for the partition to be created.

screen-shot-2022-01-19-at-6-01-42-pm.png

Upload the Windows 10 ISO file and choose the partition size.

Nelson Aguilar/CNET

Once the Windows partition is finished, your laptop will restart.

3. Install Windows on your Mac

Your computer will boot up, but instead of showing you the Apple logo you're accustomed to, you should instead see the blue Windows logo appear. Here's what you need to do next:

1. Go through the Windows setup.

2. Enter a product key if you have one. If not, you can continue without one.

Even without a product key, you'll be able to access Windows on your Mac, so don't worry. During the installation, you'll see window files copied, features and updates installed and more. This should take another 10 minutes.

4. Set up Windows on a Mac

Your Mac will restart. But this time you'll be asked to set up Windows, just as you would on a Windows computer. You can use Cortana and your voice to complete the setup, but you're also welcome to use your keyboard, mouse and trackpad.

1. Choose your language, keyboard layout, Wi-Fi and more to begin.

2. If you have a Windows account, log in with your credentials.

3. Windows will boot up on your Mac. You'll be asked to create a passcode and/or PIN to enter your computer. Do that to protect your account.

img-6130.jpg

This is the Windows lock screen that appears after your Mac restarts.

Nelson Aguilar/CNET

5. Install Boot Camp on Windows

Finally, the last thing you'll need to do is install and update Boot Camp on Windows. That will let you make any additional changes to your partition or fix any issues while you're running Windows. When you access Windows for the first time, you should receive a notification to install Boot Camp. This will take 10 minutes to install, but it's the last thing you need to do before you can use Windows without any issues.

6. Use Windows on your Mac

Feel free to use Windows how you want. Windows 10's default web browser is Microsoft Edge, but you can use it to download Chrome or anything else to surf the internet. You can then download files and install software you would only be able to install on a Windows-powered computer -- like Paint.NET and certain games from Steam -- but on your Mac.

img-6135.jpg

Windows 10 on a MacBook Pro.

Nelson Aguilar/CNET

7. Switch Between Windows and Mac

If you ever want to go back to MacOS from Windows, do the following:

1. Restart your computer.

2. As soon as the screen goes black, hold down the Option key for 5 seconds.

3. On the screen, you'll then have the option to boot up MacOS or Windows.

4. Choose the partition you want to open.

img-6120

Hold down the Option key when you reboot to choose a different partition.

Nelson Aguilar/CNET

Use this keyboard shortcut to switch between your disks as needed.


Source

https://klewern.costa.my.id/

.

Surface Pro 8 Vs. Surface Pro 7: Microsoft's Latest 2-in-1 Is Bigger, Better Than Before


Surface pro 8 vs surface pro 7 microsoft s latest 2 in 1 israeli surface pro 8 vs surface pro 7 microsoft s latest 2 in 1 is odd surface pro 8 vs surface pro 7 microsoft s latest 2 in 1 iso surface pro 8 vs surface pro 7 microsoft s latest 2023 surface pro 8 vs surface pro 7 microsoft s latest purchases microsoft surface pro 8 vs ipad pro surface pro 8 case surface pro 8 microsoft surface pro
Surface Pro 8 vs. Surface Pro 7: Microsoft's latest 2-in-1 is bigger, better than before


Surface Pro 8 vs. Surface Pro 7: Microsoft's latest 2-in-1 is bigger, better than before

Microsoft announced its latest premier two-in-one, the Surface Pro 8, at its Sept. 22 event and it's now available to buy starting at $1,100. The Surface Pro hadn't received a full update since October 2019, when the Pro 7 was introduced. That seems like eons ago -- and even then it didn't change much from the Surface Pro 6

Earlier this year, Microsoft did introduce the Surface Pro 7 Plus for Business. However, it has the same design as the Pro 7 but with 11th-gen Intel processors and Windows 10 Pro. There's also the 13-inch Surface Pro X that uses a custom Arm-based chipset from Microsoft instead of an Intel processor. With Windows 11 now available, though, this is a good time to update it inside and out, and that's what we got. 

While the Surface Pro 7 is no longer in the lineup, you'll still be able to buy one -- likely at a discount -- until retailers sell through their stock. Microsoft is keeping the Surface Pro 7 Plus around and will have a consumer version of it with Windows 11 Home for those who want a "classic Surface Pro." 

A larger, faster display

The Surface Pro 8 is essentially a mashup of the Pro 7 Plus and Pro X; it's the same-ish body of the 13-inch Pro X with the processors of the Pro 7 Plus. The Pro 8 is thicker and heavier than the Pro X but not by much. Since the Pro 7 and Pro 7 Plus are built around a 12.3-inch display, the 13-inch Pro 8 is larger than that model, too. 

Although the Surface Pro 8 display is the same size and resolution as the Pro X, the Surface Pro 8's screen has a refresh rate that goes up to 120Hz, which should make writing and drawing on the display a smoother experience (and gaming, too). When the extra speed isn't needed, it can drop to 60Hz to save battery life. 

Specs


Surface Pro 8 Surface Pro 7 Plus (2021) Surface Pro 7 (2019) iPad Pro (12.9-inch, 2021)
Price Starts at $1,100, £999, AU$1,649 Starts at $900, £909, AU$1,349 Starts at $650, £639, AU$1,149 Starts at $999, £199, AU$1,649
Optional keyboard $180, £160, AU$260 $129, £125, AU$200 $129, £125, AU$200 $329, £329, AU$549
Optional stylus $130, £120, AU$190 $99, £60, AU$140 $99, £60, AU$140 $119, £119, AU$199
Display 13-inch PixelSense display (120Hz), 2,880x1,920 (267 ppi) 12.3-inch PixelSense display, 2,736x1,824 resolution (267 ppi) 12.3-inch PixelSense display, 2,736x1,824 resolution (267 ppi) 12.9-inch Liquid Retina XDR True Tone with ProMotion display, 2,732x2,048 resolution (264 ppi)
Processor 11th-gen Intel Core i5, i7 11th-gen Intel Core i3, i5, i7 10th-gen Intel Core i3, i5, i7 M1
RAM 8GB / 16GB / 32GB 8GB / 16GB / 32GB 4GB / 8GB / 16GB 8GB / 16GB
Storage 128GB / 256GB / 512GB / 1TB 128GB / 256GB / 512GB / 1TB 128GB / 256GB / 512GB / 1TB 128GB / 256GB / 512GB / 1TB / 2TB
SIM card support for cellular model None Nano-SIM, eSIM None Nano-SIM; eSIM; 5G support (sub-6 GHz and mmWave)
Wireless 802.11ax (Wi-Fi 6), Bluetooth 5.1 802.11ax (Wi-Fi 6), Bluetooth 5.0 802.11ax (Wi-Fi 6), Bluetooth 5.0 802.11ax, Bluetooth 5.0
Ports USB-C (2; USB 4.0/Thunderbolt 4), Surface Connect, Surface Type Cover port, 3.5mm headphone jack USB-C, Surface Connect, Surface Type Cover port, MicroSDXC, USB-A, 3.5mm headphone jack USB-C, Surface Connect, Surface Type Cover port, MicroSDXC, USB-A, 3.5mm headphone jack USB-C with Thunderbolt 4/USB 4 support
Cameras Front: 5-megapixel with support for Windows Hello, rear: 10-megapixel Front: 5-megapixel with support for Windows Hello, rear: 8-megapixel Front: 5-megapixel with support for Windows Hello, rear: 8-megapixel Front: 12-megapixel TrueDepth; 1080p video, rear: 12-megapixel f/1.8 wide, 10-megapixel f/2.4 ultrawide
OS Windows 11 Home Windows 10 Pro or Windows 11 Pro Windows 10 Home iPadOS
Dimensions (HWD) 11.3 x 8.2 x 0.37 inches 11.5 x 7.9 x 0.33 inches 11.5 x 7.9 x 0.33 inches 11 x 8.5 x 0.25 inches
Weight 2 lb., 0.9 kg 1.7 lb., 0.77 kg 1.7 lb., 0.77 kg 1.5 lb., 0.68 kg
Battery life Up to 16 hours Up to 15 hours Up to 10.5 hours Up to 10 hours

Buh-bye, USB-A; hello, Thunderbolt 4

With the move to 11th-gen Intel processors, Microsoft added not one, but two Thunderbolt 4 USB-C ports. This makes it easier than ever to connect external displays directly to the Surface Pro, as well as giving you high-speed data transfers and more expansion options with a dock or hub. And even though Microsoft still uses its proprietary Surface Connector for the power adapter, you can charge the Pro 8 via the USB-C ports. 

Of course, with the addition of the USB-C ports, something had to go: There is no more good ol' USB-A port on the Surface Pro 8. Microsoft also did away with the microSD card slot for expanding storage. The two-in-one does offer a removable SSD option, though it is a short M.2 2230 drive. Still, it's an option down the road if you need more physical storage.

Read more:  Here's what the Surface Duo 2 needs to succeed . Plus, check out how the specs stack up between the Surface Duo 2 and Surface Duo, and some cool camera tricks the Surface Duo can do.

microsoft-surface-pro-8-03

The new Slim Pen 2 magnetically stores and charges at the top of the keyboard cover.

Richard Peterson/CNET

New keyboard, new pen; neither are included

As you might expect, the increased screen size of the Surface Pro 8 means the keyboard cover from the Pro 7 won't fit. If you're upgrading to the Pro 8, you'll need a new keyboard cover, too. Microsoft did develop a new one for the Pro 8 that has a spot at the top to hold and charge the new Surface Slim Pen 2

Like past Surface Pro models, the keyboard cover isn't included with the Surface Pro 8. Neither is the pen. They are not cheap. The keyboard alone is $180, the pen is $130 and bundled together they're $280. At least the kickstand is built into the body of the Pro 8 so you don't have to buy a separate cover for that function.

A lot more time to work, create and play

While the 11th-gen Intel Core processors will certainly boost performance over the Surface Pro 7's 10th-gen chips, it'll also give you much better battery life. True, it helps that the Surface Pro 8 also has a larger battery pack. But, according to Microsoft's numbers, the Pro 7 Plus, using the same size battery as the regular Pro 7, gets up to 15 hours of battery life compared to the Pro 7's 10.5 hours. The Pro 8 will run for up to 16 hours. 

Richard Peterson/CNET

The Surface Pro 8 has a larger, faster display, new processors to improve performance and extend battery life, Thunderbolt 4 for greater versatility and a new keyboard and pen. It is, however, still pricey, and the keyboard, which is pretty much a must-have, isn't included. Neither is its active pen. 

Read our Surface Pro 8 review.


Source

Search This Blog

Menu Halaman Statis

close