Step into a world where the focus is keenly set on Adobe Tool Photoshop. Within the confines of this article, a tapestry of references to Adobe Tool Photoshop awaits your exploration. If your pursuit involves unraveling the depths of Adobe Tool Photoshop, you've arrived at the perfect destination.
Our narrative unfolds with a wealth of insights surrounding Adobe Tool Photoshop. This is not just a standard article; it's a curated journey into the facets and intricacies of Adobe Tool Photoshop. Whether you're thirsting for comprehensive knowledge or just a glimpse into the universe of Adobe Tool Photoshop, this promises to be an enriching experience.
The spotlight is firmly on Adobe Tool Photoshop, and as you navigate through the text on these digital pages, you'll discover an extensive array of information centered around Adobe Tool Photoshop. This is more than mere information; it's an invitation to immerse yourself in the enthralling world of Adobe Tool Photoshop.
So, if you're eager to satisfy your curiosity about Adobe Tool Photoshop, your journey commences here. Let's embark together on a captivating odyssey through the myriad dimensions of Adobe Tool Photoshop.
Adobe Tool Makes it Easier to Post Videos to Instagram, Facebook, Twitter
Adobe Tool Makes it Easier to Post Videos to Instagram, Facebook, Twitter
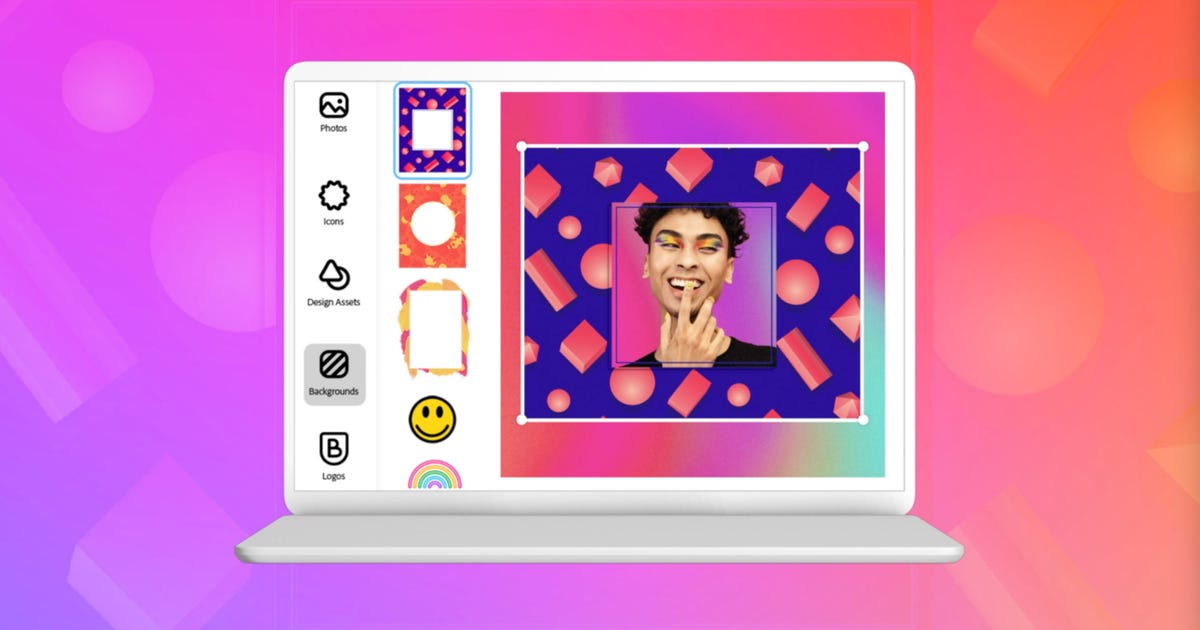
Adobe's Creative Cloud Express tool , originally geared for people who want to create punchy videos for social media, now is good for posting those videos, too.
A Tuesday update to Creative Cloud Express adds a feature called Content Scheduler that allows influencers, small businesses and others who want to post graphics and videos to Instagram, Twitter and Facebook in one single action. The tool, available only through the Creative Cloud Express web app for now, also lets you preview posts and schedule them to publish in the future.
The tool handles some of the more complicated aspects of social media publishing, such as character-count limits and autocompleting usernames. It's available as a free tool, but a $10 per month subscription adds more fonts, templates, online storage, editing tools and stock photos.
Adobe has profited handsomely from its shift from licensing individual versions of software packages such as Photoshop and Lightroom to its Creative Cloud subscriptions. Free versions of some of its tools, like Lightroom and Creative Cloud Express, can lure people into subscription plans.
Creative Cloud Express is geared for an era when publicity no longer means just buying advertisements, said Scott Belsky, Adobe's chief product officer for Creative Cloud.
"Marketing budgets are being shifted from print and traditional TV into social media quickly," Belsky said.
Photoshop and lightroom super resolution how to quadruple click photoshop and lightroom super resolution how to quadruple crochet photoshop and lightroom super resolution howell photoshop and lightroom super resolution video photoshop and lightroom super resolution gan photoshop and lightroom super resolution ultrasound photoshop and lightroom plan photoshop and lightroom tutorials photoshop and editing free download arabic in adobe photoshop and games photoshop and lightroom
Photoshop and Lightroom Super Resolution: How to quadruple your photo size
Photoshop and Lightroom Super Resolution: How to quadruple your photo size
Adobe's Super Resolution feature in Lightroom and Photoshop is remarkable technology that uses artificial intelligence to quadruple the size of your photos. It's not perfect, but it's a great way to breathe new life into older shots and to print photos larger with twice the number of pixels in both width and height. Here's what it is and how to use it.
To build the Super Resolution feature, Adobe trained its Sensei artificial intelligence technology on millions of real photos. It compared originals with quarter-size versions so the system could learn the best way to blow them back up again. It applies that behavior to your own photos, making very well-informed guesses about how to increase their resolution.
Yes, Photoshop is fabricating pixels that weren't there in the first place, and no, it's not going to magically add detail the way Rick Deckard does with "enhance" commands in the sci-fi movie Blade Runner. Those caveats aside, I find it works well on many images, particularly when expanding edges, where it often does so without adding artifacts like mushiness or jaggy pixelization. Even faces -- the parts of images that we're often most concerned about -- come out well.
Super Resolution works through the Adobe Camera Raw tool in Photoshop. Adobe trained the feature to work on raw photos, the format that photo enthusiasts and pros prefer for editing flexibility and image quality. But Super Resolution can work on conventional images, like the JPEGs and HEICs your phone probably captures.
With that said, let's jump in. I'll explain first how to use Super Resolution on its own, then how to apply it to JPEGs, and finally how use it in Adobe's Lightroom software for editing and cataloging photos.
How to use Super Resolution in Photoshop's Adobe Camera Raw
Begin the Super Resolution process by opening a raw file. Photoshop will open raw files in the Adobe Camera Raw tool directly.
Next, right-click the photo and select the Enhance option. You can also use the keyboard shortcut Command-Shift-D on MacOS and Control-Shift-D on Windows.
Screenshot by Stephen Shankland/CNET
You'll see an Enhanced Preview dialog box with a couple of options to control the process. First, the Raw Details option Adobe added in 2019 improves how raw files are rendered. Below that, make sure you've checked the Super Resolution checkbox. To see the expected results, click and drag to pan around the preview image, or click on the magnifying glass icon to zoom out and then click again on the patch you want to scrutinize.
Screenshot by Stephen Shankland/CNET
Next, click the Enhance button and wait. Photoshop shows its estimate for how long the process will take -- several minutes in some cases -- but often it gets done faster in my testing, sometimes just a few seconds to turn 12 megapixel photos into 48 megapixels.
If you want to bypass the Enhanced Preview dialog box, hold down Option on MacOS or Alt on Windows as you click the Enhance option.
After that comes the fine tuning. I recommend zooming in closely to edit details like sharpness, texture and noise reduction using the sliders on the right edge of the tool.
Screenshot by Stephen Shankland/CNET
Last, click either the Done button, which will save the new version next to the original with "-Enhanced" added to its filename, or Open, which opens the image in Photoshop.
How to use Super Resolution on a JPEG
To apply Super Resolution to JPEG, HEIC or TIFF, you'll first have to change Photoshop's preferences to open those file formats in Adobe Camera Raw by default. Unfortunately, you can't just use the Filter menu's Camera Raw Filter menu command.
First, open Photoshop preferences, go to the File Handling section, then click Camera Raw Preferences. In the next dialog box that appears, click the File Handling section. Change the JPEG/HEIC dropdown to "Automatically open all supported" images, and do the same with TIFF images if you want that, too.
Screenshot by Stephen Shankland/CNET
Note that this will mean these images will open in Adobe Camera Raw even if you don't want to use Super Resolution and the rest of the Adobe Camera Raw editing options. Personally, I like them, since I do most of my photo editing in Lightroom -- a close relative to Adobe Camera Raw. But if you want Photoshop's regular behavior, you'll have to switch it off in Photoshop's preferences again.
DSLRs and mirrorless cameras from Sony, Nikon, Canon and other camera makers all have the option to shoot raw, but smartphones are getting better at it too, with Apple's ProRaw and Google's computational raw technology.
How to use Super Resolution from Adobe Lightroom
For a few months there, it was tough to use Super Resolution if you use Lightroom for cataloging and editing your photos. Happily, with the June 2021 Lightroom release, the feature is built in.
Using it is simple, but it's a step off the beaten track from your usual editing and catalog operations. Select the photo in Lightroom's Library mode, then choose "Enhance" from the Photo menu. You can also right-click on the image to get the option in a pop-up menu.
Screenshot by Stephen Shankland/CNET Screenshot by Stephen Shankland/CNET
After a moment to generate a preview, you'll see a dialog box that lets you pan around the preview, zoom and out, click to compare before-and-after previews, and check Lightroom's estimate for how long the job will take. Click "Enhance" when you're ready.
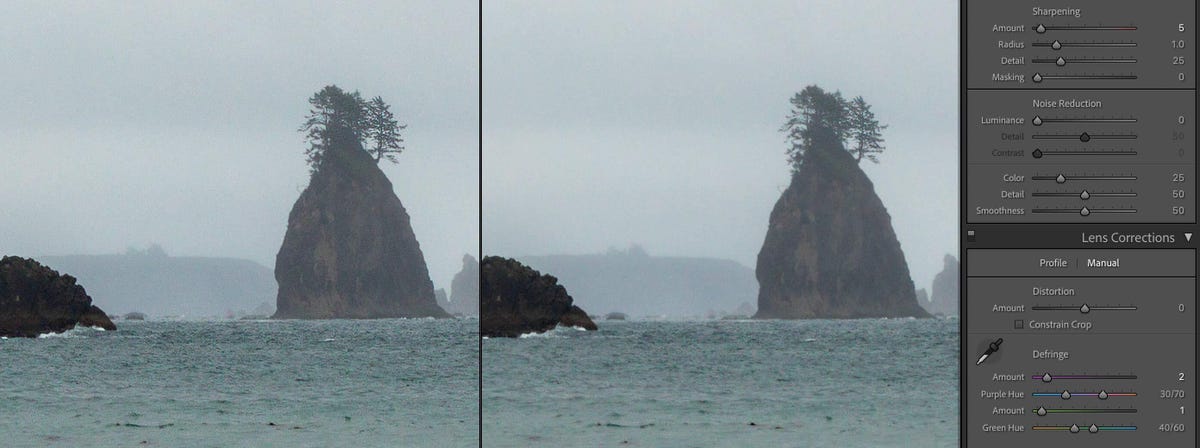
As with Photoshop, it's best to pixel peep to check your detailed edits zoomed in. You might want to turn down sharpness, particularly in areas like hair, where Super Resolution can make mistakes, or to crank up noise reduction. I've also found that manually adjusting purple and green fringing problems in the Lens Corrections panel can be useful to reduce color artifacts.
Screenshot by Stephen Shankland/CNET
Note that the keyboard shortcut for Enhance is different for Lightroom and Lightroom Classic, Adobe's two very different versions of Lightroom. For Lightroom Classic (which stores photos on your computer's storage system) it's Ctrl-Alt-I on Windows and Ctrl-Opt-I on MacOS. For Lightroom (which stores photos in the cloud and syncs them across your computer, phone and other devices) the shortcut is Ctrl-Alt-E on Windows Cmd-Opt-E on MacOS.
Also, in Lightroom Classic, you can skip the Enhance dialog box and just kick off a Super Resolution expansion with Shift-Ctrl-Alt-I on Windows and Shift-Ctrl-Option-I on MacOS. It'll apply the previous Enhance settings, so if you unchecked Super Resolution before, you'll have to reselect it through the dialog box first.
Super resolution in Lightroom can handle JPEGs as well as raw images, though it'll turn the JPEG into a DNG file. As with all DNG files, you'll have to export a JPEG for easy sharing.
How to process and edit in iphone 12 decision in process after with editor process editor process editor visual studio how to process and edit in iphone 12 how to process emotions and feelings android process media has stopped how to fix elderberry how to harvest and process how to write a process and procedure document how to process grief how to process emotions how to process trauma how to process food in genshin impact how to process a chicken how to get on dark web how to screenshot on windows 10 how to make slime how to print screen
How to process and edit raw files from your camera
How to process and edit raw files from your camera
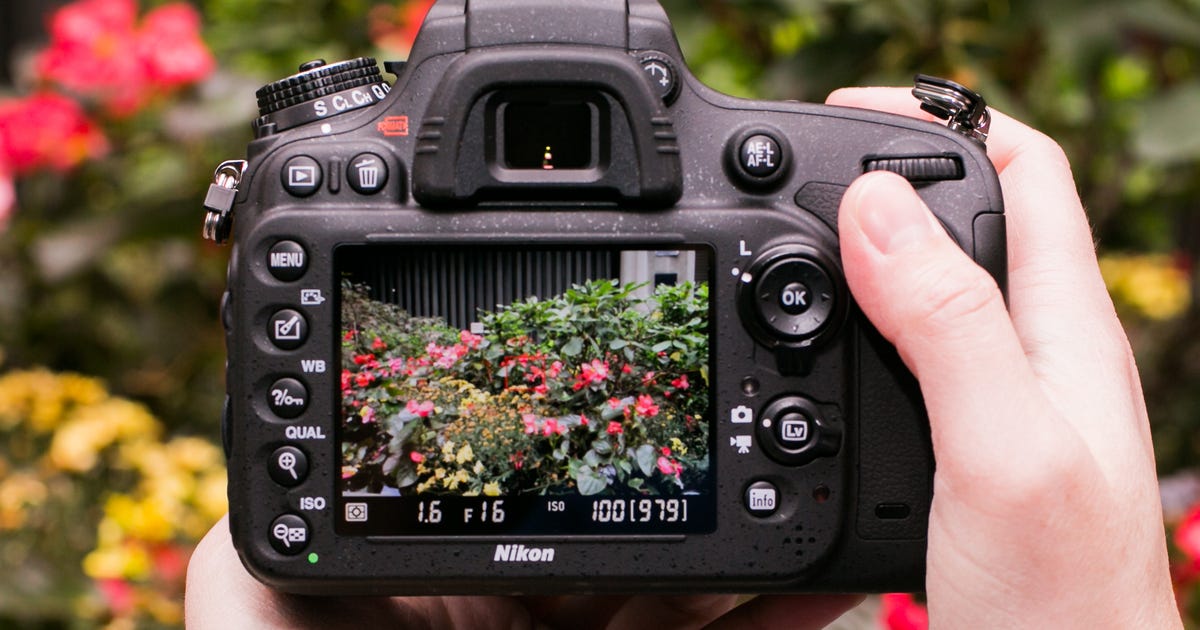
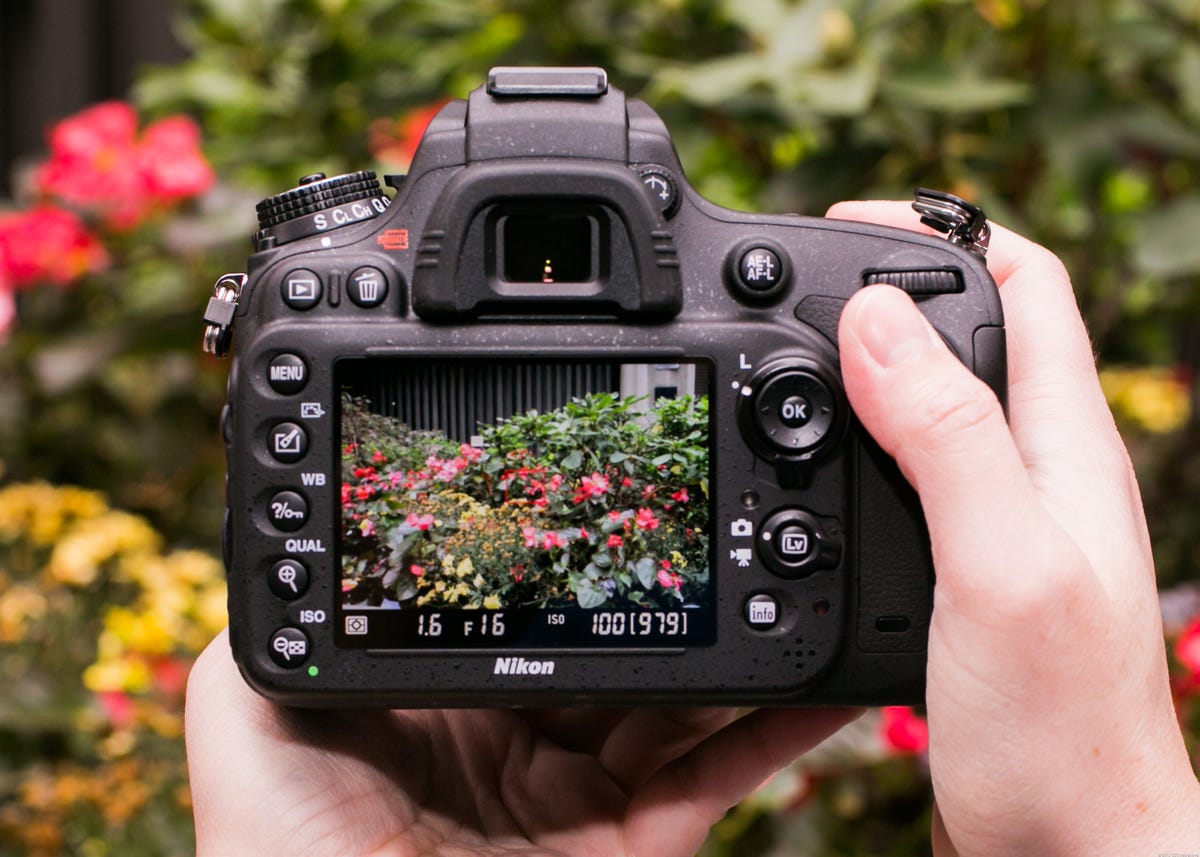
Shooting in raw is one of the best ways to have total control over your images in post-processing.
A raw file is the image as seen by the camera's sensor. Think of it like unprocessed film. Rather than letting the camera process the image for you, turning it into a JPEG image, shooting in raw allows you to process the image to your liking.
Applying adjustments to a raw image is a non-destructive method of editing your photos, unlike editing a JPEG.
Want the best of both worlds? Some digital cameras will let you shoot in raw + JPEG mode, capturing the raw image while simultaneously processing a JPEG image for easy use.
What you need
A digital SLR or camera that can shoot raw
Image processing software such as Adobe Lightroom, Photoshop or the software that came with your camera
Remember that not all raw files are created equal, as different manufacturers will more than likely use their own proprietary file formats. For example, Nikon uses the .NEF extension, Canon uses .CR2 and Sony uses .ARW. Pentax generally uses the more open DNG format.
If you don't have access to raw editing software, there are also a few web-based tools that can help, such as WebRaw and Pics.io.
For this tutorial we will be using Adobe Camera Raw and Photoshop CC, but the principles should be very similar for whichever editing program you use.
Basic adjustments
When you open up the raw image in Photoshop, Adobe Camera Raw will automatically start. The window will look something like this:
Screenshot by Lexy Savvides/CNET
From here, you can adjust values such as the exposure and temperature. Move the exposure slider to simulate the effect of adjusting your exposure in-camera. The results will be automatically reflected in the image.
Notice that as you adjust most of these settings, the histogram will also change.
Recovering detail
One of the most important reasons for shooting in raw is to be able to recover image detail in case something goes wrong. Blown out your exposure so there are white patches of highlights everywhere? You probably will be able to bring some of this detail back thanks to the raw file.
In the example below, you can see from the histogram that there are clipped highlights in the sky. If you need help reading your histogram, this article explains more.
Screenshot by Lexy Savvides/CNET
The highlights slider is the key here; moving it further to the left will bring back detail that was lost from the blown out highlights. Extra image detail can be recovered by adjusting the exposure slider as well.
The same process can be used to bring back shadow detail in underexposed areas.
This image has a lot of detail in the underexposed shadow areas that can be brought back with a bit of tweaking. Lexy Savvides/CNET
To recover shadow detail, use the same technique as for recovering highlights. Simply move the slider until you see detail appearing again.
Screenshot by Lexy Savvides/CNET
White balance
Rather than setting a white balance value in the camera, when you shoot raw you can use any white balance setting and then adjust it in post-processing. From the Camera Raw interface, choose an option from the drop-down menu that best suits your needs.
There is another tool available in Camera Raw that provides white balance adjustment -- the white balance dropper. At the top of the window, simply select the white balance tool, and click on the part of the image that should be white. Then, Camera Raw will automatically adjust the colour temperature to make that component a true white. This is exactly the same as taking a manual white balance reading in-camera.
Making images pop
The examples above have mostly been working with images with quite obvious faults. Sometimes, there may be nothing wrong with your image at all but it looks a bit dull. Here is how to make an image pop with a few simple tweaks to the raw file.
Below is an image taken on the camera's metered exposure. It looks OK, but could use a bit of work to make it look even better.
Screenshot by Lexy Savvides/CNET
First, let's brighten things up a bit by increasing the exposure. I have also brought up the contrast a bit.
Screenshot by Lexy Savvides/CNET
The image still looks a bit cool, so I'm going to change the white balance option to warm things up a bit. For outdoor situations, the cloudy white balance preset adds a more warmth to the scene. You could also achieve a similar effect by moving the temperature adjustment slider. I have also taken this opportunity to pull up the white value, and recover some of the lost highlights in the wall by bringing down the highlight slider.
Finally, to really make things look defined, boost the clarity slider a little bit to the right. The clarity tool looks for edges and defines midtone contrast. Use it sparingly for the best results.
Screenshot by Lexy Savvides/CNET
Here is a comparison of the before and after image to give you an idea of how you can make an image pop using raw adjustments:
Lexy Savvides/CNET
Once you have applied some basic adjustments, click Open Image to enter into Photoshop and continue editing as you need.
This is a basic walkthrough of editing raw images -- stay tuned for a more in-depth look at raw adjustments soon.
Macbook pro m1 max teardown m1 max macbook pro availability apple macbook pro m1 max review problems on the m1 today accidents on the m1 what happened when myers first sent his poems what happened when tony schiavone podcast
What happened when my M1 Max MacBook Pro met a $60,000 camera
What happened when my M1 Max MacBook Pro met a $60,000 camera
When Apple launched its latest line of MacBook Pros with the new M1 Max chips, I was excited, as a professional photographer, by the upgrades and what that could mean for working creatives. The 16-inch model with an M1 Max CPU impressed CNET's Dan Ackerman so much it earned a coveted Editors' Choice award.
So when I got one in my hands, I wanted to see how well it copes with a demanding professional photoshoot workload.
I put the top-end 16-inch Pro with the M1 Max chip with 64GB of RAM to the test in a studio photoshoot with probably the world's best -- and most demanding -- camera. It's the Phase One XFIQ4, a commercial-standard medium format camera that churns out whopping 150-megapixel images and costs somewhere north of $60,000. This beast is in the hands of elite professional commercial photographers the world over, and its stunning, detailed images would be a great test for the M1 Max chip.
The finished image I created was eventually made up of 28 individual full-resolution images composited together into what you see here.
Andrew Hoyle/CNET
I put together an ambitious product photoshoot of a "technology stir fry" showing a variety of tech products being tossed in oil in a wok above roaring flames. It involved shooting all the different elements individually, then piecing together numerous images from the camera into the single, finished shot seen above. This kind of compositing work can be demanding on a system, especially when working with multiple high-resolution layers.
The finished image was made of 28 full-resolution images, loaded into a single document in Photoshop, each one with its own masking, adjustments and other effects. In short, it's a behemoth of a Photoshop document, clocking in at almost 11GB in size.
Anecdotally, working on the MacBook Pro felt swift. The camera was tethered over USB-C and the images were taken, imported and initially adjusted in Phase One's own Capture One Pro software, which has been optimized for Apple's M1 chips. It was zippy, with no noticeable lag when making adjustments to the images or when flicking between the shots I'd taken, despite their size. This alone was a relief, as some of my product photoshoots can involve taking hundreds upon hundreds of images and any slowdown from the machine can be frustrating.
Shooting the Samsung Galaxy S22 Ultra in the wok. These complex composites take time and are demanding on both photographer and computer, but they're common in the industry and any way to increase the speed of the workflow is welcome.
Andrew Hoyle/CNET
I initially exported 45 full-resolution images (in Phase One's .IIQ format), which I loaded into an image stack in Photoshop. On the M1 Max MacBook it took 2 minutes, 44 seconds to load the images into the document. I did the same thing using the older 13-inch M1 MacBook Pro (a 2020 model with 16GB of RAM) and it struggled, crashing multiple times before eventually taking almost exactly 5 minutes to load the stack.
Time taken to load 45-image stack in Photoshop
16-inch MacBook Pro M1 Max (2021)
13-inch MacBook Pro M1 (2020)
16-inch MacBook Pro (Intel Core i9, 2019)
Note:
Shorter bars equals better performance
I then tried the same import test with a 2019 16-inch, Intel Core i9 MacBook Pro with 64GB of RAM, which took 4 minutes, 43 seconds. It should be noted that this MacBook is my work-provided one, and as such has a variety of security applications running in the background that could affect its performance.
Time taken to auto-align 45 images in Photoshop
16-inch MacBook Pro M1 Max (2021)
13-inch MacBook Pro M1 (2020)
16-inch MacBook Pro (Intel Core i9, 2019)
Note:
Shorter bars equals better performance
Once loaded, I selected the layers and used the Auto-Align tool to ensure all the images lined up with each other. It's a demanding process but one that I use regularly for product photography, so efficient performance here is essential for my workflow. The M1 Max model took 6 minutes, 24 seconds to align the layers, the 16-inch Intel model took 7 minutes, 15 seconds while the 13-inch M1 model took a whopping 18 minutes, 20 seconds to complete the same task.
Forty-five full-resolution layers might not sound like a lot, but keep in mind that these are from a 150-megapixel medium format camera, so each individual image is huge and packed with detail.
Andrew Hoyle/CNET
The M1 Max MacBook handled the rest of the edit without any issue, allowing me to zoom in and out without lag or showing any real signs of slowing down. I ended up deleting some layers to get down to the 28 that made up the final image, yet even with every layer having its own masks and effects, the machine coped admirably with the edit process.
My next test involved a focus stack of an image of an iPhone I shot with the Phase One camera. Focus stacking involves taking separate images of an object at different focus points before merging those shots to achieve pin-sharp focus from front to back. As with layer aligning, it's a demanding task for the processor. You can see the full breakdown below of times it took each MacBook to load the 12 individual 303MB DNG (Adobe Digital Negative raw) files into an image stack, align the images and then focus stack in Photoshop, but the M1 Max was way ahead of the others on every single test, with the focus stacking tool in particular seeming to benefit from the M1 optimizations in Photoshop.
MacBook Pro performance comparisons
16-inch MacBook Pro M1 Max (2021)
13-inch MacBook Pro M1 (2020)
16-inch MacBook Pro (Intel Core i9, 2019)
Legend:
Time taken to load 12 DNG files into Photoshop stack
Time taken to align 12 DNG files in Photoshop
Time taken to focus stack 12 DNG files
Note:
Shorter bars equals better performance
Arguably that should come as no surprise, given that it's the latest model and it's running Apple's top-performing processor with the highest amount of RAM you can get it with. But pro photographers are a demanding bunch and time is money in a busy studio, so it's good to know the extra investment for the M1 Max will indeed result in faster and more efficient work.
Asus zenbook duo 14 ux482 review asus zenbook duo 14 ux482 review asus zenbook duo 14 ux482 14 asus zenbook duo ux482eg asus zenbook 13 asus zenbook pro asus zenbook 17 fold oled
Asus ZenBook Duo 14 UX482 review: A dual-screen laptop that makes sense
Asus ZenBook Duo 14 UX482 review: A dual-screen laptop that makes sense
What I like most about the ZenBook Duo 14 is that you really can't tell from the outside of the laptop what you'll see when you lift the lid. Despite opening and closing it countless times at this point, I still get a kick out of seeing its secondary 12.6-inch touchscreen rise from above the keyboard to meet the bottom of the main 14-inch display. One screen flows into the next and, with the help of Asus' software, that slim display becomes more useful than you might think (and certainly more useful than Apple's Touch Bar). There are a few compromises that come with the design, but they might just be worth it.
Like
Useful dual-display design
Excellent performance and battery life
Active pen and case included
Don't Like
Keyboard, touchpad layout might take some adjustment
Memory is soldered on
The ZenBook Duo is available in two versions, a Pro Duo 15 OLED and the Duo 14 reviewed here. The Pro Duo 15 OLED will have up to a 10th-gen Intel Core i9 processor, with an Nvidia GeForce RTX 3070 discrete graphics and up to 32GB of memory when it arrives in April. The Duo 14 has either 11th-gen Core i5 or i7 processors, optional Nvidia MX450 discrete graphics and up to 32GB of memory. Prices start at $1,000, but the configuration I tested is $1,300. That converts to about AU$1,695 and £950.
The Duo 14 has a 14-inch, 1,920x1,080-pixel touchscreen paired with a 12.6-inch, 1,920x515-pixel touchscreen. Both panels have a 400-nit brightness, but the 12.6-inch screen has a matte finish and looks a little dim by comparison unless you're looking straight down on it.
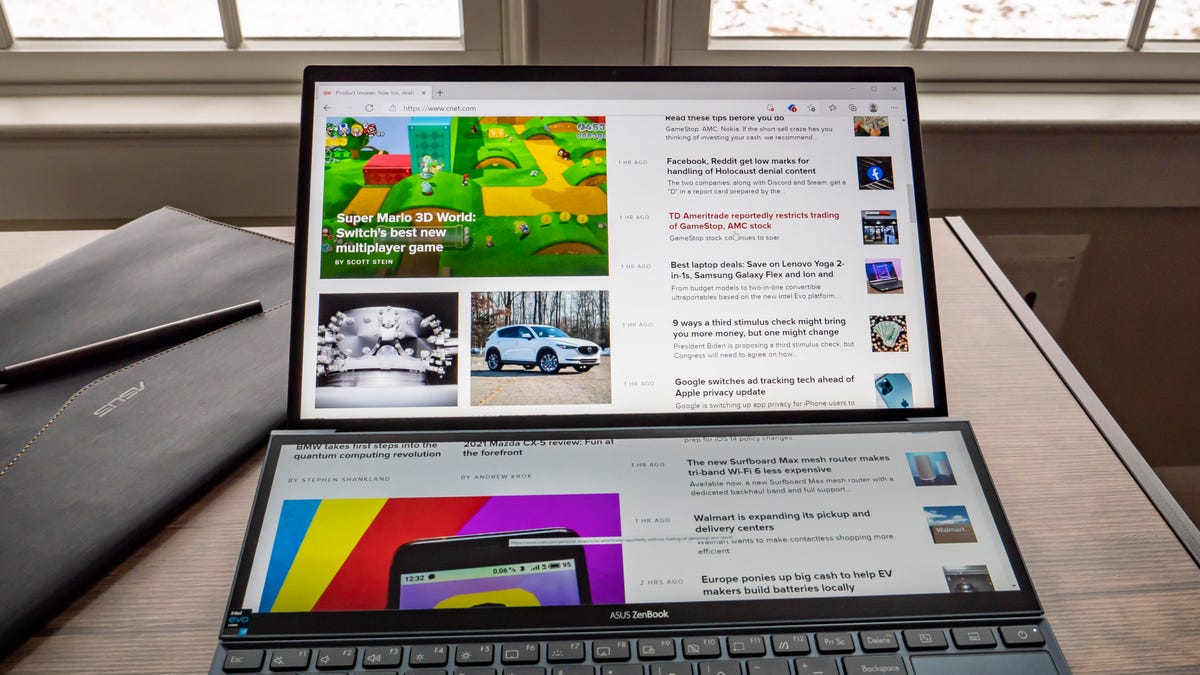
On the Duo 14's predecessor, the smaller screen, officially called ScreenPad Plus, was flat on the body so you had to crane your neck some to use it. Now, with its new hinge design, the screen angles up to 7 degrees. It gives you a better viewing angle but also increases airflow and creates a smaller gap between it and the main display. It's not seamless, but because the frames on both screens are slim, it's similar to working with two external displays side by side.
App windows can flow from the top display to the bottom.
Josh Goldman/CNET
A better second screen
Windows recognizes the ScreenPad Plus as a second display, so you can use it for whatever you would use a second screen for. It's great for anything you'd typically lose sight of while you're working on something full screen on the main display. For instance, I put Slack, Outlook and Spotify on the ScreenPad Plus while I worked on the main display. Asus' ScreenXpert 2.0 software can automatically resize up to three windows on the ScreenPad to fit evenly across it. You can also flick windows between screens with your fingertip, which is kind of fun. There's also a dedicated button above the touchpad to move windows up and down.
Asus also has a bunch of utilities for the ScreenPad Plus available through an onscreen touch bar. You can, for example, launch a number pad or, with a three-finger tap, turn it into a giant touchpad. You can also write on it with the included active pen if you need to jot down a quick note, sign a document or just want to doodle. I was a bit worried about putting too much pressure on the ScreenPad with my hand while writing but the metal hinges held firm and you can easily disable both the touchpad and keyboard while you use it.
Although the hinge design lifts the rear of the laptop up some, Asus also includes an attachable stand to lift it even higher that folds flat when not in use.
Josh Goldman/CNET
A new Control Panel app for the ScreenPad Plus gives you customizable dial, slider and button decks for Adobe Creative Cloud apps. Open Photoshop, for example, and it'll load a tool deck of your own design on the ScreenPad. It's sort of like a supersized Touch Bar on a MacBook Pro, but considerably more useful and with greater flexibility. Even if you're not using Adobe apps, the ScreenPad is a great place to put tool palettes for other creative software.
Get a little, give a little
The 12.6-inch display turned out to be handier to have than I initially thought. Even if you never use it for anything other than seeing messages that come in or changing your music, it's nice not to have to constantly switch between windows when you're working.
The keyboard and touchpad certainly feel cramped compared to a normal 14-inch laptop.
Josh Goldman/CNET
The trade-off for the extra display, though, is the keyboard and touchpad. First, the touchpad is small and narrow and I frequently hit the right arrow key instead of the touchpad's left button. And there's the matter of it being to the left of the keyboard. If you're moving to the Duo 14 from a typical laptop layout with the keyboard at the top and the touchpad at the bottom, muscle memory will not be your friend. Desktop users or anyone using a mouse regularly will have an easier time of it.
The keyboard feels a bit cramped to me, but it might just be that it feels like I'm being shoved to the left by the touchpad. It does have a couple of keys that are reduced, like the Enter and Backspace. Also, since it is at the bottom, there is no keyboard deck and, hence, no palm rests. The raised back end of the keyboard helps here, though, as my wrists more comfortably rested on my desk while typing.
The hinge lifts the keyboard at the back.
Josh Goldman/CNET
There are a couple of other things to be aware of. While the battery life is generally excellent, the second display will cut into your time away from an outlet. On our streaming video test, the Duo 14 hit 9 hours, 6 minutes of battery life with both displays set to 50% brightness. With just the 14-inch high-efficiency panel on, though, it made it to 11 hours, 57 minutes. A button to the left of the power button lets you quickly turn off the 12.6-inch panel so it's easy enough to power it down and save some battery. It would be nice if you could lay the screen flat for those times when it's not in use, but it is always angled up when the Duo 14 is open.
Overall performance was right where it should be compared to other 11th-gen Intel Core i7 laptops we've tested. However, if you're going to be using this for content creation, you'll be better off waiting for a model with the Nvidia GeForce MX450 discrete graphics. Also, memory goes up to 32GB, but it's onboard and can't be upgraded. If you need 16GB or 32GB, make sure it's part of your initial configuration.
Asus includes a pen and laptop sleeve with the Duo 14.
Josh Goldman/CNET
One last minor point: The ZenBook Duo 14 is heavier than your average premium 14-inch laptop at 3.5 pounds (1.6 kilograms) but all things considered, that's still light and fairly thin at 16.9 millimeters (0.7 inch).
Aside from the second display, this is a solid 14-inch laptop, with a nice main display with an IR camera, excellent performance and a long battery life. In the end, if you can get past the keyboard and touchpad layout, the second display really does come in handy, especially if you're a heavy Adobe user, from Photoshop to Illustrator to Premiere.
Geekbench 5 (multicore)
Lenovo Yoga 9i (14-inch)
Asus ZenBook 13 UX325EA-AH77
Acer AP714-51T Porsche Design Acer Book RS
Asus ZenBook Duo 14 UX482
HP Envy x360 13 (2020)
Lenovo Yoga C940 (14-inch)
Note:
Longer bars indicate better performance
Cinebench R20 CPU (multicore)
Asus ZenBook Duo 14 UX482
HP Envy x360 13 (2020)
Lenovo Yoga 9i (14-inch)
Acer AP714-51T Porsche Design Acer Book RS
Asus ZenBook 13 UX325EA-AH77
Lenovo Yoga C940 (14-inch)
Note:
Longer bars indicate better performance
Streaming video playback battery drain test (minutes)
Lenovo Yoga 9i (14-inch)
Acer AP714-51T Porsche Design Acer Book RS
Asus ZenBook 13 UX325EA-AH77
Asus ZenBook Duo 14 UX482
Lenovo Yoga C940 (14-inch)
HP Envy x360 13 (2020)
Note:
Longer bars indicate better performance
System Configurations
Asus ZenBook Duo 14 UX482
Microsoft Windows 10 Home (64-bit); 2.8GHz Intel Core i7-1165G7; 8GB DDR4 SDRAM 4,267MHz; 128MB Intel Iris Xe graphics; 512GB SSD
Lenovo Yoga 9i (14-inch)
Microsoft Windows 10 Home (64-bit); 3.0GHz Intel Core i7-1185G7; 16GB DDR4 SDRAM 4,267MHz; 128MB Intel Iris Xe graphics; 512GB SSD
Acer AP714-51T Porsche Design Acer Book RS
Microsoft Windows 10 Home (64-bit); 2.4GHz Intel Core i5-1135G7; 8GB DDR4 SDRAM 4,267MHz; 128MB Intel Iris Xe graphics; 512GB SSD
Asus ZenBook 13 UX325EA-AH77
Microsoft Windows 10 Pro (64-bit); 2.8GHz Intel Core i7-1165G7; 16GB DDR4 SDRAM 4,267MHz; 128MB Intel Iris Xe graphics; 1TB SSD
HP Envy x360 13 (2020)
Microsoft Windows 10 Home (64-bit); 2.3GHz; AMD Ryzen 5 4500U; 8GB DDR4 SDRAM 3,200MHz; 512MB Radeon graphics; 256GB SSD
Lenovo Yoga C940 (14-inch)
Microsoft Windows 10 Home (64-bit); 1.3GHz Intel Core i7-1057G7; 12GB DDR4 SDRAM 4,267MHz; 128MB Intel Iris Plus graphics; 512GB SSD
Asus zenbook duo 14 ux482 review article asus zenbook duo 14 ux482 review a restaurant asus zenbook duo 14 ux482 review airpods asus zenbook duo 14 ux482 review asus zenbook duo 14 ux482 price asus zenbook duo accessories asus zenbook pro asus zenbook flip 15 asus zenbook ux305
Asus ZenBook Duo 14 UX482 review: A dual-screen laptop that makes sense
Asus ZenBook Duo 14 UX482 review: A dual-screen laptop that makes sense
What I like most about the ZenBook Duo 14 is that you really can't tell from the outside of the laptop what you'll see when you lift the lid. Despite opening and closing it countless times at this point, I still get a kick out of seeing its secondary 12.6-inch touchscreen rise from above the keyboard to meet the bottom of the main 14-inch display. One screen flows into the next and, with the help of Asus' software, that slim display becomes more useful than you might think (and certainly more useful than Apple's Touch Bar). There are a few compromises that come with the design, but they might just be worth it.
Like
Useful dual-display design
Excellent performance and battery life
Active pen and case included
Don't Like
Keyboard, touchpad layout might take some adjustment
Memory is soldered on
The ZenBook Duo is available in two versions, a Pro Duo 15 OLED and the Duo 14 reviewed here. The Pro Duo 15 OLED will have up to a 10th-gen Intel Core i9 processor, with an Nvidia GeForce RTX 3070 discrete graphics and up to 32GB of memory when it arrives in April. The Duo 14 has either 11th-gen Core i5 or i7 processors, optional Nvidia MX450 discrete graphics and up to 32GB of memory. Prices start at $1,000, but the configuration I tested is $1,300. That converts to about AU$1,695 and £950.
The Duo 14 has a 14-inch, 1,920x1,080-pixel touchscreen paired with a 12.6-inch, 1,920x515-pixel touchscreen. Both panels have a 400-nit brightness, but the 12.6-inch screen has a matte finish and looks a little dim by comparison unless you're looking straight down on it.
On the Duo 14's predecessor, the smaller screen, officially called ScreenPad Plus, was flat on the body so you had to crane your neck some to use it. Now, with its new hinge design, the screen angles up to 7 degrees. It gives you a better viewing angle but also increases airflow and creates a smaller gap between it and the main display. It's not seamless, but because the frames on both screens are slim, it's similar to working with two external displays side by side.
App windows can flow from the top display to the bottom.
Josh Goldman/CNET
A better second screen
Windows recognizes the ScreenPad Plus as a second display, so you can use it for whatever you would use a second screen for. It's great for anything you'd typically lose sight of while you're working on something full screen on the main display. For instance, I put Slack, Outlook and Spotify on the ScreenPad Plus while I worked on the main display. Asus' ScreenXpert 2.0 software can automatically resize up to three windows on the ScreenPad to fit evenly across it. You can also flick windows between screens with your fingertip, which is kind of fun. There's also a dedicated button above the touchpad to move windows up and down.
Asus also has a bunch of utilities for the ScreenPad Plus available through an onscreen touch bar. You can, for example, launch a number pad or, with a three-finger tap, turn it into a giant touchpad. You can also write on it with the included active pen if you need to jot down a quick note, sign a document or just want to doodle. I was a bit worried about putting too much pressure on the ScreenPad with my hand while writing but the metal hinges held firm and you can easily disable both the touchpad and keyboard while you use it.
Although the hinge design lifts the rear of the laptop up some, Asus also includes an attachable stand to lift it even higher that folds flat when not in use.
Josh Goldman/CNET
A new Control Panel app for the ScreenPad Plus gives you customizable dial, slider and button decks for Adobe Creative Cloud apps. Open Photoshop, for example, and it'll load a tool deck of your own design on the ScreenPad. It's sort of like a supersized Touch Bar on a MacBook Pro, but considerably more useful and with greater flexibility. Even if you're not using Adobe apps, the ScreenPad is a great place to put tool palettes for other creative software.
Get a little, give a little
The 12.6-inch display turned out to be handier to have than I initially thought. Even if you never use it for anything other than seeing messages that come in or changing your music, it's nice not to have to constantly switch between windows when you're working.
The keyboard and touchpad certainly feel cramped compared to a normal 14-inch laptop.
Josh Goldman/CNET
The trade-off for the extra display, though, is the keyboard and touchpad. First, the touchpad is small and narrow and I frequently hit the right arrow key instead of the touchpad's left button. And there's the matter of it being to the left of the keyboard. If you're moving to the Duo 14 from a typical laptop layout with the keyboard at the top and the touchpad at the bottom, muscle memory will not be your friend. Desktop users or anyone using a mouse regularly will have an easier time of it.
The keyboard feels a bit cramped to me, but it might just be that it feels like I'm being shoved to the left by the touchpad. It does have a couple of keys that are reduced, like the Enter and Backspace. Also, since it is at the bottom, there is no keyboard deck and, hence, no palm rests. The raised back end of the keyboard helps here, though, as my wrists more comfortably rested on my desk while typing.
The hinge lifts the keyboard at the back.
Josh Goldman/CNET
There are a couple of other things to be aware of. While the battery life is generally excellent, the second display will cut into your time away from an outlet. On our streaming video test, the Duo 14 hit 9 hours, 6 minutes of battery life with both displays set to 50% brightness. With just the 14-inch high-efficiency panel on, though, it made it to 11 hours, 57 minutes. A button to the left of the power button lets you quickly turn off the 12.6-inch panel so it's easy enough to power it down and save some battery. It would be nice if you could lay the screen flat for those times when it's not in use, but it is always angled up when the Duo 14 is open.
Overall performance was right where it should be compared to other 11th-gen Intel Core i7 laptops we've tested. However, if you're going to be using this for content creation, you'll be better off waiting for a model with the Nvidia GeForce MX450 discrete graphics. Also, memory goes up to 32GB, but it's onboard and can't be upgraded. If you need 16GB or 32GB, make sure it's part of your initial configuration.
Asus includes a pen and laptop sleeve with the Duo 14.
Josh Goldman/CNET
One last minor point: The ZenBook Duo 14 is heavier than your average premium 14-inch laptop at 3.5 pounds (1.6 kilograms) but all things considered, that's still light and fairly thin at 16.9 millimeters (0.7 inch).
Aside from the second display, this is a solid 14-inch laptop, with a nice main display with an IR camera, excellent performance and a long battery life. In the end, if you can get past the keyboard and touchpad layout, the second display really does come in handy, especially if you're a heavy Adobe user, from Photoshop to Illustrator to Premiere.
Geekbench 5 (multicore)
Lenovo Yoga 9i (14-inch)
Asus ZenBook 13 UX325EA-AH77
Acer AP714-51T Porsche Design Acer Book RS
Asus ZenBook Duo 14 UX482
HP Envy x360 13 (2020)
Lenovo Yoga C940 (14-inch)
Note:
Longer bars indicate better performance
Cinebench R20 CPU (multicore)
Asus ZenBook Duo 14 UX482
HP Envy x360 13 (2020)
Lenovo Yoga 9i (14-inch)
Acer AP714-51T Porsche Design Acer Book RS
Asus ZenBook 13 UX325EA-AH77
Lenovo Yoga C940 (14-inch)
Note:
Longer bars indicate better performance
Streaming video playback battery drain test (minutes)
Lenovo Yoga 9i (14-inch)
Acer AP714-51T Porsche Design Acer Book RS
Asus ZenBook 13 UX325EA-AH77
Asus ZenBook Duo 14 UX482
Lenovo Yoga C940 (14-inch)
HP Envy x360 13 (2020)
Note:
Longer bars indicate better performance
System Configurations
Asus ZenBook Duo 14 UX482
Microsoft Windows 10 Home (64-bit); 2.8GHz Intel Core i7-1165G7; 8GB DDR4 SDRAM 4,267MHz; 128MB Intel Iris Xe graphics; 512GB SSD
Lenovo Yoga 9i (14-inch)
Microsoft Windows 10 Home (64-bit); 3.0GHz Intel Core i7-1185G7; 16GB DDR4 SDRAM 4,267MHz; 128MB Intel Iris Xe graphics; 512GB SSD
Acer AP714-51T Porsche Design Acer Book RS
Microsoft Windows 10 Home (64-bit); 2.4GHz Intel Core i5-1135G7; 8GB DDR4 SDRAM 4,267MHz; 128MB Intel Iris Xe graphics; 512GB SSD
Asus ZenBook 13 UX325EA-AH77
Microsoft Windows 10 Pro (64-bit); 2.8GHz Intel Core i7-1165G7; 16GB DDR4 SDRAM 4,267MHz; 128MB Intel Iris Xe graphics; 1TB SSD
HP Envy x360 13 (2020)
Microsoft Windows 10 Home (64-bit); 2.3GHz; AMD Ryzen 5 4500U; 8GB DDR4 SDRAM 3,200MHz; 512MB Radeon graphics; 256GB SSD
Lenovo Yoga C940 (14-inch)
Microsoft Windows 10 Home (64-bit); 1.3GHz Intel Core i7-1057G7; 12GB DDR4 SDRAM 4,267MHz; 128MB Intel Iris Plus graphics; 512GB SSD