DJI Phantom 3

4k And 1080p Difference

Embark on a Quest with 4k And 1080p Difference

Step into a world where the focus is keenly set on 4k And 1080p Difference. Within the confines of this article, a tapestry of references to 4k And 1080p Difference awaits your exploration. If your pursuit involves unraveling the depths of 4k And 1080p Difference, you've arrived at the perfect destination.

Our narrative unfolds with a wealth of insights surrounding 4k And 1080p Difference. This is not just a standard article; it's a curated journey into the facets and intricacies of 4k And 1080p Difference. Whether you're thirsting for comprehensive knowledge or just a glimpse into the universe of 4k And 1080p Difference, this promises to be an enriching experience.

The spotlight is firmly on 4k And 1080p Difference, and as you navigate through the text on these digital pages, you'll discover an extensive array of information centered around 4k And 1080p Difference. This is more than mere information; it's an invitation to immerse yourself in the enthralling world of 4k And 1080p Difference.

So, if you're eager to satisfy your curiosity about 4k And 1080p Difference, your journey commences here. Let's embark together on a captivating odyssey through the myriad dimensions of 4k And 1080p Difference.

Showing posts sorted by date for query 4k And 1080p Difference. Sort by relevance Show all posts

DJI Phantom 3 Professional Review: Stunning 4K Aerial Footage That Doesn't Break The Bank


Dji phantom 3 professional 4k drone dji phantom 3 standard review dji phantom 3 advanced review dji phantom 3 se review dji phantom 3 pro dji phantom 3 professional drone dji phantom 3 professional battery dji phantom 3 dji phantom 3 standard
DJI Phantom 3 Professional review: Stunning 4K aerial footage that doesn't break the bank


DJI Phantom 3 Professional review: Stunning 4K aerial footage that doesn't break the bank

DJI's Phantom series have become a benchmark for consumer drones -- or quadcopters, if you prefer -- thanks to their simple setup, ease of flying and relatively low price. The current king of the lineup, the Phantom 3 Professional, raises the bar even higher with the addition of 4K video recording from its stabilised camera.

Its design is almost unchanged from the previous Phantom 2 series , with a chunky white plastic body, and it's still incredibly easy to learn to fly. It has improved image sensors too, which provide superior footage than previously available, and ground-scanning sensors to help it fly indoors. If you want to take your home movies to the next level, but don't want to fork out the many thousands for professional-level drones, the Phantom 3 is a superb starting point.

There are currently three versions of the drone available. The Phantom 3 Professional (which I review here) shoots video in 4K (3,820x2,160-pixel) resolution and retails for $1,259, £1,159 or AU$1,950. The Phantom 3 Advanced is functionally identical, but shoots video in 1080p (1,920x1,080); it costs $999, £899 or AU$1,550. Both of those debuted in April, but they were just joined by a third model, the more affordablePhantom 3 Standard ($799, £649 or AU$1,299), which strips away some of the better features of its sibling models and includes the same controller as the older Phantom 2 Vision+. (Meanwhile, DJI has also scheduled a press conference in Los Angeles later this month, making another new drone announcement likely.)

Ultimately, the Advanced is arguably the sweet spot, given the fact that its 1080p video will more than suffice for most eyes (discerning the extra detail on 4K displays is a challenge, to say the least). But for those who must have 4K, the Phantom 3 Pro delivers best-in-class video for many thousands less than you'll pay for professional drones.

Design

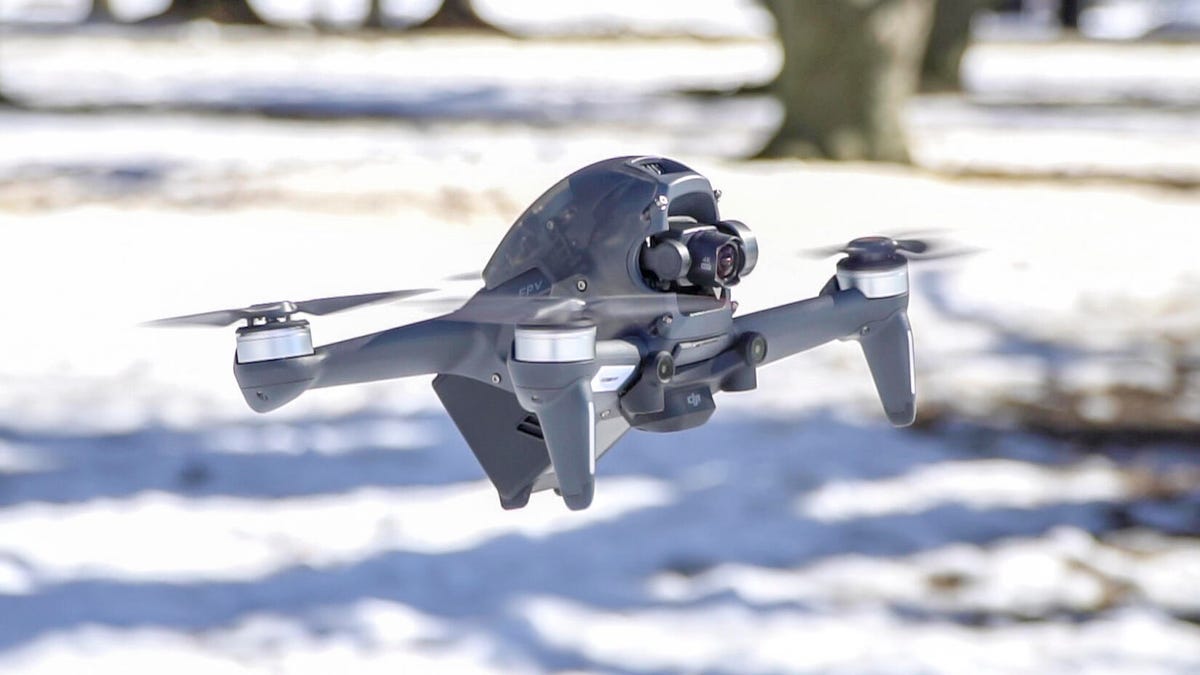
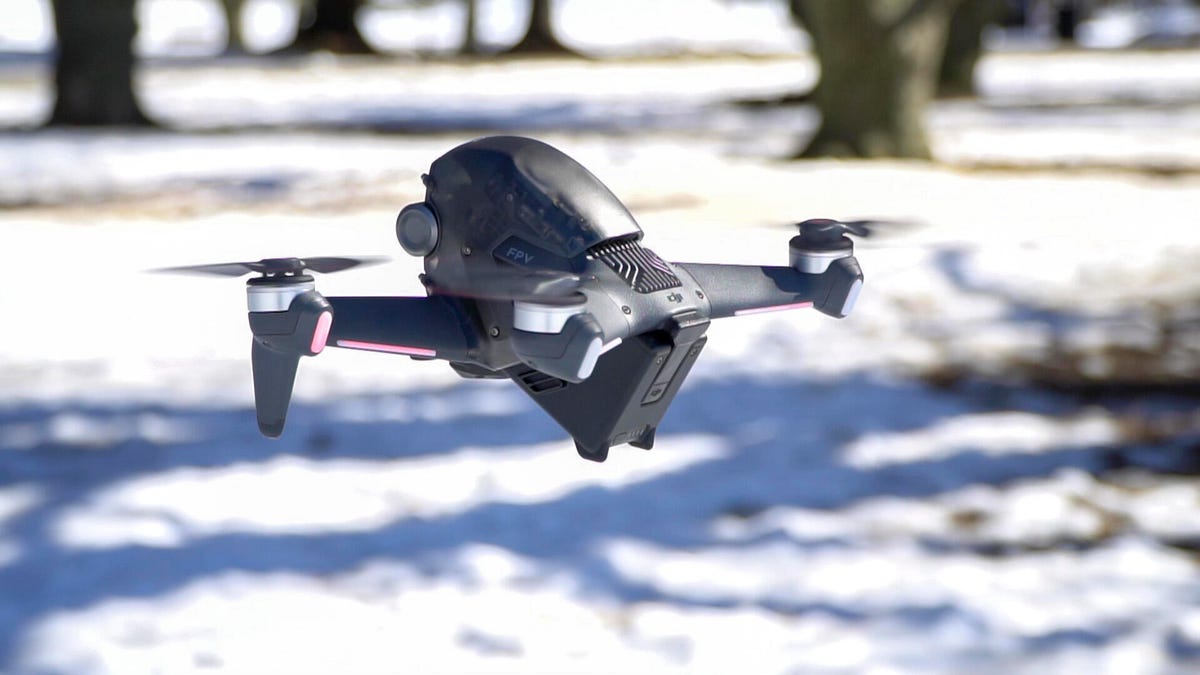
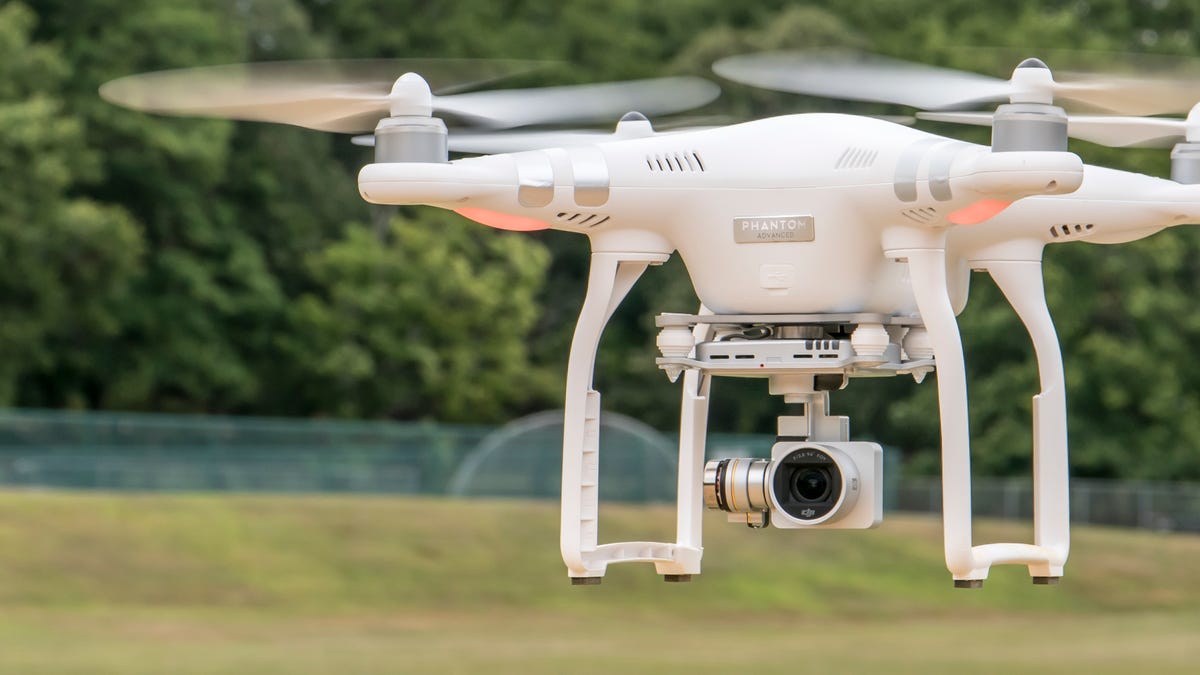
The Phantom 3 looks pretty much identical to DJI's previous Phantom models: a stout white plastic body, four rotors and narrow, fixed landing legs slung beneath. It's light enough to carry in one hand and, when you unscrew the rotor blades, it's just about small enough to fit into a decent-sized backpack. It's certainly more portable than the much larger Inspire 1 drone.

Andrew Hoyle/CNET

It feels as well built as before, with the capacity to survive both the odd bump into a wall or a small crash while you're getting the hang of flying it. I managed to fly it straight into the roof of my house where it plummeted three storeys to the grass below. Aside from a few cosmetic scuffs, it was absolutely fine, and continues to fly without any trouble.

The rotor blades are easily replaceable if you snap a few. Just unscrew them from the motors on each of the drone's four corners. You'll know how to do it already, since the blades are the only parts you need to assemble out of the box.

The controller is roughly similar to previous versions, with two main sticks and a clamp to hold a tablet -- I used my iPad Mini without a problem -- which acts as the display for the drone's camera via the DJI Pilot app. There are small, fold-down brackets to hold a smartphone, with the app optimised for use with the iPhone 5S , 6 and 6 Plus . It was easier, however, to view the footage and use the app's small on-screen buttons on the the tablet's larger screen. Android device support is thin, with just the Samsung Galaxy S5 and Note 3 , Sony Xperia Z3, Google Nexus 7 II , Google Nexus 9 , Xiaomi Mi 3 and ZTE Nubia Z7 mini listed.

Andrew Hoyle/CNET

On each top corner of the controller are buttons for starting and stopping recording and quickly changing camera settings like the exposure and angle of view. Using these physical controls is much easier than poking at the tiny on-screen controls while the drone is airborne.

Setup

Getting started with the drone is incredibly easy. When you take it out of the box, just start charging the battery and the controller (a supplied lead charges both through one plug), and download the DJI Pilot app onto your iOS or Android device.

Once everything is charged, switch on the controller and the drone, pop your phone or tablet into the bracket and connect your mobile device with its usual charging cable to the controller. Then, after a few simple steps on the app, you're connected and ready to go -- around five minutes of playing around had me up and running.

Before you take off for the first time, you can use the app as a training guide. You pilot a virtual drone around a field on-screen, allowing you to familiarise yourself with the main controls, without risking smashing your new toy into a tree. Even so, the first time you use it should be in a very open space, and you should stick to basic manoeuvres until you get the hang of it.

Andrew Hoyle/CNET

When you first get your drone, it's worth checking DJI's downloads site for any available firmware updates -- oddly, I didn't see an update notification in the app, even though there was one to download. Updating the camera firmware is a long process, albeit fairly straightforward. You'll need to pop the camera's microSD card into your computer, download the firmware, unzip it and put it on the card. After you insert the card back into the drone and turn it on, it'll take about 20 minutes to install it, bleeping the whole time.

Flying the drone

The DJI 3 is every bit as easy to fly as its predecessors. Even just 10 minutes of casual flying around an open area is sufficient time to learn the basics. It helps that the drone is incredibly responsive and can accelerate -- and, more importantly, decelerate -- extremely quickly. If you see you're getting too close to some trees, a quick movement on the stick will instantly change its course to get you out of trouble or simply return the sticks to neutral to stop it in its tracks.

At close range (up to around 30 metres, or 100 feet) I find it easy to pilot the drone simply by looking at it. Once it gets a bit further away -- or it's above you, visibly lost against the bright sky -- then it's more convenient to use the camera view on your tablet, seeing what it's seeing, to help navigate. It automatically corrects for wind, so slight gusts won't throw it off course, but trying to get closeup footage of a tornado is not a good idea.

Andrew Hoyle/CNET

New sensors on the bottom of the drone point down and detect patterns on the floor to lock on to, in order to remain stable when flying indoors, where a GPS signal (used for stability outdoors) isn't available. Although you could technically fly any of the previous drones indoors, the new sensors provide better stability, making it able to hover in a fixed location without any control from you. This made a big difference in my testing as I was able to fly the drone from inside my living room out of the window.

Of course, you have to be much more careful than when flying outdoors as there are various factors which make it less stable. Flying above a plain surface, for example, will give the cameras nothing to lock onto, and above about 2 metres (6 feet), it doesn't detect the ground at all and can easily start to drift off course. I managed to crash it inside the CNET office when I flew it about 6 metres (about 20 feet) above the floor and it wasn't able to hold its position. It was, thankfully, unharmed.

DJI reckons you can get around 20-23 minutes of flight time from a full charge of the drone's battery, which I'd say is accurate. It does depend on how vigorously you're flying though, so if you do plan on really hitting top speed at high altitudes, expect a little less time. Although that's pretty standard for this type of drone, it's still very limiting if you want to take it away to a specific location to capture footage.

The batteries are removable, and you can buy spares, but they'll set you back around £125, $149 or AU$205 each. Batteries compatible with previous models are not compatible with the Phantom 3.

Andrew Hoyle/CNET

A return-to-home function will automatically bring the drone safely back to your location to land when it detects that the batteries are critically low -- it won't simply fall out of the sky. You can also press the return to home button on screen and there's one on the controller too. It will automatically bring the drone back to the location it took off from, which is a handy failsafe option to have if you begin to lose sight of it and want to bring it back to you safely.

Camera

As with the predecessor, the camera is slung beneath the drone -- but this time with a bunch of significant upgrades. It has the same 1/2.3-inch sensor, although it's been tweaked to provide better dynamic range. Exposure is generally more balanced. Bright skies are kept under control, while the darker ground is kept easily visible.

The Phantom Vision 2's camera had a habit of either exposing for the bright sky, plunging the ground into shadow, or exposing for the ground, resulting in a washed-out sky. The Phantom 3 does a considerably better job, producing rich, well balanced footage.

Andrew Hoyle/CNET

The headline feature on the Professional model is its ability to shoot video in Ultra HD 4K resolution. It brings a tonne of detail when viewing the footage on a high resolution monitor, which is particularly noticeable when looking at small details on house roofs far below. The benefit of 4K footage isn't just to look crisp on a 4K monitor, it also gives you a lot of room to crop into the frame, while still maintaining full HD quality or better.

If you're shooting a specific object, this extra resolution allows you to digitally stabilise the footage, smoothing out any slight movements of the drone and ensuring the object stays perfectly central, without sacrificing any quality.

It can do this at frame rates of 24, 25 or 30 frames per second too, the latter of which will be great for long, smooth shots. If your shots require faster motion from the camera and the subject, then shooting at 60fps in Full HD will produce much smoother footage.

With the wheels on each corner of the controller you can tilt the camera up or down, and to pan simply turn the drone on its axis. You can point it exactly down, which gives a really neat view of the landscape, particularly when you take it really high. One of the main differences between this and the pricier DJI Inspire 1 drone is that there's no ability to control the camera using a second controller. If you want to shoot a subject with one person flying the drone past, with a second producer independently controlling the camera (which can pan and tilt in all directions), you'll need to splash more cash for the Inspire.

Andrew Hoyle/CNET

The lens on the camera has a 90-degree field of view, which is narrower than the previous version. That may seem a step down, but it's actually for a very good reason. The extreme wide angles used by the Phantom 2 caused distortion of the image, particularly at the corners, meaning a lot of digital correction had to be used, if the footage was for a professional purpose. It's particularly noticeable when panning around a horizon, as you can visibly see the horizon curving down at the edge.

The narrower angle does make a huge difference, with considerably less distortion of the image. As well as just producing nicer-looking footage for your Facebook feed, professionals among you will appreciate the time saved by not having to digitally correct it.

Andrew Hoyle/CNET

The camera is mounted on the same three-axis stabilising gimbal, which automatically corrects for any slight movements of the drone, and smoothing out vibrations from the rotors. It works incredibly well and results in much smoother footage, without the unpleasant jerks and bumps seen from drones that don't use stabilisation -- including DJI's Phantom 2.

Do keep in mind that when flying the drone at high speeds, or turning quickly, the gimbal will have to move the camera at a more extreme upwards angle to the extent that it's possible to see the rotors in the top portion of the image. Smooth motions will therefore produce the best results. You can see some of our test footage in the following video:

Live streaming

A neat new feature on the Phantom 3 is the ability to stream live video from the drone to YouTube. The DJI app makes it easy to set up live streaming -- you also need to enable your YouTube account for live video on the desktop site. It needs a good data connection, so if you're using a tablet or phone that doesn't have a SIM card, you'll need to tether it to your phone.

Streaming video is no easy task for a mobile connection, so you'll want to make sure you're on a fast 4G LTE connection for it to work properly. When I was on 3G, the YouTube stream being watched remotely was extremely jumpy and froze numerous times. On 4G, however, it was much smoother and gave a good view of the action. Its lower quality and lower frame rate means it's far less smooth than video taken directly from the camera, but it's perfectly watchable, particularly when the drone remains fairly still in the air.

Andrew Hoyle/CNET

It might not be a killer feature for many of you, but it could be handy for news journalists wanting to give a top-down view of an unfolding event. Engineers too may find it useful to be able to fly into a potentially dangerous building and send footage back, without risking injury by entering themselves.

Conclusion

The DJI Phantom 3 Professional drone is simple to set up and incredibly easy to learn to fly, making it an accessible piece of kit even to those with only a vague knowledge of technology. Its drastically improved image quality, addition of 4K resolution and its excellent stabilising gimbal allows it to capture brilliant footage, with none of the jerkiness or exposure issues seen on earlier models.

Ultimately, the stepdown Phantom 3 Advanced -- with all of the same features except a 1080p camera in place of the Pro's 4K one -- is the better choice for most flyers, but anyone who needs the extra resolution (or the comfort of futureproofing) will find the Phantom 3 Pro a solid choice. Either one is a much more affordable entry into aerial videography than any professional drone, and is well worth considering, whether you're an enthusiastic amateur filmmaker or simply want to add cool, creative shots to your home videos.

CNET Senior Editor Josh Goldman contributed to this review.


Source

https://nichols.my.id/how-to-fix-your-sleep-schedule.html

.

DJI FPV Drone Hands-on: A High-speed Immersive Flying Experience With 4K Video For $1,299


Dji fpv drone footage dji fpv drone manual dji new fpv drone dji fpv drone weight dji fpv drone bag dji fpv combo dji fpv weight
DJI FPV drone hands-on: A high-speed immersive flying experience with 4K video for $1,299


DJI FPV drone hands-on: A high-speed immersive flying experience with 4K video for $1,299

The DJI FPV drone is made for everyone but is not for everyone. It's built for speed and agility, but its features and capabilities cater to both beginner pilots and those who can keep a drone in the air without the assistance of sensors and GPS. The FPV drone is also much more about experiencing flight than it is about what the camera can do. 

In the box for $1,299 (£1,249, AU$2,099) you'll get the FPV drone, DJI's FPV Goggles V2, a new gaming-style controller and a single battery. That means out of the box you have everything you need for FPV flying and, with the exception of a firmware update, it's also ready to fly. That's unusual for the category, which is still mainly a DIY situation. Even the prebuilt drones this size usually require some setup. 

dji-fpv-09

The FPV has obstacle detection to help beginners.

Drew Evans/CNET

No fear of flying (well, almost)

If you've never flown using an FPV headset, it can be simultaneously thrilling and terrifying, with a little bit of nausea thrown in for good measure (at least for me). It really does feel like you're in the pilot's seat of an aircraft as you soar through the air or zip above the ground at speeds up to 87 mph (140 kph). It also means one small control slip-up could take you out of the sky and empty your wallet. 

If you've ever built your own racing drone, you're likely good to repair damage from crashes. Trying to lower that bar, DJI made some of the FPV's parts easily replaceable, specifically the landing gear, the plastic top shell (an extra is included), the gimbal and the propellers. It's sturdier than DJI's other drones, too, which helps if you get a little too close to a tree, building or other obstacles. 

The large battery is integrated into the frame and securely clips in. DJI says it will last up to 20 minutes, but that's going to depend on how aggressively you're flying. Still, I didn't have any problems getting past the 10-minute mark in Sport mode, which is about the best you can do. It's typical for an FPV drone to only last five to 10 minutes in the air. 

dji-fpv-06

Most of the main body is a battery.

Drew Evans/CNET

Choose your own adventure

The FPV has three flight modes -- Normal, Sport and Manual -- with varying degrees of automated assistance. Normal mode is the closest to flying something like DJI's Air 2 or Mini 2 camera drones. Cameras on the bottom can keep the drone hovering in place without your help, while more on the front will slow you down as you approach obstacles. The top speed is 30 mph. 

Switching to Sport mode lets you fly at up to 60 mph, but the front obstacle detection is shut off. In Manual mode, you're pretty much on your own, although by default it starts with an attitude limit that can be turned off. There is no obstacle detection and no help hovering in place. You can even open up the back of the controller and adjust the stick tension so they don't spring back to the center. 

No matter what mode you're in though, you get an emergency brake on the controller and the same button will trigger the drone to return to the home point. Plus, there's a Find My Drone feature that you can use if you crash and can't see exactly where it went down. 

Analog performance with digital clarity  

dji-fpv-02

The Goggles are lightweight and comfortable. 

Drew Evans/CNET

Most FPV drones aimed at consumers typically rely on using an app and your phone in a VR-type headset. That's fine for casual flying, but the latency of the video feed from the drone's camera to the phone won't be much good at speeds up to nearly 90 mph. On the other hand, FPV racing drones generally use low-resolution analog cameras to send a low-latency feed to a headset while a second camera records the action. The image quality isn't great but when milliseconds count, you want as little delay in the video as possible. 

The FPV drone paired with the FPV Goggles V2 solves these problems by using DJI's transmission technologies to give you low-latency video with great visual clarity. When DJI launched the Goggles I said it's like the difference between a VHS tape that's been played a few too many times and a remastered DVD. 

It's the clear, cinematic live view at 810-pixel resolution that drives the immersive experience from the FPV. Plus, since all of the pieces are paired and ready out of the box, it's a hassle-free experience. Turn on the drone, the headset and the controller and you're ready for take-off. 

A controller fit for FPV gaming

dji-fpv-03

The controller ties it all together. 

Drew Evans/CNET

Many transmitters used for FPV drone racing are large, clunky and loaded with switches. DJI's controller has more in common with your favorite gaming console controller. Flying by FPV feels a lot like you're playing a racing game with a view from behind the wheel, so it's fitting that the controller feels like one made for gaming. 

On top, you just have the two sticks, the power button and a programmable shortcut button. The sticks unscrew and can be stored in the controller's grips and the antenna flips down so it's easier to slip into a bag. The back of the controller is loaded with buttons to control the camera and performance. For example, there's a switch for jumping between flight modes as well as a switch and a dial for moving the camera up and down on its gimbal. 

DJI also made a single-handed pistol-grip motion controller. There are buttons for camera controls, the emergency brake and take-offs and landings. Flying, however, is done by pulling back on a trigger and tilting your hand to the sides or up and down. It's available for $200. 

More a drone with a camera than a camera drone

dji-fpv-05

The FPV's camera records 4K video and transmits a view to the headset.

Drew Evans/CNET

The FPV's camera can record video: up to 4K resolution at 60 frames per second and 128 Mbps, or 1080p at up to 120 fps. It's on a single-axis gimbal for image stabilization, as opposed to the three-axis gimbals found on most of DJI's drones. The gimbal helps when rotating vertically, but most of the shake and vibration is controlled with DJI's RockSteady electronic stabilization. The results are overall good, especially given how quickly the drone moves, but it's not without some motion artifacts. If you're expecting the silky smooth -- and level -- video of a three-axis gimbal, you're better off with a Mavic 2 Pro

Also, recording video is pretty much the end of the road for camera features. There are no drone modes or any other automated camera moves. There's no subject tracking or panorama photos. You can correct distortion to remove the fish-eye look from your recordings and video can be stored in H.265 or H.264. That's it, though, and all of the settings are navigated with a mini-joystick and buttons on the headset. Also, there's a microSD card slot on the headset so you can record the FPV video, but it won't have the RockSteady stabilization. 

dji-fpv-06

A big battery for big power. 

Drew Evans/CNET

The DJI FPV is fun to use. For beginners, there's just enough flight assistance to take some of the intimidation out of flying. Experienced pilots will appreciate the additional camera control and how agile and fast the drone is and the great-looking video in the headset. And it's also a good, albeit expensive, way to grow as an FPV pilot without needing to cobble together your own drone, headset and transmitter combo. 


Source

https://nichols.my.id/how-to-fix-corrupted-files-on-iphone.html

.

DJI Phantom 3 Advanced Review: The Sweet Spot For Features, Performance And Price


Dji phantom 3 advanced review the sweet spot for intermittent dji phantom 3 advanced review the sweet spot for achievement dji phantom 3 advanced review the lincoln dji phantom 3 advanced manual dji phantom 3 advanced vs professional dji phantom 3 standard dji phantom 3 firmware update dji phantom 3 advanced
DJI Phantom 3 Advanced review: The sweet spot for features, performance and price


DJI Phantom 3 Advanced review: The sweet spot for features, performance and price

DJI currently has three versions of its Phantom 3 drone: the Standard , Advanced and Professional . While there are several important differences between the entry-level Phantom 3 Standard ($799, £649 or AU$1,299) and its two linemates, the feature gap between the Professional and Advanced amounts to two things.

The Phantom 3 Professional shoots video in 4K (3,820x2,160-pixel) resolution and has a 100-watt battery charger. It retails for $1,259, £1,159 or AU$1,950. The Advanced captures video in 1080p (1,920x1,080) and has a slower 57-watt charger, but costs $999, £899 or AU$1,550. That's it.

The 4K video from the Professional is a step up from the Advanced's full-HD results. But it's not a big step up, and unless you want or need the extra resolution and have a computer powerful enough to play and edit 4K video, the Advanced's 1080p video doesn't disappoint. And since the drones' features and controllers are the same, the Phantom 3 Advanced is as easy to recommended as it is to fly. Which is to say it's really easy.

Joshua Goldman/CNET

Design and features

The quadcopter itself is, for the most part, unchanged from its predecessor, the Phantom 2 Vision+. You'll find all the same convenience features like color-coded, self-tightening propellers for easy installation and replacement, and a slot-loading battery pack, though it's a newly designed battery making the Phantom 2's batteries incompatible with the 3.

The three-axis gimbal on its belly stabilizes the camera in roll, pitch and yaw directions keeping the video looking smooth even with sudden stick movements or wind gusts. Plus, the camera can do a 90-degree tilt, letting you shoot straight down, straight ahead and anywhere in between. The camera is permanently attached to the gimbal, so if you irreparably damage one or the other, you'll have to replace the entire gimbal-and-camera assembly. It also means you don't have the option of using the camera for anything else, unlike models that use GoPro or other small cameras such as 3D Robotic's Solo or EHang's Ghost.

The Advanced's camera features a Sony-made 12-megapixel 1/2.3-inch CMOS sensor behind a new f2.8 20mm lens (35mm equivalent), which gives you a 94-degree field of view. That's much narrower than the Vision+ camera's 140-degree field of view resulting in far less distortion.

Joshua Goldman/CNET

Sitting to the back of the gimbal is the new Vision Positioning System, a set of sensors to help the Phantom 3 hover while indoors when GPS isn't available. There are many caveats for it to work properly, however, such as not flying over sound-absorbing materials, water or highly reflective surfaces. It's also only effective up to about 10 feet (3 meters). If you're thinking of getting the Advanced to fly above crowds in an arena or auditorium, you better up your piloting skills first.

When you're outside, GPS is used to help the drone determine its position and yours and is what makes it possible for the drone to stop and hover in place when you release the controller's sticks as well as delivering accurate location data for safety features like automatically returning to a home position. The more satellites it can lock onto, the better off you are, so DJI added the Russian navigational system, GLONASS, which lets it tap into more satellites than GPS alone.

Satellite acquisition speeds are noticeably faster compared to the Phantom 2 Vision+, so you can lock on and start flying more quickly. Also, with the Vision+ there were times I would struggle to get a solid lock on six satellites (the minimum for GPS-assisted flight). The Advanced never had a problem grabbing onto 10 satellites or more in a matter of seconds and regularly had upward of 15 in my testing. This makes a huge difference when it comes to putting the drone in the exact position you want for photos and video.

Joshua Goldman/CNET

The controller and DJI Go mobile app (formerly called Pilot) are important, too, of course. The Advanced and its controller have DJI's Lightbridge technology for better image transmission between the sky and ground. Lightbridge allows for a continuous connection back and forth between the two and increases flight range over the wireless range extender used for the Phantom 2 and the entry-level Phantom 3 Standard. This does mean you'll need your iOS or Android device's charging cable to use it, but the performance improvement is well worth it.

On each of the top corners you'll find discrete camera controls for starting and stopping recordings, taking pictures, reviewing your shots and two wheels, one for adjusting exposure compensation, ISO and shutter speed and the other for the gimbal's tilt. Two customizable buttons are on the bottom as well that can be used for a handful of gimbal or camera functions. Overall it's a great setup, but more than a few times I accidentally switched to playback mode while trying to snap a photo.

DJI also included a Return-to-Home button for those times when panic starts to set in and you just want to bring it on back. The controller's battery is built in and will last through several flights before you'll need to recharge it. DJI simplified charging, too, using one power supply with two cables attached: one for the controller's battery and one for the drone's.

Andrew Hoyle/CNET

Connecting your iOS or Android smartphone or tablet is as simple as plugging in your device's charging cable into the USB port on the Advanced's controller. (It'll keep your device charged while you use it for flying, too.) Then, with the controller and drone turned on, you just open the DJI Go app and tap to get the camera view.

The controller's device mount can handle phones and tablets big and small, however the app is optimized for use with the iPhone 5S, 6 and 6 Plus. Android device support is thin, with just the Samsung Galaxy S5 and Note 3, Sony Xperia Z3, Google Nexus 7 II, Google Nexus 9, Xiaomi Mi 3 and ZTE Nubia Z7 Mini listed. I tested with both a 6 Plus and a Galaxy S5 and the app performance was clearly stronger on the iOS device with the S5 occasionally freezing up forcing me midflight to restart the app.

In addition to a first-person view from the camera, you get complete camera controls, meters for signal strengths, GPS and battery life and access to settings for the whole system. It will also notify you if a firmware update is necessary (which occur with some regularity) and, eventually, you'll be able to do the updates through the app; currently they're done by downloading a file to a microSD card and popping the card into the drone's camera.

The app can also be used for automated take-offs and landings, if you don't want to handle them with stick commands, and triggering the Return-to-Home safety function. Another new safety feature of sorts is the Beginner Mode. This sets up virtual barriers called a geofence with a maximum altitude and flight distance of 30 meters (98 feet), giving you a safe way to limit where the drone can travel. It's pretty amazing to see in action as you send the Phantom full throttle toward its limit and the drone stops as if it's been snagged in an invisible net.

As for the camera settings, video recording options include full HD (1,920x1,080-pixel) and HD (1,280x720-pixel) resolutions at 24, 25, 30, 48, 50, 60 frames per second and you can choose between MOV or MP4 formats. Thanks to the Lightbridge technology, you can even use it to live-stream video straight to YouTube and uses your mobile device's mic for capturing audio.

Joshua Goldman/CNET

For photos, you can capture in JPEG, DNG raw format or both simultaneously. Shooting modes include single shots or bursts of three, five or seven; HDR and auto exposure bracketing (0.7EV bias) of three or five pictures; and time-lapse continuous shooting at 5-, 7-, 10-, 20- and 30-second intervals. You can also control ISO, exposure compensation and white balance.

At the time of this review the Phantom 3 Advanced (and Professional) didn't have DJI's Intelligent Flight features including waypoint navigation, point of interest (POI) flight planning or Follow Me function, but these are now available.

Waypoint navigation lets you set up a multipoint path for the drone to follow while you control the camera, while POI flight planning allows you to autonomously fly a circle around a subject, keeping it centered. Follow Me sets the drone to track your movement based on your orientation. Support for SDK apps already created by third-party DJI developers is available as well, giving the Advanced more features and future potential.

Joshua Goldman/CNET

Flying

If you're reading this review, you probably already know that DJI's Phantom quadcopters have a reputation of being extremely easy to fly (and fly away, but it's something I've never experienced). With the Phantom 3 the experience has only improved.

DJI has added a flight simulator to the mobile app (iOS only) that you can use to learn your way around the app and controls. I found it to be a little frustrating because the actual drone performs so much better in real life. Regardless of safety features and how stable the Phantom 3 is, I highly recommend taking your first flights out in an open area where there are no people or distractions.

Again, if you don't want to use stick commands, you can takeoff and land with a tap and a swipe on your screen. With GPS, the drone will just sit and hover wherever you leave it. Start flying a bit too close to a tree and you can just let go of the sticks and it will stop while you regroup and steer away. You can fly without GPS, but if you release the sticks the Phantom won't stop but instead continues to drift in the direction it was last headed. It's a gut-wrenching experience watching $1,000 float away seemingly uncontrollably, so it's best to fly with GPS until you fully understand the controls.

Joshua Goldman/CNET

The app is well laid out and at a glance you can see all the information you need. There's even a battery timeline meter giving you estimates on everything from remaining flight time to the power required to return home or land.

Speaking of battery life, DJI says you'll be able to get up to 23 minutes of flight time. I was able to get to just under 21 minutes of flying -- nothing too aggressive, mostly hovering in place and in light wind -- before it took over and landed itself. That flight time is very good when you factor in all that it's doing to stay in the air while recording video. It does feel short, though, especially if you're trying to get out some distance for a picture and still make it back. And extras are pricey at around $149, £125 or AU$205 each.

Video and photo quality

Closely examining the 4K video of the Phantom 3 Professional or DJI's higher-end Inspire 1 straight from the camera against the 1080p clips from the Advanced, there are noticeable differences, mainly in the level of fine detail and sharpness of subjects. There is better detail from the 4K and it's especially visible if you're viewing on a large TV or monitor. So, if it's necessary for you to capture the highest quality video without ponying up a ton more cash, the Phantom 3 Professional is the better choice.

Frankly, though, the full-HD clips from the Advanced look pretty great as do its photos, and they're more than suitable for sharing online and/or viewing on a phone, tablet or laptop. It's also a huge jump in quality from the Phantom 2 Vision+. For those considering an upgrade from that model to the Professional, your needs might be met with the less expensive Advanced.

Joshua Goldman/CNET

The live-streaming quality to YouTube is just OK. You have to have a pretty strong wireless connection to keep the video moving smoothly and even then the results were a bit glitchy and compressed. Still, it's sort of amazing it can do it at all and could be helpful for professional uses.

Lastly, whenever you record a video, a compressed 720p version is stored to your mobile device. To help make the most of these clips, DJI built in a basic video editor to the Go app. You can use it to cut up your clips, gather them up and then combine them into one movie. DJI also included some style templates with music you can apply before you save. Then you can just share away.

Joshua Goldman/CNET

Conclusion

The DJI Phantom 3 Advanced is a great little aerial photo and video machine, however it's the whole system -- the drone, the controller and the app -- that make it so easy to pick up and just start flying. It's not inexpensive, but compared with the $900 Parrot Bebop with its Skycontroller , you won't regret spending the extra money. And if you don't need the Professional's 4K video, you can put your money toward a spare battery or two so the good times don't come to an end after 20 minutes.


Source

https://nichols.my.id/how-to-download-draft-tiktok.html

.

Best Outdoor Projector For 2022


Best small projector 2022 best inexpensive projector 2022 best home projectors 2022 best outdoor projector for daytime use best outdoor projector for movies best outdoor projector for watching sports best outdoor projector best outdoor projector for daylight best outdoor projector
Best Outdoor Projector for 2022


Best Outdoor Projector for 2022

Enjoying a movie with your family is great. Enjoying it outside, relaxing under the stars, is even better. As projectors have gotten smaller, brighter, and cheaper, it's become easier than ever to set up a backyard movie night. You can choose between easily portable, battery-powered models, or wired models with built-in streaming and tons of brightness. 

Ideally, you'll have some sort of screen, but even a big sheet or posterboard can do the trick. All the projectors on this list have speakers, but if you have a big yard, or want the movie to be heard over the ruckus of some younglings, it'd be best to connect to a Bluetooth speaker. If your Wi-Fi isn't strong enough to reach where you want to show the movie, you can turn your phone into a hotspot. In a few cases you can download some content to the projector itself, but don't expect this from every model nor with every streaming service. 

Here are the best outdoor projectors we've tested.

Geoffrey Morrison/CNET

The small Mars II Pro isn't the brightest, nor smallest, nor cheapest projector on this list. It's not even the easiest to use. But it does combine a pleasing image with decent sound for a good price. It's an all-around great option without the serious drawbacks of many other portable projectors. 

The main issue with the Mars II Pro is it doesn't use the full version of the Android TV streaming service like some newer models. As such, it's not as easy to use and you won't get every streaming service. The big ones are here, of course, like Netflix and Disney Plus, but no HBO. You can connect a streaming stick, of course, and there's a USB connection to power it right on the back. 

The battery lasts about the length of a long movie. 

Check out our in-depth review of the Mars II Pro..

Geoffrey Morrison/CNET

The AAXA P6 throws out an impressive amount of light, and lasts up to a claimed 4 hours with its built-in battery. You'll need to add a streaming stick to watch anything, but there's a USB connection to power one so that's easy to do.

Overall the image quality is OK, but not great. The colors are off, the contrast ratio isn't great and its resolution of 1,280x800 pixels is noticeably softer than 1080p and especially 4K projectors. 

That said, it's bright and inexpensive, which is a great combination.

Check out our full review of the AAXA P6X.

Geoff Morrison/CNET

The Vimgo P10 regularly hovers around $250, and often drops even cheaper. It's a strange product, doing something right and a lot of things wrong. The image it produces is watchable, and has an impressively high contrast ratio, but the colors are flat-out atrocious. The brightness and sharpness uniformity are some of the worst I've seen, which means everything that's not dead center in the image is dimmer and softer than the middle. It also has no upwards throw, so it needs to be placed at the same height as the middle of the screen, which is, like I said, strange for an inexpensive projector. 

The biggest drawback for this list is its lack of a battery. But for the added price of an extension cord it's still cheaper than most other projectors on this list.

But for the price, it's hard to beat. But if you can spend more, you'll get more.

Check out our full review of the Vimgo P10..

Geoffrey Morrison/CNET

The AAXA P8 is tiny, like the Nebula Capsule, but rectangular to that projectors cylindricalness. It's significantly brighter than the Capsule, but it lacks that projector's battery.

Like its big brother, the P6X, the P8 doesn't have the best picture quality. However, it's inexpensive and bright, two things we like a lot. For similar money the Vimgo P10's picture quality is a little better, but that projector has its own serious drawbacks. 

All ultra-budget projectors have concessions to price, but with the P8 those concessions don't include brightness and size.

Check out our full review of the AAXA P8..

Geoffrey Morrison/CNET

The Laser 4K's claim to being portable and "outdoor" boils down to a huge handle built into its design. It lacks a battery, is quite heavy, and it's really expensive. 

It is, however, exceptionally bright. One of the brightest projectors we've ever tested. It has built-in Android TV too. It's more portable, and better suited to outdoor movie nights than, say, the Epson 5050. 

The Optoma UHZ50, the BenQ HT2050A or the Epson Home Cinema 2250 are better overall, however. They're all bright, cheaper and easily carried, though they lack a stylish handle.

Check out our review of the Anker Nebula Cosmos Laser 4K.

Four kids lay in the grass under the stars watching a movie on a small screen.
Klaus Vedfelt/GettyImages

Other products we've tested

Anker Nebula Solar Portable : The Solar's sibling, the Mars II Pro, is better. The Solar's main disadvantage compared to others on this list is its relatively dim image, which means it can't project as large a picture and still look good. If you want a sleek, budget-friendly portable with 1080p and plan on keeping the image on the small side, however, this is a solid choice. Read our Anker Nebula Solar Portable Review.

LG CineBeam PH30N : The tiny LG PH30N is only slightly larger than the AAXA P8. It's not particularly bright, however, nor does it have built-in apps. The battery doesn't last as long as the AAXA P6X although it is a bit cheaper. Read our LG CineBeam PH30N review.

Samsung Freestyle : The small, stylish, cylindrical Freestyle is an interesting idea, but it's not very bright, lacks a battery, and is quite expensive. Read our Samsung Freestyle review.

The Samsung Freestyle portable projector on a yellow background.

The Samsung Freestyle is a cool looking design but too expensive for what you get.

Geoff Morrison/CNET

Xiaomi Mi Smart Projector 2 : Is another relatively expensive small projector that could be better. You may appreciate the compact size, 1080p resolution and built-in Android TV streaming, but it's relatively dim, especially for the price. It also lacks both a built-in battery and compatibility with a USB power source, so it's not truly portable. Read our Xiaomi Mi Smart Projector 2 review.

How we test outdoor projectors

We don't treat outdoor projectors any differently, testing-wise, than any other projector. Just because a projector has the convenience of being portable doesn't mean it shouldn't perform to reasonable standards. The biggest difference is checking the performance on the battery vs. plugged in. That almost always just results in a difference in light output.

Read more: How We Test Projectors

Outdoor projector FAQs

Can any projector work outside?

Yes! Well, sort of. No projector should live outside. The humidity and temperature variations will quickly ruin a projector, just like it will with a TV. But if you plan to bring it inside after every use, something we highly recommend, you can use any projector outside.

What if my Wi-Fi doesn't reach outside?

Most phones can work as a Wi-Fi hotspot, using your cellular data instead. If you're not on an unlimited data plan, this can drain your available data however. Also consider some free, or low cost, improvements to your home's wireless network. That might extend the reach enough.

Do outdoor projectors have streaming apps? Netflix, Disney, etc?

Sometimes. Most of the projectors on this list either have full, or partial, streaming interfaces like you'd find in a modern smart TV. They might not have every streaming app, however. Netflix is pretty much a given, but beyond that, it varies. 

All the projectors on this list have an HDMI input, and all except the Capsule also have a USB connection, so you can connect any streaming stick to them and get all the apps you're used to.


Source

https://ajarana.kian.my.id/

.

4K And 8K TV Refresh Rates From 60hz To 120Hz: Everything You Should Know


4K and 8K TV refresh rates from 60hz to 120Hz: Everything you should know


4K and 8K TV refresh rates from 60hz to 120Hz: Everything you should know

Refresh rate is one of the more confusing aspects of TV technology and TV makers don't do much to explain it. In fact, they often obscure it.

Refresh rate is a number that specifies how many times per second the image on your TV changes. With most TVs it's 60, though it's rare you'll ever see a TV with that number listed. Instead, manufacturers use different technologies, such as the soap opera effect and black frame insertion, to claim a higher number. Sometimes those claims are justified, sometimes they aren't. 

Higher refresh rate claims with numbers like 120, 240 and higher are common, but not always accurate. In fact, no matter what number you see listed with a 4K TV, no 4K TV has a native panel refresh rate higher than 120Hz. As we'll explain, though, a number higher than 120Hz doesn't necessarily mean the claim is false.

Here's the basics:

  • Refresh rate is the number time times per second (written in hertz, or Hz) a TV refreshes its image.
  • Movies are almost always filmed 24 frames per second, or 24Hz. Live TV shows at 30 or 60.
  • Most TVs refresh at 60, some midrange and higher-end models at 120. Some older 1080p LCD TVs refreshed at 240Hz.
  • One benefit of a higher refresh rate is to reduce the motion blur inherent in all current TV technologies.
  • Motion blur is the softening of the image when an object, or the entire screen, is in motion.
  • Another benefit is compatibility with 120 frame-per-second signals from PlayStation 5, Xbox Series X and some video cards.
  • TV manufacturers use multiple technologies in addition to refresh rate to come up with an "effective refresh rate."
  • Effective refresh rate means the TV refreshes its image at a lower rate, but might appear to have similar motion resolution as a TV with an actual higher refresh rate.

What TV makers say

Let me start with the terms you'll see on various TV makers' marketing materials and web sites. Each one calls the TVs motion handling capability something different, and many don't even mention the term "refresh rate" or use "Hz" at all.

LG:  TruMotion

LG's web site lists the panel's native refresh rate up front. On TVs that have a 120Hz refresh rate it simply says "120Hz Native," while with 60Hz models it lists "TruMotion 120 (60Hz Native)." 

Samsung:  Motion Rate

Samsung is better than it used to be about this, albeit not as transparent as LG. The 4K TVs and 8K TVs on its site list a "Motion Rate." This is, generally, twice the native refresh rate. So Motion Rate 240 indicates a native refresh of 120Hz while Motion Rate 120 means a 60Hz refresh. In the least expensive of their TVs, a Motion Rate of 60 means a 60Hz refresh.

Sony: MotionFlow XR

For most of its 2021 TVs Sony doesn't list a number on its website, instead it just says "Motionflow XR." On some, however, it lists a number along with the native refresh: "Motionflow XR 240 (native 60 Hz)" and "Motionflow XR 960 (native 120 Hz)."

Vizio: Refresh Rate

Vizio used to list an "Effective Refresh Rate" on its web site, which was just double the native refresh rate. For 2021, however, none of its TVs use that term as far as we could find, and most don't list any refresh rate spec. The bottom line? All of Vizio's 2021 TVs are 60Hz native, except for the P-Series and the H1 OLED, which are 120Hz native.

TCL:  Clear Motion Index or Natural Motion

TCL's sets are all over the place. Some don't list any motion term -- those are 60Hz native. Some say "120Hz CMI," which stands for Clear Motion Index, but they're actually 60Hz native too. And some say Natural Motion 240, but they're 60Hz as well. The only TCL TVs that are true 120Hz say Natural Motion 480. 

For the most effective increase in motion resolution, and compatibility with next-gen gaming consoles' best video output modes, you need a native 120Hz refresh television. That said, it is possible to have some improvement in motion resolution even with a 60Hz TV if it uses some other feature, like backlight scanning or black frame insertion, that improves motion resolution. 

That's a lot of technical jargon, so let's tackle it from the beginning.

Back up a second: What's refresh rate?

Refresh rate is how often a TV changes the image (also known as a "frame") onscreen. With traditional televisions, this was 60 times each second, or "60Hz."

Some modern TVs can refresh at double this rate, or 120Hz (120 frames per second). We've covered this before, with 1080p HDTVs, and it's the same idea with 4K TVs. Certain parts of the world have TVs that refresh at 50Hz normally, with some TVs that refresh at 100Hz. That just depends on the electricity in your country. 

For the purposes of this article, 50 and 60 work the same, as do 100 and 120. For my own sanity, and ease of reading, I'm going to stick with 60 and 120, but feel free to read that as 50 and 100 if you're in the UK, Australia or any place that has 50Hz electricity. 

So are these higher refresh numbers just another "more is better!" marketing ploy? Not entirely. Higher refresh rates can reduce motion blur in LCDs and OLED TVs. 

What's motion blur? Glad you asked...

Your brain on blur

All LCD and current OLED models suffer from "motion blur." This is where anything in motion, either an object on screen or the entire image (like when the camera pans), blurs and looks softer than if it was stationary.

dolphinsharpandblur.jpg

Motion blur makes images in motion look softer than stationary ones.

Geoffrey Morrison/CNET

Interestingly, this blur is largely created by your brain. Basically, your brain notices the motion, and makes assumptions as to where that object (or overall image) is going to be in the next fraction of a second. The problem with LCD and current OLED TVs is that they hold that image there for the full 60th of a second, so your brain actually smears the motion, thinking it should be moving, when in fact it's just a series of still images.

It's actually quite fascinating, but the details are beyond the scope of this article. I recommend checking out BlurBuster's great article for more info.

The motion blur we're talking about here, despite coming from your brain, is caused by how the television works. This is separate from whatever blur the camera itself creates. 

Some people aren't bothered by motion blur. Some don't even notice it. Others, like me, do notice it and are bothered by it. Fortunately, it can be minimized. 

LG C1 OLED TV

One sure sign of a native 120Hz TV? The ability to accept a 4K/120Hz input.

David Katzmaier/CNET

Antiblurring technologies beyond refresh rate

Refresh rate itself is really only part of the solution. Just doubling the same frames doesn't actually do much for reducing motion blur. Something else is needed.

There are two main methods. The first is frame interpolation, where the TV itself creates brand-new frames that are sort of hybrids of the frame that came before, and the one that comes after. This can fool your brain enough that it doesn't blur the image. Depending how aggressive the interpolation is, however, it can lead to the soap opera effect, which makes movies look like ultra-smooth reality TV shows. Some viewers like the effect, but it's generally hated by film buffs and others who pay close attention to image quality. 

There are different levels of this processing, where a little might reduce motion blur some, and not cause undue harm to the quality of the image. Or on the other end of the "dial," it's cranked up so that there's even less motion blur, but the movement is hyper-realistic and for many, distractingly unreal. Some TVs let you choose how much of this processing gets applied to the image, others have just a single setting. More on these settings further down.

The other alternative is black frame insertion (BFI) or a scanning backlight. This is where all or part of the backlight of the TV turns off (goes black). This effectively means the image doesn't "hold" in place, so your brain doesn't blur it. Do it poorly, however, and many people will see the image flicker. The light output of the TV also drops, as it's not outputting any light for a period of time. 

Both of these techniques are what manufacturers use to come up with their "effective refresh rate" numbers. For example, a TV with a 60Hz refresh and a scanning backlight might claim to have an effective refresh rate of 120. A TV with a more elaborate BFI mode, and frame interpolation, might have a claimed effective refresh rate of "540." There's no transparency in how companies determine their "effective rate" numbers, but there is at least more consistency than there used to be.

It's also possible these features, when enabled, are bothersome over time. Some people are especially sensitive to a flickering backlight, so you might need to turn these features off. If you're concerned about that, or notice motion blur, it's best to find a TV that actually has a 120Hz refresh rate.

Bottom line (should you care?)

There are two things at play here. The first is simple, and one we've said many times before: don't trust marketing. At least, don't trust it at face value. Marketing is designed to sell you a product, not give you information about a product. That's secondary.

The second is being able to reduce motion blur. When 120Hz 1080p TVs first hit the market, they offered a noticeable improvement in motion resolution. The technology has only gotten better. 

But if you're sensitive to motion blur, or you want to get the most from your Xbox Series X or PlayStation 5, it is worth checking for a true 120Hz TV. It would be a shame to let all that extra 4K resolution go to waste due to blur. It's also worth checking reviews for measurements and subjective takes on how the TV handles motion -- that's more useful than any manufacturer-supplied spec.

Note: This article was originally published in 2015 but has been updated regularly since.  


Got a question for Geoff? First, check out all the other articles he's written on topics such as why you shouldn't buy expensive HDMI cables, TV resolutions explained, how HDR works and more.

Still have a question? Tweet at him @TechWriterGeoff, then check out his travel adventures as a digital nomad on Instagram and YouTube. He also thinks you should check out his best-selling sci-fi novel about city-sized submarines and its sequel.


Source

Tags:

Lenovo IdeaPad Yoga 2 Pro Review: A Better-than-HD Hybrid For Less


Lenovo IdeaPad Yoga 2 Pro review: A better-than-HD hybrid for less


Lenovo IdeaPad Yoga 2 Pro review: A better-than-HD hybrid for less

The all-around best-in-class example of a first-generation Windows 8 hybrid was the Lenovo IdeaPad Yoga, a clever fold-back laptop-turned-tablet that was almost universally liked in both its 13-inch and 11-inch versions (let's just not mention the 11-inch Windows RT variant). It's a tough act to follow, but the flagship for the Windows 8.1 era may well be the IdeaPad Yoga 2 Pro.

If you're not familiar with how the Yoga line works, it masquerades as an ordinary thin clamshell laptop, but the lid and display fold back a full 360 degrees to form either a thick tablet, or a stand/kiosk device when only folded partway back. That basic hook applies to both the original and updated models.

How exactly does the Yoga 2 top the original? The star of the show is an ultrahigh-res 13.3-inch display, with a native resolution of 3,200x1,800 pixels. That puts the Yoga 2 in similar territory to the Toshiba Kirabook, the MacBook Pro with Retina Display, the Chromebook Pixel, the Samsung Ativ Book 9 Plus, and a handful of others. That's an especially notable improvement, as the original Yoga had a 1,600x900-pixel display, which was not what one would expect from a modern $1,000 laptop.

Sarah Tew/CNET

The price can be a bit difficult to pin down, as Lenovo is infamous of late for offering a confusing array of preconfigured systems, many with poorly explained "coupon codes," discounting some models to what feels like what the original price should have been.

As of this writing, our Intel Core i5, 4GB RAM, 128GB solid-state drive (SSD) review unit is available for $999 both from Best Buy and from Lenovo's Web site, although the latter is technically a discount from the $1,099 list price. In any event, the specs listed above are just right for $999, if you consider the higher-than-HD resolution, slim design, and flexible tablet modes.

IdeaPad is Lenovo's line of forward-thinking consumer products, in contrast to its ThinkPad line of business laptops and tablets, so adding the superfluous "Pro" to its name is an odd choice. But despite the naming confusion, this is still a strong consumer hybrid. And like the original Yoga, the Yoga 2 scores by remembering that it's a laptop first, and doing nothing to interfere with the traditional laptop form. Adding that higher-res screen for $999 is also a price breakthrough, and makes the Yoga 2 a hard-to-ignore value.

Lenovo IdeaPad Yoga 2 Pro Samsung Ativ Book 9 Plus Apple MacBook Pro 13-inch (October 2013)
Price $999 $1,399.99 $1,499
Display size/resolution 13.3-inch, 3,200x1,800 touch screen 13.3-inch, 3,200x1,800 touch screen 13.3-inch, 2,560x1,600 screen
PC CPU 1.6GHz Intel Core i5-4200U 1.6GHz Intel Core i5-4200U 2.4GHz Intel Core i7-4850HQ
PC memory 4,096MB DDR3 SDRAM 1,600MHz 4,096MB DDR3 SDRAM 1,600MHz 8GB DDR3 SDRAM 1,600MHz
Graphics 1,792MB (shared) Intel HD Graphics 4400 1,749MB (shared) Intel HD Graphics 4400 1GB Intel Iris Graphics
Storage 128GB SSD 128GB SSD 256GB SSD
Optical drive None None None
Networking 802.11b/g/n wireless, Bluetooth 4.0 802.11b/g/n wireless, Bluetooth 4.0 802.11ac wireless, Bluetooth 4.0
Operating system Windows 8.1 (64-bit) Windows 8 (64-bit) OS X Mavericks 10.9

Design and features
If I had to go out and find a thin, light, sharp-looking ultrabook-style laptop for around $1,000, the Yoga 2 would be on my short list, along with the MacBook Air and MacBook Pro, the Samsung Book 9, the Sony Vaio Pro 13, and a few others. The Yoga 2 feels like it can stand toe-to-toe with any of those as a laptop, ignoring its shape-shifting abilities. The overall look is close to the original, but the new version is a bit thinner and lighter, with a slight taper to its previously squared-off lip.

The most apt comparison is with other better-than-HD systems, such as the MacBook Pro and Samsung Ativ Book 9 Plus. The Yoga 2 is not quite as slick or solidly built as those, but it also costs less for a similar Core i5, 128GB configuration, making it the least expensive way to get into higher-resolution mobile computing.

Sarah Tew/CNET

Hybrids and convertibles fall into two categories. Some are primarily tablets that can spend part of their time as laptoplike devices, while others are primarily laptops that can double as part-time tablets. For example, the recent Sony Vaio Tap 11 is maybe 75 percent tablet and 25 percent laptop. The Microsoft Surface Pro 2 is perhaps a 60-40 tablet/laptop. On the other hand, the Lenovo Yoga 2 is 75 percent laptop, and you'll use the other modes less frequently. Frankly, if you need something that's a full-time tablet, look elsewhere.

That's primarily because when the Yoga 2 is folded back as a slate, the keyboard is exposed, pointing out from the back of the system. Although the keyboard and touch pad are deactivated in this mode, it's still not ideal, and one of the few things people criticized about the original Yoga.

There's also the problem that spans all Windows 8 tablets, which is that Windows 8/8.1 is still not a 100 percent tablet-friendly OS, and rarely knows how to organize information efficiently in portrait mode, which is how the iPad has trained a generation of consumers to hold a tablet.

In laptop mode, however, the Yoga 2 is a joy to use. Lenovo is known for putting serious resources into keyboard R&D and usage testing, and the current design is found (with a few variations) across most of Lenovo's consumer and business laptops. It takes the standard flat-topped island-style keyboard and adds a slight curve to the bottom, which helps catch nearly missed keystrokes. The finish on the keys feels softer and the keys themselves less clacky than on the original Yoga. My only real complaint is that a shortened right Shift key has carried over from the first Yoga, and I still find it hard to get acclimated to. This new keyboard is also backlit, which is a big upgrade for people who use their laptops in dim coffee shops and commuter train cars.

The large clickpad-style touch pad is similar to the previous version, and works well with two-finger gestures, such as Web site scrolling. It's tuned a little too sensitively for my tastes, but you can tweak the settings a bit to find the right level for you.

Sarah Tew/CNET

Besides the laptop and tablet modes, you can fold the screen back about 180 degrees and put the system into what I call a kiosk mode, with the display pointing out at the audience, without a keyboard or touch pad in the way. That's helpful for presentations or playing photo slideshows and videos. You can also fold it a bit farther back and position the Yoga 2 so that it's standing up in a table-tent shape. It's technically one of the four shapes Lenovo promotes for the Yoga 2, but I can't see how that's preferable to the kiosk mode.

The real forward leap here is the move to a better-than-HD screen, with a native 3,200x1,800-pixel resolution. That's higher even than the MacBook Pro's, and equal to the resolution on the $1,500-and-up Samsung Ativ Book 9 Plus. More importantly, offering that screen at $999 (or even $929 currently for a Core i3 configuration) is amazing.

The benefits come from crisper text and more screen real estate for editing images. In the Windows 8 tile interface, you're unlikely to notice the difference unless you look closely. Like OS X, Windows 8 autoscales its icons and layout to fit any resolution. In the traditional desktop view still accessible in Windows 8, however, the very high resolution looks and feels odd on such a small screen. Icons and links will be hard to hit, and loading up Photoshop, you had better be familiar with the menu layout, or else be prepared for some hunting and pecking amid the tiny pull-down menus. As very little online video is available at resolutions higher than 1080p, it's not a huge help for that, either, even if the 4K video era is coming quickly.

Think of the higher-res IPS display as a bit of future-proofing, especially as it's turning up in more and more systems with each passing month.

Connections, performance, and battery
A few corners had to be cut somewhere for Lenovo to get this sharp design and great display in at under $1,000. There's only one USB 3.0 port (and a second USB 2.0 one), and the Wi-Fi is not of the newer 802.11ac variety. Your only built-in video output is via Micro-HDMI, and an Ethernet connection will require a sold-separately dongle.

Sarah Tew/CNET

The $999 Yoga 2 (available for this price from Best Buy, and through an artificial-feeling "coupon code" direct from Lenovo), is a decent all-around config with an Intel Core i5-4200U CPU, 4GB of RAM, and a 128GB SSD. Paying $1,399 will double the RAM to 8GB and the SSD to 256GB, and $1,499 takes it to a Core i7 CPU. Go all the way up to $1,599 and you add the final upgrade, a big 512GB SSD. Going the other way, you can trade down to a Core i3 CPU for $929, but that seems like less power than you'd want to drive the high-res display, for only a small savings.

Lenovo IdeaPad Yoga 2 Pro
Video Micro-HDMI
Audio Stereo speakers, combo headphone/microphone jack
Data 1 USB 3.0, 1 USB 2.0, SD card reader
Networking 802.11n Wi-Fi, Bluetooth
Optical drive None

Our basic Core i5 configuration performed as expected, and was closely matched with other laptops sharing this similar set of components. The real test is how it compared with other, more expensive, laptops that have similarly expansive screen resolutions. In that case, the Yoga 2 was about even to slightly slower, especially compared with the current 13-inch MacBook Pro. In our Photoshop test, the higher screen resolution may have affected performance, as the lower-res 1,600x900 original Yoga did better in that single-app test.

But a current fourth-generation Intel Core i5 CPU is more than powerful enough for everyday computing, even multitasking, and we experienced no slowdown or stuttering when using the system anecdotally. For just the base set of components, we'd expect to pay $800 or so, but keep in mind that with the Yoga 2, you also get an excellent design and build, the flexible hybrid features, and the 3,200x1,800-pixel-resolution display.

Sarah Tew/CNET

Battery life surpasses the original Yoga, partially because this system has a current-gen Intel Haswell processor, which makes great strides in battery life over the previous generation. Our other higher-res laptops have similar CPUs, so they also can be counted on to run for a long time. The 13-inch MacBook is still the undisputed champion among this group, and the excellent Samsung Ativ Book 9 Plus also ran longer, but the 7 hours and 10 minutes the Yoga 2 ran in our video playback battery drain test is still a very impressive time.

Conclusion
Interestingly, the Yoga line is undergoing a split of sorts, with some features being added to the consumer IdeaPad version, and completely different features showing up in the new business-oriented ThinkPad Yoga. In this case, the IdeaPad Yoga 2 gets the ultrahigh-res screen, but the ThinkPad Yoga gets a clever new keyboard mechanism that hides the keyboard when the system is folded flat in tablet mode.

The presence of the keyboard and touch pad under your fingers, even though they are deactivated, when holding the Yoga 2 as a tablet remains a design oddity, and the one thing many people disliked about the original Yoga. Perhaps if we all ask very nicely, we can get a future Yoga that combines the 3,200x1,800-pixel display and sleek design of the Yoga 2 with the brilliant hidden keyboard of the ThinkPad Yoga.

But if you think of the Yoga 2 as primarily a laptop that can be called on to flip and fold into new shapes to serve specific purposes, it's one of the best all-around ultrabook-style systems available, and one that adds new high-end features at a price that makes it almost irresistible.

Find more shopping tips in our laptop buying guide.

Lenovo IdeaPad Yoga 2 Pro
Windows 8.1 (64.bit); 1.6GHZ Intel Core i5-4200U; 4GB DDR3 SDRAM 1,600MHz; 1,792MB (shared) Intel HD 4400 Graphics; 128GB Samsung SSD

Samsung Ativ Book 9 Plus
Windows 8 (64-bit); 1.6GHz Intel Core i5-4200U; 4GB DDR3 SDRAM 1,600MHz; 1,749MB (shared) Intel HD Graphics 4400: 128GB SSD

Apple MacBook Pro 13-inch (October 2013)
OSX 10.9 Mavericks; 2.4GHz Intel Core i5-4258U; 8GB DDR3 SDRAM 1,600MHz; 1GB Intel Iris Graphics; 256GB Apple SSD

Toshiba Kirabook
Windows 8 (64-bit); 2GHz Intel Core i7-3667U; 8GB DDR3 SDRAM 1,600MHz; 32MB (Dedicated) Intel HD 4000; 256GB Toshiba SSD

Lenovo IdeaPad Yoga 13
Windows 8 (64-bit); 1.7GHz Intel Core i5-3317U; 4GB DDR3 SDRAM 1,600MHz; 32MB (shared) Intel HD 4000 Graphics; 128GB Samsung SSD


Source

Tags:

Search This Blog

Menu Halaman Statis

close