DJI Phantom 3

diamond price up or down

Embark on a Quest with diamond price up or down

Step into a world where the focus is keenly set on diamond price up or down. Within the confines of this article, a tapestry of references to diamond price up or down awaits your exploration. If your pursuit involves unraveling the depths of diamond price up or down, you've arrived at the perfect destination.

Our narrative unfolds with a wealth of insights surrounding diamond price up or down. This is not just a standard article; it's a curated journey into the facets and intricacies of diamond price up or down. Whether you're thirsting for comprehensive knowledge or just a glimpse into the universe of diamond price up or down, this promises to be an enriching experience.

The spotlight is firmly on diamond price up or down, and as you navigate through the text on these digital pages, you'll discover an extensive array of information centered around diamond price up or down. This is more than mere information; it's an invitation to immerse yourself in the enthralling world of diamond price up or down.

So, if you're eager to satisfy your curiosity about diamond price up or down, your journey commences here. Let's embark together on a captivating odyssey through the myriad dimensions of diamond price up or down.

Showing posts sorted by relevance for query diamond price up or down. Sort by date Show all posts

Best Ceramic Coating For 2022


Best ceramic coating for vinyl wraps best ceramic coating for cars best ceramic coating reviews best ceramic coating for boats best ceramic coating for wheels best ceramic coating spray for cars best ceramic coating for motorcycles best ceramic cookware best ceramic coating best ceramic grills

Best Ceramic Coating for 2022


Best Ceramic Coating for 2022

Listen to the hype about ceramic auto paint coatings and you might get the idea that a ceramic top coat will protect your vehicle from falling tree limbs. It won't. The best ceramic coatings will give your car or truck its best defense against settling airborne chemicals and pollutants, tree sap, road and sea salt, bird poop and the sun's harmful ultraviolet rays. They'll also deliver a gorgeous sheen that's hard to beat.

Think of ceramic coating as a harder, more protective clear coat for your paint's clear coat. It's the best, most durable way to protect your vehicle's finish, short of a full transparent film wrap, and its hydrophobic (water sheeting) properties make cleaning much, much easier. A properly applied ceramic coating can last for years.

The best ceramic coatings require differing amounts of time and energy to apply, but all require some level of sweat equity and commitment (there's a reason automotive detailing shops get big bucks to professionally apply ceramic). There's a lot of white noise about ceramic coatings and literally hundreds of products to choose from. We've waded through the hype and chosen the best OTC ceramic coatings for a variety of circumstances, purposes and commitment levels based on expert knowledge and opinion, user ratings and personal experience. Click through our best ceramic coatings to understand your options, then read on for a primer on what this amazing technology will and won't do for your vehicle and how best to use it.

CarPro

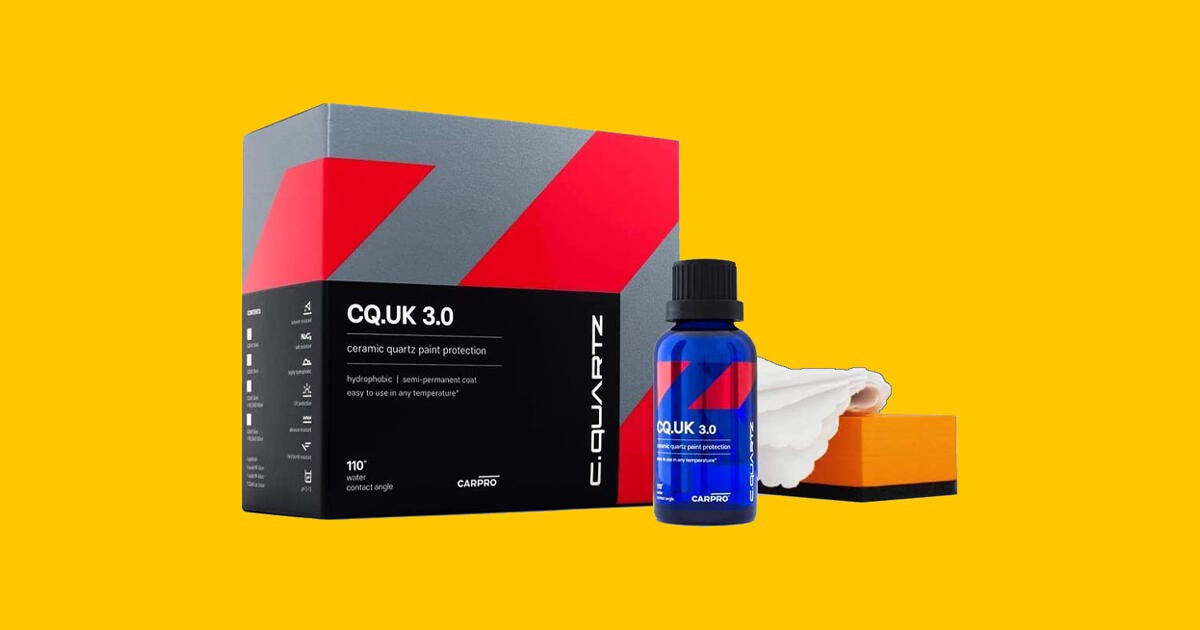
CarPro CQuartz UK 3.0 is the top over-the-counter product from a Malta-based company that pioneered automotive ceramic coatings in the early 21st century. It contains 70% silicon dioxide that's 99% pure and it leaves what might be the deepest wet-look gloss we've seen. It delivers all the durably protective properties only true ceramic coatings can.

Better still, CQuartz UK 3.0 is not terribly difficult to apply, as pro-grade ceramic coatings go. It's much less finicky about air temperature during application than other serum-type ceramic liquids (anything between 40 and 100 degrees Fahrenheit will work). Its initial hardening time is longer than most, so there's more time to spread and work. Yet it fully cures in only 60 minutes, so you can take a blast by the time you clean up. Or you can build layers during a single-day session, if you want even longer protection. CarPro projects 18 to 24 months of full hydrophobic performance for each layer applied. Every bottle is labeled with its production date and it's guaranteed to remain fully pliant for one year

In short, CarPro CQuartz UK 3.0 is the best combination of quality and ease of application we've encountered and the kit includes almost everything you need. According to users (and CarPro's own math), the included suede applicator wraps will be used up before a medium to large size vehicle is coated, so you might want to order some extras.

Nasiol

Like our best overall ceramic coating product, this kit comes from a company that has been in the ceramic coating business since the beginning. Indeed, Turkey-based Nasiol manufacturers a range of nano-ceramic protectants, including coatings for countertops, marine products, wood and clothing. The chemistry in ZR53 Nano Ceramic coating is impeccable. It goes on in one coat, delivers a rich shine and 9H hardness and should last at least three years in all conditions. The kit includes ZR53 ceramic coating, application pads, gloves, two microfiber cloths and other accessories.

So what's not to like? You'd better know what you're doing when you lay this ceramic down. It needs to go on thin and even and that's easier said than done. Trickier still, it starts to harden in as little as 20 seconds. It's imperative to work small, and quickly, because if it's not buffed before it dries, it can leave streaks or uneven clouds. And the only way this stuff is coming off is with ultra-high PH detergent you won't find at your local hardware store, or with pro-skill power wheeling and enough experience to get it without going into the paint underneath.

Mothers

How difficult is applying Mothers CMX Ceramic Spray Coating? You spray it on an applicator pad, spread it evenly, let it set about five minutes and buff it lightly with a microfiber towel. Then you let it cure for 24 hours. In other words, it goes on easier than conventional "wax on, wax off" carnauba or polymer auto coatings. While it won't last as long as more expensive (and more challenging) ceramic coatings, it will last multiples longer than most of those conventional carnaubas and polys. Or a year or so, depending on how much your car sits out in the sunlight and smog.

You can also layer CMX Ceramic Spray with two or three consecutive coats, leaving those 24 hours in between, before you ever pull the car from the garage. That will extend its durability. Either way, it will provide better hydrophobic protection than most carnaubas and poly waxes, keeping your paint safer and your car cleaner and making your car easier to wash. With application this easy there shouldn't be too much trouble finding time to shine your car once a year.

Nexgen

Nexgen Ceramic Spray can leave flecks and streaks that take some serious elbow grease to buff out. That's almost certainly because you sprayed too much on the paint to begin with. Use less, work less. The eight-ounce bottle is enough for four or five mid-size cars. Once it's on, Nexgen leaves a slick shine and something you don't get in many easy-app ceramic sprays.

That would be a whole lot more silicon dioxide in the formula and silicon dioxides are what thatch the coating molecules together and bond the ceramic to your paint. Nexgen claims it has the highest concentration of SiO2 in any over-the-counter spray; at 13%, double what many have. That should mean that its liquid-shedding, chemical protecting gloss will last longer than the typical easy-app ceramic spray.

Meguiar's

Meguiar's Hybrid Ceramic Liquid Wax is more like a conventional wax formula infused with silicon dioxides to bond the molecules and build that ceramic barrier and there's something to be said for familiarity. It goes on like conventional liquid in a circular motion and dries to a haze that you buff off. To be sure, the haze is lighter than old-school wax residue and less work to remove. It's really hard to mess this stuff up.

What's left when you're finished is a deep, mellow shine and extreme water-beading action. Moreover, the haze makes it harder to miss spots and easier to gauge even coverage and Meguiar's Hybrid will not whiten non-painted trim or rubber gaskets.

Drexler

Drexler is a relatively new, small-volume company in France that warrants some of its ceramic coatings up to 10 years. Its over-the-counter ceramic for vehicles is applied in two stages: one liquid, one spray. It's time consuming (at best) to apply, but not terribly tricky and the manufacturer offers an on-line tutorial.

What you get for the trouble is a hard 9H finish that should minimize light scratching as effectively as any ceramic coating can. It's intended to last five years or more, like many of the professionally applied, detail-shop ceramics. Drexler claims that with moderate hose pressure (say, from a low-grade pressure washer), virtually anything stuck to a Drexler-coated vehicle will rinse off without rubbing.

Weiruixin

This product originates in China and delivers pro-grade chemistry for the price of good, easy-application, consumer-grade detailing products, with applicator, towels, etc. in the package. Weiruixin claims 10H Ceramic Coating 3.0 has an industry best 10H hardness rating and remains bonded at temperatures up to 1,400 degrees Fahrenheit. It guarantees its hydrophobic properties for at least two years... or your money back.

We wouldn't want to have to chase that $25, but the indicators suggest this could be a good product for not much money, if you're willing to make it work. Experience tells us that it won't be easy to use. The thick fluid will be temperature sensitive, demanding room-temperature, no-dust application conditions and you'll have to keep your car dry and shaded for seven days for it to fully cure. If you lack pro-grade skills, better to choose something like our best cheap and easy ceramic coating. You'll be much happier with the process and maybe even with the results.

Mothers

Remember the first fundamental rule of all ceramic coatings: Surface or paint preparation matters at least as much as the coating itself. The coating simply protects and shines whatever is underneath and it will last longest when its bond with the paint is strongest.

Now, you could spend thousands of dollars or a week's worth of hard work on a full paint correction for your daily-driving 2008 Subaru Impreza. Or you could get Mothers' relatively inexpensive CMX Surface Prep. CMX Surface Prep is pH neutral and biodegradable, and it strips oil, grease, wax and other chemical residue without harming the paint-as easily as cleaning the windows. Just spray CMX Surface Prep on the paint and wipe it off. It won't do much about existing swirl marks or scratches, but it will leave a chemically spotless foundation that helps ensure maximum bonding for the ceramic coating that follows. 

Mothers

Like our best minimalist ceramic coating prep (Mothers CMX Surface Prep), CMX Ceramic 3-in-1 Polish & Coat removes grease, old wax and other chemical residue in advance of your ceramic coating application. Yet 3-in-1 adds a light polishing compound, so with a dose more elbow grease or a polishing wheel, it can also remove swirl marks, light scratches, oxidation and other imperfections in the paint.

Better still, Mothers CMX Ceramic 3-in-1 Polish & Coat includes mineral oxides like those in the ceramic coating itself, so it leaves a nice, hard gloss when you're finished. It's hardy enough to leave as it is, but it also provides a fantastic primer coat for a full ceramic coating on top. It won't deteriorate an existing ceramic coating, either, and that makes it a great refresher to invigorate and deepen a good coating that's a couple years old with less work (and cost) than starting from scratch.

Comparison of the best ceramic coatings for 2022


Product Price
Best ceramic coating overall CarPro CQuartz UK 3.0 Kit $83
Best ceramic coating for pro-skill home detailers Nasiol ZR53 Nano Ceramic Coating Kit $118
Best cheap and easy ceramic coating Mothers CMX Ceramic Spray Coating $18
Best ceramic coating for home detailing newbies Nexgen Ceramic Spray $35
Best old school/new school ceramic wax Meguiar's Hybrid Ceramic Liquid Wax $25
Best ceramic coating for off-roaders Drexler Ceramic Car Coating Kit $74
Best cheap ceramic coating for pro-skill home detailers Weiruixin 10H Ceramic Coating 3.0 Kit $25
Best minimalist prep for any ceramic coating Mothers CMX Surface Prep $13
Best stage 1 upgrade prep for any ceramic coating Mothers CMX Ceramic 3-in-1 Polish & Coat $13
Mothers

Ceramic coatings 101

Somewhere in or under your automobile, there's almost certainly some ceramic coating. Automakers have been using it for years because it's the best protective finish for a variety of parts, including wheel hubs, interior trim bits and things you'll see if you lift the hood. You just won't have ceramic coating on your vehicle's finish paint unless you put it there yourself.

Ceramic coatings can have different names -- nano ceramic, quartz or silica coatings -- and come in various forms. There are thermal sprays, dry powder coatings and wet chemical sprays or liquids. There are different auto-detailing ceramics for different surfaces like wheels, paint, windows or trim. In this report we'll focus on the paint, though some products will work on all of the above. Some of them aren't ceramic coatings in the original form. They're hybrids manufactured like more conventional auto waxes and infused with the key ingredient that makes ceramic coatings "ceramic."

That ingredient is silicon dioxide (SiO2), which bonds the coating at a molecular level to itself and the paint underneath, then cures to form a hard, hydrophobic (impenetrable to water) layer on top of the paint. The silicon dioxide is extracted from natural materials like quartz or sand. Over the years, some ceramic coating manufacturers have added titanium dioxide (Ti02) or more complex silicon compounds such as silicon nitride (Si3N4 9) and silicon carbide (SiC) to their formulae. These can increase the performance of the coating.

Any ceramic coating worth the name will have at least 5% silicon dioxide. The best consumer-grade ceramics have SiO2 concentrates in the 70-80%range, though these can also be the most difficult to apply. Professional detailers and installers typically use ceramic coatings with SiO2 concentrations between 93 and 97%. Other things equal, the higher the SiO2 percentage, the stronger and more durable the coating becomes, and the more money it costs.

In ceramic coatings, other things are rarely equal. The overall performance and price of the product is at least as important as the amount of silicon dioxide. Every ceramic coating also has polymers (more conventional bonding chemicals), glossing agents, curing compounds and or other ingredients. While most manufacturers keep their exact formula proprietary, their products must do more than protect. They must also maximize shine and make application consistent, if not necessarily easy. While the level of silicon dioxide is important to a ceramic coating's overall durability, it's not the only thing that determines a coating's overall performance, in terms of how it looks on your car and how easy or difficult it is to put there.

Meguiar's

Ceramic coatings are sometimes rated with a number before the letter H like 8H or 9H. Contrary to published claims and popular belief, this is not a rating on the Moh scale, which is used by geologists to rank mineral hardness from 1 to 10 (the surface of a copper penny is about 3.5H on the Moh scale, while a diamond is 10H). Rather, the ratings for ceramic coatings will be based on the Wolff-Wilborn Pencil Hardness Test. A pencil hardness test drags increasingly hard graphite pencils across the surface of a coating. The resultant number identifies the softest pencil that will leave a scratch on the coating. A 9H in a pencil hardness test demonstrates about the same surface hardness as the copper penny on the Moh scale, and while that's not diamond grade, it's still pretty darn hard. By pencil hardness, the standard clear coat paint on your car or truck is somewhere between 2H and 4H. That means a 9H ceramic coating is 2.25 to 4.5 times harder to scra tch.

Over-the-counter ceramic coatings are, obviously, intended for use by DIY auto detailers. In the simplest terms, application is similar to traditional automotive wax: You spread the ceramic on in some fashion and then buff it (though not necessarily off). Yet anyone who's done much automobile waxing knows the simplest terms don't fully explain the level of energy required. The best do-it-yourself ceramic coatings and the best results demand some level of sweat equity, in both surface preparation and application. The best in terms of durability or long-term protection are usually the most demanding. If you mess a high-grade ceramic coating up, it will be really, really hard to get off.

It's no coincidence that high-end detailing shops (sometimes called auto spas) have boomed in the era of ceramic coatings. The good shops know what they're doing and they can almost certainly do it better than you can. There are nonetheless a range of great consumer-grade ceramic coatings out there, suitable for everyone from raw DIY detailers to those with pro-grade skills. Those products can leave the paint on your car or truck looking gorgeous... and a you that's proud of what you accomplished, wherever you rank in the detailing-skills pecking order.

We'll get to the details of ceramic coating preparation and application shortly, but if you plan to do it yourself you need to start by gauging how much time and energy you're willing to commit. And by not overestimating your skills. And by considering what you're willing to do if it goes wrong.

First, let's get specific about the real benefits of ceramic coatings and the myths.

Nasiol

What ceramic coatings will (and won't) do

The best ceramic coatings will give your car or truck an incredible shine and probably a better shine than it's ever had before. Professional detailers and some car geeks know that shines can be different like the deep, mellow, lusty shine of perfectly applied, old-school carnauba wax or the more aggressive, wet-look shine of subsequent polymer sealants. The best ceramic coatings span a similar spectrum, but all of them will leave you looking over your shoulder and admiring as you walk away from your vehicle in a parking lot. They'll keep your car cleaner, longer and they'll make it look like you just re-waxed it every time you wash it.

At least as importantly, the best ceramic coatings will protect your car's paint better than any conventional carnauba or poly wax can. Think of any wax or sealant as a transparent sacrificial layer that can be removed or reapplied as necessary to protect the paint underneath it. Ceramic coating is just harder and less porous than more conventional waxes, so it makes it more difficult for anything that settles on the paint to penetrate or even stick. We're talking things like airborne chemicals and pollutants, overspray of any type, tree sap, bird droppings, road or sea salt or the sun's relentless UV rays. Ceramic coating is the best chemical barrier against the harmful effects of multiple substances that can damage paint and diminish its appearance over the years, even moreso if your car lives outside. It will fill the role of sacrificial layer better than any carnauba or poly was and it can do so more economically.

That's because, thanks to silicon dioxide and all that molecular bonding, ceramics stay put a lot longer. A relatively inexpensive, easy application, ceramic spray can protect for a year or so. To maintain peak performance with a traditional wax-on, wax-off carnauba or poly coat, you'll need to lay down a new layer every three or four months. The manufacturers of some more expensive ceramic liquids warranty their product for two years. (We are not weighing in on how difficult or fruitful it might be to make a claim on those warranties.) We've known consumer-grade ceramic liquids that have lasted close to five years before their hydrophobic properties start to diminish. Detailing shops in urban areas around the country, including Motor City Auto Spas in greater Detroit, will guarantee their ceramic applications five, seven or 10 years, depending on the product used.

"We'll guarantee our top product for life, if the car is relatively new, with an annual inspection and detail," says Motor City founder and CEO Matt Lifter. "Short of the annual visits we'll guarantee seven years. Not even acidic solvents like wheel or brake-dust cleaners will take it off. It's really amazing stuff."

Mothers

Ceramic coating is more durable than wax or poly in another sense because it's much harder. That means it's more resistant to light scratches or paint swirls (those spiraling curves that can develop in clear coat after years of washing). Indeed, a ceramic-coated vehicle that's washed properly (no drive-thrus) is nearly immune to paint swirls.

We emphasize "resistant" above because no ceramic coating is scratch proof, even if some to the wildest marketing hype suggests that it might be. Drag a key along a door panel on a ceramic-coated car and the panel will definitely scratch. Throw pebbles at it hard and it will nick. Bottom line: Ceramic-coated cars are still susceptible to rock chips. Some road rash is still likely to build up over the miles and years.

If your overriding goal is preventing rock chips or road rash, better look past ceramic coating. In the current state of auto protection, that would mean looking toward transparent film or "wraps."

Not up to speed on wraps? Vinyl auto wrap is a blend of polyvinylchloride and additives that make it flexible and resistant to UV light and sometimes add color. The additives are blended, dropped onto moving sheets of PVC, then baked and cured. Transparent wrap is virtually invisible on your car's paint, except for barely perceptible edges where the wrap might end and give way to unprotected paint, and it provides an actual, physical cushioning barrier between the paint and whatever the road throws at it. Good wrap will self-heal, so if a high-velocity pebble takes a divot out of the protective barrier, light and heat will actually close and smooth it again.

Drexler

Wrap will get you closer to proofing your car from scratches, rock chips or road rash than any ceramic coating can. It is also considerably more expensive than ceramic (the product) and significantly more difficult to apply. While some brave amateurs have tried, we wouldn't think about doing this ourselves.

Before we get to the process of applying ceramic, there's one more myth to address: Yes, even with the best ceramic coating, you will still have to wash your car.

We're compelled to make this point because a lot of the hype out there seems to suggest you'll never have to wash your car again. We assure you you'll have to do it less often, but dirt, road salt and other appearance-marring substances will eventually build up on the ceramic. The good news, beyond the fact that you'll wash it less, is that your ceramic coated vehicle should be much easier to wash than it was before the ceramic coating: generally no repeated rubbing back and forth over sticky, embedded stuff (which is another reason ceramic can keep swirl marks to a minimum) and usually more like a wipe and rinse. Indeed, some ceramic manufactures promise that, with proper application and sufficient water pressure, anything on your paint will rinse off without rubbing. Finally, know that washing can still leave water spots on ceramic coated cars, depending on the mineral content in your water source. Always towel dry.

On to the work at hand.

Mothers

Layin' it down

Professional-grade ceramic coatings are usually thick, almost glue-like and often require more than one step in the curing process. Consumer-grade ceramics are generally more forgiving to apply, though the most durable can be tricky. If you've browsed our best list, you've seen that there are several types of over-the-counter ceramic coatings. Even the most modestly priced, easiest-to-apply ceramics should outperform comparably priced conventional waxes when it comes to protection and longevity.

Whichever you choose, you must understand the first rule of ceramic coatings (or conventional carnauba and poly waxes, for that matter): surface or paint preparation matters at least as much as the coating itself, and more so if the paint is in poor shape to begin with. The coating simply protects and shines whatever is underneath and it will last longest when its bond with the paint is strongest. Without any prep, you're going to make those scratches or tar flecks or bits of oxidation shine for a long time.

"I'd say on average, our prep is four to five hours," says Lifter, whose Motor City Auto Spa has been doing ceramic since the early days (ed. note: that's four or five hours from efficient, well-trained techs). "It's at least two or three times more time than the actual application. Sometimes the prep can take two full days, but we can't guarantee our product without it."

You can expect a detailing shop to undertake most or all of these steps in advance of applying ceramic coating: Washing the vehicle with an appropriate detergent and sometimes a power washer; "Claying" the paint from stem to stern, or rubbing it with soft clay slabs and a lubricating fluid to remove sap, tar and other substances from the clear coat's pores; Polishing with a compound and a power pad, which can be the trickiest part depending on the age and depth of the paint, to remove swirls, scratches and oxidation; Wiping with a chemical cleaner to remove the final vestiges of dust, grit, waxes or grease.

Mothers

Now, you can do all those things yourself, if you have the inclination and fortitude and the time. It's always worth it, even on a beater with decent paint. You have to decide what you're willing to try. If it's your baby, which only leaves the garage on nice days for car meets or weekend blasts, you probably need to suck it up and try the full Cleveland. It will pay big in the final results. If it's a car you use for track days or the 10-year-old Civic that gets you reliably and satisfyingly to work and the paint still looks good, you can get away with a clay and chemical wash.

If you lean toward the less-work end of the prep spectrum, we urge you to at least undertake the chemical wash (after a good water wash). Using a product like Mothers CMX Surface Prep is essentially like washing windows. You spray it on and wipe it off, and it leaves a squeaky, chemical-free foundation that will ensure a solid bond between the ceramic and the paint. If you're up to a little more elbow grease or have an easy oscillating buffer, try something like Mothers 3-in-1 Prep & Coat. It adds a light polishing compound, so the extra rubbing will take care of a lot of the swirls and light scratches and leave a nice, polished finish.

Given the steps in proper preparation, you might surmise that the best time to apply ceramic coating is when a car is brand new or nearly so. You'd be correct. New cars (for lack of wear) require the least amount of paint correction. Detail shops will often guarantee their ceramic coatings longest when they're applied to new vehicles. If your car is already a few years old, you've got what you got. Just remember that your final ceramic-coating results will be directly related to how well the paint is prepped.

When it's time to actually apply the coating, follow these general rules. Do not apply in direct sunlight, or to paint that's hot to the touch. Do it in a garage, if there is enough light, or borrow one of those cheap outdoor canopies, if that's the next best option. Zero dust is best, and nearly impossible to achieve short of full climate-control conditions, but keep that objective in mind as you set up to start coating. An ambient temperature of about 70 F is ideal; your specific product's instructions will give you a range of acceptable application temps.

Definitely read those instructions and watch the videos on your product manufacturer's website (if available). Time spent now will be time saved during the application, and it will likely improve the end results.

Mothers

Ceramic liquids are invariably what the pros use and typically have the highest silicon-dioxide concentration in consumer-grade coatings. Most come in kits with an applicator sponge and soft cloths to wrap it. Some come with microfiber towels for buffing. It never hurts to have extra application clothes.

To start, you'll wrap the applicator with one of the clothes and spot it with the ceramic coating, sometimes as little as several drops. Working in small areas, spread the coating as evenly as possible. Your product will have its own recommendation on "small," but it's not going to be more than two feet square. Over the next few minutes, depending on the product, the moisture in the ceramic will evaporate to a point where the surface gets a gleaming, almost oily look (sometimes called flashing). That's when you buff with a microfiber towel. When you're happy with what you see, start a new section.

Too little product will be better than too much. The typical 50 ml bottle of ceramic liquid can be enough for multiple cars and too much on the surface is a frequent cause of bad results. Change the applicator cloth and the polishing rags frequently, because if the coating hardens on the rags, it can definitely scratch the paint. If you have any hope of reusing the rags or applicators, throw them in a bucket of water to keep the ceramic from setting until you can wash them thoroughly.

Once you've made your way around your vehicle, leave it sitting out of the sun (and the rain) for as long as it takes for the ceramic to cure. Your product instructions will tell you specifically. Touch contact is typically allowed in 60 minutes to six hours. Liquid contact usually requires at least 24 hours, though it can take up to seven days.

Nasiol

"You've got to make sure the prep is good, but we already said that," veteran ceramic pro Lifter reminds home detailers. "Stay small [in the application area] as you progress, and don't think because you've successfully applied a couple small patches you can expand to bigger sections. Staying small is the best way to avoid high spots. We've had a few customers bring us messes because they lost track of that idea."

The worst-case outcome with consumer grade ceramic liquids is relatively rare, but it happens. It's usually the result of too much product applied in too big an area for the workable set time and is an uneven mess of ridges and cloudy high spots on the paint that is really, really hard to get off. Remember that this stuff is designed to last for years. The only options are looking at the mess every time you get in your car for years, or heading to a good detail or body shop, where a pro-skill polisher might get it off without wrecking the paint. That's going to cost you as much or more than what you hoped to save by applying the ceramic coating yourself.

If you're not willing to accept that risk, we suggest at least starting with one of our relatively inexpensive best ceramic sprays. The general rules are the same: Use it in the best conditions you can create, use less than you might think you need and work small. Thanks to the viscosity of the sprays, which sometimes include lubricants, and to the way they set up, they're loads more forgiving than most liquids. And they're easy enough that you can apply two or three layers in short order, as long as you respect the cure time.

Finally, whichever product you use, don't neglect your health and safety. These products are industrial-grade chemicals. You definitely want to avoid sucking the vapors into your lungs and you want to keep the liquid off your skin. Work in a well-ventilated space and wear a ventilator or a chemical mask (we should be used to masks by now). Definitely wear gloves (many kits include them); it's not a bad idea to wear a long-sleeve shirt, too.

Mothers

Are you ready?

There might be a couple big-picture questions to ponder before you tear into this ceramic coating thing. If you own multiple vehicles, which do you most want to protect as best you can? How much money do you have to spend on your cars?

If the answer to that second question is as much as you need to spend, have ceramic coating professionally applied. Or maybe think about a full wrap with transparent film. It will cost more than pro-applied ceramic, but it has advantages, as previously noted.

If you only have as much money to protect your paint as you can get away with, think creatively. Maybe you pay the pros for a limited wrap (say the front fascia, door sills and rear fender bulges) and put ceramic on everything including the wrap yourself. That might be your most efficient use of resources. Or maybe you just take a nice day and apply a relatively inexpensive ceramic spray.

Unless you have the full inventory of tools, climate-controlled car space, the right skills, years of experience and a lot of time, you will not get the same results and durability as a professional establishment applying high-grade ceramic coatings. What you can get is an awesome gloss that protects much better and lasts years longer than conventional carnauba or polymer auto waxes, for up to thousands less than you might pay the pros.

That's not bad at all.

Written by J.P. Vettraino for CNET Cars.

More car cleaning recommendations

Ceramic coating FAQs

What is ceramic coating and is it worth it?

Ceramic coatings, sometimes called nano-ceramic, quartz or silica coatings, were developed in the early part of the 21st century. They're applied to automobiles in very generally the same fashion as old-school liquid or paste waxes: spread on and buff. They universally contain silicon dioxide (SiO2), derived from quartz or sand. Over the years, some manufacturers have added other mineral compounds, including titanium dioxide (Ti02) or more complex silicon compounds such as silicon nitride (Si3N4 9) and silicon carbide (SiC). These compounds bond the coating at a molecular level to itself and the paint underneath, then cure to form a hard, hydrophobic layer on the paint. It's the primary reason ceramic coatings last.

Worth it? Loaded question, but yes, ceramic coatings are worth it. The least expensive consumer-grade ceramics don't cost much more than traditional waxes and don't take any longer to apply. Properly done, they'll work better and last longer.

How much does a ceramic coating cost?

It can be $1,000 or more when it's professionally applied by product-certified auto detailers. Consumer-grade ceramics can cost in excess of $100 for top-grade durability and performance and can be tricky to apply. Ultimate results are directly related to cost or time and energy invested, yet even the least expensive, easiest-to-apply ceramics (about $20) should out-perform conventional wax of a similar price.

Is ceramic coating easy to apply?

Yes, and no. Generally, the most protective and durable ceramic coatings are the most difficult or time consuming to apply and the trickiest. Experienced do-it yourself detailers shouldn't have too much trouble with any of them, but it takes work and occasionally disasters ensue. Easy ceramic sprays or hybrids are easier than traditional wax-on, wax-off sealants to apply. They'll shine at least as well as the conventional waxes, protect better and last longer.

Just remember: the ceramic coating will only shine and protect whatever is underneath it, so you can end up with some really shiny scratches and tar flecks. Final appearance and durability are directly related to the amount of paint prep that precedes the actual coating. If your paint is in reasonably good shape, we at least recommend a spay-and-wipe prep solution, which will remove old wax and chemical residue and ensure a solid foundation that maximizes the bond between the coating and paint.

How do I maintain a ceramic-coated car?

You wash it, until the coating's hydrophobic properties start to wane and that can be years. Washing will be easier than ever: You won't have to wash your vehicle as often as you did before the ceramic coating and you shouldn't need strong detergents. Ceramic coatings work partly because far fewer substances stick to them than to old-school carnauba or polymer waxes, sort of like Teflon on a frying pan. Those substances that do settle are much more easily removed.

You can use a wash detergent that's intended for ceramic coatings, or a spray refresher on the paint as you dry. Both can extend the life of the coating itself. Either way, your vehicle will look like you just polished it when you're done. You definitely don't need to wax it once the ceramic is applied. The ceramic coating replaces wax and provides all the gloss and protection you need.

How long does ceramic coating last?

Longer than conventional wax, in the worst case. Some professional auto detailers will guarantee their ceramic coatings for the life of the car. Pro-style consumer-grade ceramics can last five years or more, properly applied. Some manufacturers guarantee these for two or three years. The easiest spray-on ceramic coatings can last a year or so, depending on whether the vehicle lives outside and they're easily layered for more durability. Conventional carnauba or poly waxes typically need to be applied every three or four months.


Source

GoPro HD Hero2 Review: GoPro HD Hero2


Gopro hd hero 2 review gopro hd2 gopro hd hero 2 review gopro hd gopro hd hero 2 review gopro cameras gopro hd hero 2 review gopro 8 gopro hd hero 2 review gopro gopro hd hero 2 gopro hdmi cable
GoPro HD Hero2 review: GoPro HD Hero2


GoPro HD Hero2 review: GoPro HD Hero2

I've had a bit of a love-hate relationship with the GoPro HD Hero that we've used during the recording of the Car Tech Live podcast for the last year or so. On the one hand, the Hero takes phenomenal wide-angle video, is ridiculously durable thanks to its polycarbonate shell, and (when you get the settings right) relatively easy to use. However, that last bit is also my biggest point of contention with the first few generations of the GoPro Hero cameras; I'm a self-proclaimed techie who's recorded hours of footage using the HD Hero and I still have to break out the poorly written instruction sheet to change any of the settings. More often than not, I just leave the settings where I left them and just point and shoot.

So, when the new generation GoPro HD Hero2 landed on my desk boasting an improved interface, I decided to challenge myself to full-test the device without cracking the spine on its (also improved) 90-page user manual.

Old design with a twist
Looking at the GoPro HD Hero2 side by side with the original HD Hero (hereafter referred to as the HD Hero1), reveals remarkably little change in the unit's form factor. Both units are dimensionally identical and feature the same lens, power button, shutter button, and LCD screen placement. This means that any waterproof cases or lens covers purchased for the HD Hero1 will still work with the HD Hero2, which is a good thing for GoPro devotees. Likewise, both units feature the same rear hook and connection port for GoPro's line of removable BacPacs, which we'll discuss later.

Closer inspection reveals that there's more than the addition of the number 2 to distinguish the new model from the old. For starters, the Hero2 features a new glass lens that should be sharper and more durable than the old lens. Where the Hero1 featured only one red recording indicator LED, the Hero2 features four (one enlarged indicator on the front of the unit and smaller lights on its top, back, and bottom edges). On the right edge (when viewed from the front) are the connections for the proprietary video output, the Mini-USB port for charging, and a 2.5mm microphone input. Thankfully, these three connections are actually labeled this go-round. On the left edge are the full-size SD card slot and a new HDMI video output. Onboard microphones are now located on the top and bottom edges of the unit. Finally, the rear panel is where you'll find the battery door that covers the user-replaceable 1,100mAh lithium ion battery.

I mentioned that the HD Hero2 ships with the same waterproof housing as the Hero1. For those unfamiliar with this housing, it's a clear, polycarbonate shell that holds the Hero camera to whatever mounting option you chose to use. Spring-loaded waterproof buttons give users access to the selection and shutter buttons and a clear lens bubble protects the HD Hero2's lens from scratches. In the event that this bubble is damaged, a replacement can be ordered and affixed with a small screwdriver. At the back of the shell is door that locks shut with a plastic latching clamp. (The plastic latch on our HD Hero1 busted after only a few weeks of use, so this bit worries me. Fortunately, it's a relatively simple fix.) Users are given the choice between two easily swappable doors that ship with the HD Hero2. The first is a sealed waterproof door that keeps the camera dry, even when submerged to a depth of 197 feet. The second door is a "skeleton door" with openings that sacrifice waterproofing f or increased sound quality.

The mounting options included in the box will depend on which HD Hero2 kit you pick up. The Motorsports Edition, for example, ships with a suction cup mount on an articulated arm and five adhesive mounts. The Surf Edition packs a pair of surfboard mounts and a special "Floaty" back door that will keep your camera from sinking to the bottom of the ocean in the event of a detachment. Finally, the Outdoor Edition includes a helmet strap, a head strap, and a selection of adhesive mounts. Additionally, additional mounts for handlebars, roll bars, chest straps, etc. are available from the manufacturer for additional cost.

Same screen, new interface
Of all of the changes to the HD Hero, the most drastic is the overhauled interface present on the tiny monochromatic LCD. For starters the HD Hero2 uses larger, bolder icons for identifying the current recording mode. So tapping the selection button on the front of the unit fills the screen momentarily with a large icon for the newly selected mode that is easier to read with goggles on or at an arm's length. When the moment is passed, the screen returns to its default state with a smaller icon indicating the mode and a new text-based setting identifier. So rather than memorizing that "R7" is 1080p video at 30 fps, the unit simply displays "1080-30," which is much easier to decode. Likewise, photo modes are clearly identified with, for example, "5 MP 0.5 sec" which can easily be identified as "take a 5 megapixel shot every half second."

Likewise, the menu system has also been made clearer, with more easily identified icons for each setting that leads to a drop-down menu where the different options can be viewed clearly. Navigating the GoPro's many options with just the select and shutter buttons is still an exercise in patience. For example, setting the date to 11:11am on 11/11/11 can take as many as 60 or more button presses. (Fortunately, the date is something you should only really have to set once.) That's an extreme example, but even simpler tasks (such as changing the video or still-photo resolution) can take as many as 10 button presses.

On the bright side, the fact that the GoPro HD Hero2 even offers granular access to all of its settings right on the camera is an advantage that it holds over simpler camera systems, such as Contour's.

There are still a few icons that don't make much sense. (I doubt many can tell me what this icon means without first checking the manual.) However, the important bits--changing the resolution of photos and video, setting time-lapse intervals--and the options that you're likely to find yourself wanting to fiddle with before bombing down that double-black-diamond slope are extremely easy to understand.

I started the review with the intention of never cracking open the GoPro HD Hero2's instruction manual and I'm pleased to state that I didn't need to use it. (Although, I did flip through the manual and found that it is both more thoroughly written and better organized than the old sheet. So if you do find yourself needing help, it's a great resource.)

Recording modes
So, we've discussed the chassis and we've explained that it's easy to use, but what sort of video and photos can you expect to get out of this camera?

Like the Hero1, the HD Hero2 features a wide range of video and photo modes to chose from. Where moving images are concerned, the HD Hero2's highest recording resolution is 1,920x1,080 pixels (1080p for short) Full HD video at 30 frames per second (fps) with a wide-screen 16:9 aspect ratio. Users can also select a 1,280x720-pixel (720p) wide-screen mode with options to capture at 30 or 60 fps. There's also 1,280x960-pixel Tall HD mode that records at a 4:3 aspect ratio with options to capture at either 30 or 48 fps. Finally, there are the 800×480-pixel (480p or WVGA) modes that capture relatively low-resolution video but at high 60 or 120 fps speeds, which can be slowed down using software to create slow-motion video.

Most video modes capture at the lens' full 170-degree wide-angle field of view (FOV), but users can choose to step down to medium 128-degree or narrow 90-degree FOVs. To my eye, 1080p video captured at these narrower FOVs appears to be grainier with visible pixelation, which leads me to believe that GoPro is using some sort of digital zoom technology to compensate for the lens' fixed focal length. This likely won't bother many, particularly at the medium FOV, but I couldn't unsee the image degradations once I'd noticed them and stuck with the full wide FOV for most videos captured after the official testing had concluded.

Still photos are captured at a maximum of 11MP with space-saving 8MP and 5 MP modes also available. Like the video mode, still photos take advantage of the full 170-degree FOV, but can be set to capture at a medium 128-degree FOV. (The narrow FOV is unavailable for still photos, presumably because the digital zoom artifacts would be too visible in a still shot, but that's just speculation.) Photos taken outdoors at the full resolution with full FOV are sharp and pleasing. The wide angle makes framing shots easy, but without the aid of the optional LCD BacPac, shot composition is a bit of a guess-and-check affair.

When shooting still photos, there are a few trigger modes to choose from. The first is a single shot. Press the button, capture a photo. It's the simplest of the available modes. Next is a self-time mode that captures a single shot after a 10-second delay. The next mode is one of my favorites: Time-lapse mode continuously captures a still photo at timed 60s, 30s, 10s, 5s, 2s, 1s, and 0.5s intervals. (Note: The fastest interval of 0.5s requires a high-speed Class 10 SD card to keep up.) Users can then stitch those photos together into a cool time-lapse video that compresses hours of actions into minutes of video.

Finally, the HD Hero2 gains a new trick made possible by its new faster digital image processor called Photo Burst Mode. In this mode, the camera can capture 10 full-resolution 11MP photos within the span of a single second. Personally, I found timing the Burst to be tricky, particularly because there's a few seconds of lag after a burst is captured while the HD Hero2 writes the contents of its buffer to the SD card. However, with practice this could be another cool tool in your GoPro toolbox.

In sum
About the only think that I didn't like about the previous-generation GoPro HD Hero was that maddeningly difficult interface. And while in my opinion GoPro still hasn't perfected its menu structure and usability, it's gotten pretty damn close within its self-imposed constraints (two-button interface, maintaining compatibility with older hardware). GoPro also states that its low-light image quality has been improved between the two generations, which you can see yourself by comparing the indoor photos below. There's no question in my mind that this is the best GoPro camera yet.

But is it the best HD sports camera? To figure that out, we have to compare it to its most fierce competitors from Contour's lineup, particularly the ContourGPS. (Contour's top tier Contour+ is significantly more expensive, so we're leaving it out of the running for now, but many of the same points I'm about to make will still apply.)

Ease of use is a tie. Both camera systems excel here in different ways. The Contour camera's supersimple slide-and-record interface and laser-pointer aiming makes it easier for first-time users to pick up and shoot with. However, the GoPro HD Hero2 excels where on-device flexibility is concerned. If you're, for example, trackside with the Hero2 and you want to switch capture modes, every still and video setting is available right there on the device itself. The ContourGPS features two user presets that can be selected with the flip of a switch, but if neither of those is what you need at the moment, then you'll need to fire up the Contour smartphone app or bust out your laptop to pick a new preset. Additionally, the Contour cameras give no visual indication of what mode they're in, where the GoPro always displays its capture mode on a display. Trust me, there's nothing worse than getting back from a full day of recording with an SD card full of photos when you wanted videos. To the p oint, users who enjoy constantly fiddling with settings on the fly will prefer the GoPro, but if you're the kind of person who sets up the camera once and never changes modes, perhaps the Contour cameras are a better fit.

One place where Contour has the GoPro system beaten is where applications are concerned. Contour's included desktop editing and uploading software makes it easy to cut the good part out of a long video. Conversely, GoPro's experience is a B.Y.O.-software affair. Contour's top-tier models also capture GPS position, speed, and elevation data that can then be displayed alongside an uploaded video. GoPro does not, but if you don't mind spending a few extra bucks, the GoPro system can be upgraded with longer battery life, an LCD display, or the ability to capture 3D video thanks to its BacPac system.

The GoPro has the Contour cameras flatly beat on ruggedness. The Contour+ and ContourGPS require an additional purchase of a waterproof housing to match the GoPro in the wet. The entry-level ContourRoam is waterproof out of the box, but not nearly to the same depth as the GoPro. And if the HD Hero2 and the ContourGPS fell off of the same car at speed, the GoPro camera would definitely fare better. When you're talking about action cameras, durability is a top-tier attribute.

Deciding which camera system is best is truly a tough decision, and depending on your particular needs, you may disagree with me. At $299, the GoPro HD Hero2 is a slightly better buy than the ContourGPS, which is the same price--provided that the collection of GPS metadata isn't one of your top priorities. The learning curve is slightly steeper (and only just barely thanks to the upgraded interface), but once you're over it, the GoPro HD Hero2 is a much more flexible and durable device.


Source

GoPro HD Hero2 Review: GoPro HD Hero2


Gopro hd hero 2 review gopro hd hero2 motorsports gopro hd hero 2 review gopro hd 1080p gopro hd hero 2 review gopro 10 gopro hd hero 2 review gopro 6 gopro hd hero 2008 gopro hd hero 2 price best gopro hd cameras videos gopro hd motorsports hero gopro hdr
GoPro HD Hero2 review: GoPro HD Hero2


GoPro HD Hero2 review: GoPro HD Hero2

I've had a bit of a love-hate relationship with the GoPro HD Hero that we've used during the recording of the Car Tech Live podcast for the last year or so. On the one hand, the Hero takes phenomenal wide-angle video, is ridiculously durable thanks to its polycarbonate shell, and (when you get the settings right) relatively easy to use. However, that last bit is also my biggest point of contention with the first few generations of the GoPro Hero cameras; I'm a self-proclaimed techie who's recorded hours of footage using the HD Hero and I still have to break out the poorly written instruction sheet to change any of the settings. More often than not, I just leave the settings where I left them and just point and shoot.

So, when the new generation GoPro HD Hero2 landed on my desk boasting an improved interface, I decided to challenge myself to full-test the device without cracking the spine on its (also improved) 90-page user manual.

Old design with a twist
Looking at the GoPro HD Hero2 side by side with the original HD Hero (hereafter referred to as the HD Hero1), reveals remarkably little change in the unit's form factor. Both units are dimensionally identical and feature the same lens, power button, shutter button, and LCD screen placement. This means that any waterproof cases or lens covers purchased for the HD Hero1 will still work with the HD Hero2, which is a good thing for GoPro devotees. Likewise, both units feature the same rear hook and connection port for GoPro's line of removable BacPacs, which we'll discuss later.

Closer inspection reveals that there's more than the addition of the number 2 to distinguish the new model from the old. For starters, the Hero2 features a new glass lens that should be sharper and more durable than the old lens. Where the Hero1 featured only one red recording indicator LED, the Hero2 features four (one enlarged indicator on the front of the unit and smaller lights on its top, back, and bottom edges). On the right edge (when viewed from the front) are the connections for the proprietary video output, the Mini-USB port for charging, and a 2.5mm microphone input. Thankfully, these three connections are actually labeled this go-round. On the left edge are the full-size SD card slot and a new HDMI video output. Onboard microphones are now located on the top and bottom edges of the unit. Finally, the rear panel is where you'll find the battery door that covers the user-replaceable 1,100mAh lithium ion battery.

I mentioned that the HD Hero2 ships with the same waterproof housing as the Hero1. For those unfamiliar with this housing, it's a clear, polycarbonate shell that holds the Hero camera to whatever mounting option you chose to use. Spring-loaded waterproof buttons give users access to the selection and shutter buttons and a clear lens bubble protects the HD Hero2's lens from scratches. In the event that this bubble is damaged, a replacement can be ordered and affixed with a small screwdriver. At the back of the shell is door that locks shut with a plastic latching clamp. (The plastic latch on our HD Hero1 busted after only a few weeks of use, so this bit worries me. Fortunately, it's a relatively simple fix.) Users are given the choice between two easily swappable doors that ship with the HD Hero2. The first is a sealed waterproof door that keeps the camera dry, even when submerged to a depth of 197 feet. The second door is a "skeleton door" with openings that sacrifice waterproofing f or increased sound quality.

The mounting options included in the box will depend on which HD Hero2 kit you pick up. The Motorsports Edition, for example, ships with a suction cup mount on an articulated arm and five adhesive mounts. The Surf Edition packs a pair of surfboard mounts and a special "Floaty" back door that will keep your camera from sinking to the bottom of the ocean in the event of a detachment. Finally, the Outdoor Edition includes a helmet strap, a head strap, and a selection of adhesive mounts. Additionally, additional mounts for handlebars, roll bars, chest straps, etc. are available from the manufacturer for additional cost.

Same screen, new interface
Of all of the changes to the HD Hero, the most drastic is the overhauled interface present on the tiny monochromatic LCD. For starters the HD Hero2 uses larger, bolder icons for identifying the current recording mode. So tapping the selection button on the front of the unit fills the screen momentarily with a large icon for the newly selected mode that is easier to read with goggles on or at an arm's length. When the moment is passed, the screen returns to its default state with a smaller icon indicating the mode and a new text-based setting identifier. So rather than memorizing that "R7" is 1080p video at 30 fps, the unit simply displays "1080-30," which is much easier to decode. Likewise, photo modes are clearly identified with, for example, "5 MP 0.5 sec" which can easily be identified as "take a 5 megapixel shot every half second."

Likewise, the menu system has also been made clearer, with more easily identified icons for each setting that leads to a drop-down menu where the different options can be viewed clearly. Navigating the GoPro's many options with just the select and shutter buttons is still an exercise in patience. For example, setting the date to 11:11am on 11/11/11 can take as many as 60 or more button presses. (Fortunately, the date is something you should only really have to set once.) That's an extreme example, but even simpler tasks (such as changing the video or still-photo resolution) can take as many as 10 button presses.

On the bright side, the fact that the GoPro HD Hero2 even offers granular access to all of its settings right on the camera is an advantage that it holds over simpler camera systems, such as Contour's.

There are still a few icons that don't make much sense. (I doubt many can tell me what this icon means without first checking the manual.) However, the important bits--changing the resolution of photos and video, setting time-lapse intervals--and the options that you're likely to find yourself wanting to fiddle with before bombing down that double-black-diamond slope are extremely easy to understand.

I started the review with the intention of never cracking open the GoPro HD Hero2's instruction manual and I'm pleased to state that I didn't need to use it. (Although, I did flip through the manual and found that it is both more thoroughly written and better organized than the old sheet. So if you do find yourself needing help, it's a great resource.)

Recording modes
So, we've discussed the chassis and we've explained that it's easy to use, but what sort of video and photos can you expect to get out of this camera?

Like the Hero1, the HD Hero2 features a wide range of video and photo modes to chose from. Where moving images are concerned, the HD Hero2's highest recording resolution is 1,920x1,080 pixels (1080p for short) Full HD video at 30 frames per second (fps) with a wide-screen 16:9 aspect ratio. Users can also select a 1,280x720-pixel (720p) wide-screen mode with options to capture at 30 or 60 fps. There's also 1,280x960-pixel Tall HD mode that records at a 4:3 aspect ratio with options to capture at either 30 or 48 fps. Finally, there are the 800×480-pixel (480p or WVGA) modes that capture relatively low-resolution video but at high 60 or 120 fps speeds, which can be slowed down using software to create slow-motion video.

Most video modes capture at the lens' full 170-degree wide-angle field of view (FOV), but users can choose to step down to medium 128-degree or narrow 90-degree FOVs. To my eye, 1080p video captured at these narrower FOVs appears to be grainier with visible pixelation, which leads me to believe that GoPro is using some sort of digital zoom technology to compensate for the lens' fixed focal length. This likely won't bother many, particularly at the medium FOV, but I couldn't unsee the image degradations once I'd noticed them and stuck with the full wide FOV for most videos captured after the official testing had concluded.

Still photos are captured at a maximum of 11MP with space-saving 8MP and 5 MP modes also available. Like the video mode, still photos take advantage of the full 170-degree FOV, but can be set to capture at a medium 128-degree FOV. (The narrow FOV is unavailable for still photos, presumably because the digital zoom artifacts would be too visible in a still shot, but that's just speculation.) Photos taken outdoors at the full resolution with full FOV are sharp and pleasing. The wide angle makes framing shots easy, but without the aid of the optional LCD BacPac, shot composition is a bit of a guess-and-check affair.

When shooting still photos, there are a few trigger modes to choose from. The first is a single shot. Press the button, capture a photo. It's the simplest of the available modes. Next is a self-time mode that captures a single shot after a 10-second delay. The next mode is one of my favorites: Time-lapse mode continuously captures a still photo at timed 60s, 30s, 10s, 5s, 2s, 1s, and 0.5s intervals. (Note: The fastest interval of 0.5s requires a high-speed Class 10 SD card to keep up.) Users can then stitch those photos together into a cool time-lapse video that compresses hours of actions into minutes of video.

Finally, the HD Hero2 gains a new trick made possible by its new faster digital image processor called Photo Burst Mode. In this mode, the camera can capture 10 full-resolution 11MP photos within the span of a single second. Personally, I found timing the Burst to be tricky, particularly because there's a few seconds of lag after a burst is captured while the HD Hero2 writes the contents of its buffer to the SD card. However, with practice this could be another cool tool in your GoPro toolbox.

In sum
About the only think that I didn't like about the previous-generation GoPro HD Hero was that maddeningly difficult interface. And while in my opinion GoPro still hasn't perfected its menu structure and usability, it's gotten pretty damn close within its self-imposed constraints (two-button interface, maintaining compatibility with older hardware). GoPro also states that its low-light image quality has been improved between the two generations, which you can see yourself by comparing the indoor photos below. There's no question in my mind that this is the best GoPro camera yet.

But is it the best HD sports camera? To figure that out, we have to compare it to its most fierce competitors from Contour's lineup, particularly the ContourGPS. (Contour's top tier Contour+ is significantly more expensive, so we're leaving it out of the running for now, but many of the same points I'm about to make will still apply.)

Ease of use is a tie. Both camera systems excel here in different ways. The Contour camera's supersimple slide-and-record interface and laser-pointer aiming makes it easier for first-time users to pick up and shoot with. However, the GoPro HD Hero2 excels where on-device flexibility is concerned. If you're, for example, trackside with the Hero2 and you want to switch capture modes, every still and video setting is available right there on the device itself. The ContourGPS features two user presets that can be selected with the flip of a switch, but if neither of those is what you need at the moment, then you'll need to fire up the Contour smartphone app or bust out your laptop to pick a new preset. Additionally, the Contour cameras give no visual indication of what mode they're in, where the GoPro always displays its capture mode on a display. Trust me, there's nothing worse than getting back from a full day of recording with an SD card full of photos when you wanted videos. To the p oint, users who enjoy constantly fiddling with settings on the fly will prefer the GoPro, but if you're the kind of person who sets up the camera once and never changes modes, perhaps the Contour cameras are a better fit.

One place where Contour has the GoPro system beaten is where applications are concerned. Contour's included desktop editing and uploading software makes it easy to cut the good part out of a long video. Conversely, GoPro's experience is a B.Y.O.-software affair. Contour's top-tier models also capture GPS position, speed, and elevation data that can then be displayed alongside an uploaded video. GoPro does not, but if you don't mind spending a few extra bucks, the GoPro system can be upgraded with longer battery life, an LCD display, or the ability to capture 3D video thanks to its BacPac system.

The GoPro has the Contour cameras flatly beat on ruggedness. The Contour+ and ContourGPS require an additional purchase of a waterproof housing to match the GoPro in the wet. The entry-level ContourRoam is waterproof out of the box, but not nearly to the same depth as the GoPro. And if the HD Hero2 and the ContourGPS fell off of the same car at speed, the GoPro camera would definitely fare better. When you're talking about action cameras, durability is a top-tier attribute.

Deciding which camera system is best is truly a tough decision, and depending on your particular needs, you may disagree with me. At $299, the GoPro HD Hero2 is a slightly better buy than the ContourGPS, which is the same price--provided that the collection of GPS metadata isn't one of your top priorities. The learning curve is slightly steeper (and only just barely thanks to the upgraded interface), but once you're over it, the GoPro HD Hero2 is a much more flexible and durable device.


Source

2022 Bentley Flying Spur Hybrid Review: Your Mileage Will Vary


2022 Bentley Flying Spur Hybrid Review: Your Mileage Will Vary


2022 Bentley Flying Spur Hybrid Review: Your Mileage Will Vary

Six-figure ultra-luxe sedans are usually perfect from top to bottom. Every detail is painstakingly pored over and the result is something that feels like it was born from a book of Victorian poetry. But when these pillars of perfection butt up against the specter of zero-emissions mandates and regulations, the result is something that feels like it's still a few hours of climbing away from the top of the mountain. Such is the case with the 2022 Bentley Flying Spur Hybrid.

The great

First impressions always matter, and the Flying Spur Hybrid makes one hell of a splash. A sedan this large stands out everywhere, even in my tester's normcore white paint. When the sun lands at the right angles, the brightwork in the grille and on the Flying B hood ornament can be seen from space, and that light also brings out the impressively strong body lines above both wheels. If you want something flashier, go for it -- as my esteemed colleague notes in his first drive, there are 56 billion different ways to configure this car -- but even a subtle spec like this one still leaves its mark.

By comparison, the Flying Spur Hybrid's interior is anything but subtle. My tester includes the Odyssean Edition specification, a $50,050 (!!!) package that ramps up the visual drama with a leather headliner, diamond quilting on the seats, 3D diamond leather on the door panels and some outright stunning open-pore Hawaiian Koa wood trim.

Every single millimeter of material is carefully executed, and the result is the best automotive interior I've ever experienced. Everything looks and feels top-notch, and I really dig the nautical blue/white/brown colorway throughout. It's so nice, I'm constantly hiding the infotainment screen (thanks, Bentley Rotating Display) just to see more wood. If I had to find a complaint, it's that all this real metal can introduce some gnarly sun reflections, but if you can afford this car, I assume you can also afford sunglasses.

Brand geeks might notice the Audi switchgear on the steering wheel, a hint that Bentley leaned on its VW Group parentage for the cabin tech. A 12.3-inch touchscreen runs a modified version of Porsche's PCM software; it's the last-gen stuff, though, so boot times are a little lazy, but the dock on the left side makes it easy to swap between the various menus when everything is up and running. Four USB-A ports are split evenly between the two rows, and both Apple CarPlay and Android Auto are standard. A tweaked version of Audi's Virtual Cockpit resides in the gauge display, so you can bounce between all sorts of things to display, but I prefer the classy old-school gauge cluster layout.

My tester's interior color combo is basically yacht rock come to life. Somebody call Christopher Cross, stat.

Andrew Krok/CNET

If you don't spec your Flying Spur Hybrid with Bentley's $8,970 Naim audio upgrade, you're a dum-dum. This 2,200-watt system absolutely bumps, providing brilliant audio clarity across a range of frequencies, so fans of either Bach or Death Grips will have an unparalleled listening experience.

Unsurprisingly, Bentley's next high-water mark comes by way of the chassis. An air suspension with adaptive dampers provide one of the softest rides around. The Flying Spur is unbelievably cushy in Comfort mode, and it does stiffen up a smidge in Sport, but the best-of-both-worlds Bentley mode is where I prefer to keep it, since the ride remains almost illegally plush. I don't find myself missing the active sway bars and rear-wheel steering found on non-PHEV models, but it is a bummer that they can't be optioned on this variant. Then again, I can't exactly say I'm in a hurry to hustle through the corners.

You'll never guess what this B stands for.

Andrew Krok/CNET

The not-so-great

The Bentley Flying Spur Hybrid combines a 2.9-liter twin-turbo V6, an 18.9-kWh lithium-ion battery and an electric motor for a net 536 horsepower and 553 pound-feet of torque. By itself, the e-motor puts out 134 hp and 295 lb-ft, and it'll cruise for an EPA-estimated 21 miles on electrons alone.

In the default EV mode, this big-body boss baby carries me around in hushed brilliance, but once it runs out of juice, the 2.9-liter V6 elbows its way into the conversation with a harsh exhaust note that sounds fine in a Porsche -- the original source for this powertrain -- but awkward in a Bentley. It never gets too loud in the cabin, though, so a little extra speaker bumpage will thankfully silence that uncouth V6 yowl.

The V6 underhood sounds OK in other vehicles, but it doesn't really scream "Bentley" under load.

Andrew Krok/CNET

Operating in its hybrid modes is where the Flying Spur Hybrid's execution falls off a cliff. Full-fat acceleration requires electro-involvement, and if that half of the equation is run dry, this hefty hauler feels a little underpowered. Hybrid mode is fine, although the crossover to internal combustion can be jarring under heavier throttle applications.

Trying to keep some electrons in the Bentley's battery is a surprisingly frustrating affair, too. Hold mode is perhaps the most vexing, because as far as I can tell, it doesn't actually hold anything. Over the course of two days of driving exclusively in this mode, I watched the lithium-ion pack drop from 40% state of charge to just 10%. In heavy traffic, I never depress the gas enough to kick the V6 to life, so even with Hold activated, I get to sit there and watch my electrons disappear into the ether.

Pro tip: Keep the Flying Spur Hybrid in pure EV mode as often as possible. You won't regret it.

Andrew Krok/CNET

Regenerative braking exists, but I cannot suss out its programming for the life of me. Whether or not the coasting feature is activated in the vehicle menu, the Flying Spur Hybrid loves to do nothing when I lift off the gas -- but only sometimes. Other times, regen will kick in, but not at a level that feels like it's really doing anything. This happens whether the battery is at a high or low state of charge, and it's truly confounding. The brake-pedal feel also leaves a lot to be desired, with a very obvious crossover point between regeneration and friction. It is surprisingly hard to brake smoothly in this car, which is a little point-defeating, being a luxo-barge and all.

Most owners will likely have homes with charging solutions, and it only takes 2.5 hours to juice up to full with a standard Level 2 setup, so I recommend keeping that bad boy topped off as much as possible. Although the braking issue is present across all modes, operating on pure electricity is where the Flying Spur Hybrid truly shines, and it leaves me incredibly optimistic that the first battery-electric Bentley will slap harder than Will Smith.

No matter where you park it, expect to draw some serious attention.

Andrew Krok/CNET

Down to brass tacks

Is this PHEV expensive? You betcha. A base Flying Spur Hybrid will set you back $217,525, including $2,725 in mandatory destination fees. My tester's Odyssean Edition spec brings the window sticker up to a spit-take-friendly $267,575, including destination. Go crazy on the custom touches, and it wouldn't be hard to spend even more. The 2022 Bentley Flying Spur might be five times more expensive than the average new car in the US, but hey, it's still $130,000 less expensive than the average home price, so there's a feather for your cap.

There are so many things to like about the 2022 Bentley Flying Spur Hybrid. Sadly, the powertrain isn't really one of them. But that's an easy fix, because the available V8 and W12 engines are both fantastic and less complex from an end-user standpoint. If you really want an electric Bentley, and I think you might, you're better off waiting for the real thing.


Source

Tags:

Search This Blog

Menu Halaman Statis

close